I picked this cabinet up a few weeks back (you can read about that adventure here). Upright Centipedes are lovely looking machines; the artwork is arguably the most iconic of Atari’s efforts from the early eighties. Over 45,000 of these units were built, making it one of the great commercial successes of the company’s early 80s coin-op division.
So the plan has always been to give it a light restore and to move it onto another collector at some point, as I already own the cabaret version of the game. I rescued this Centipede from a container in the middle of nowhere, and I guess you could say that the condition of the cabinet reflects that. What we are starting with is a bit of a mess:
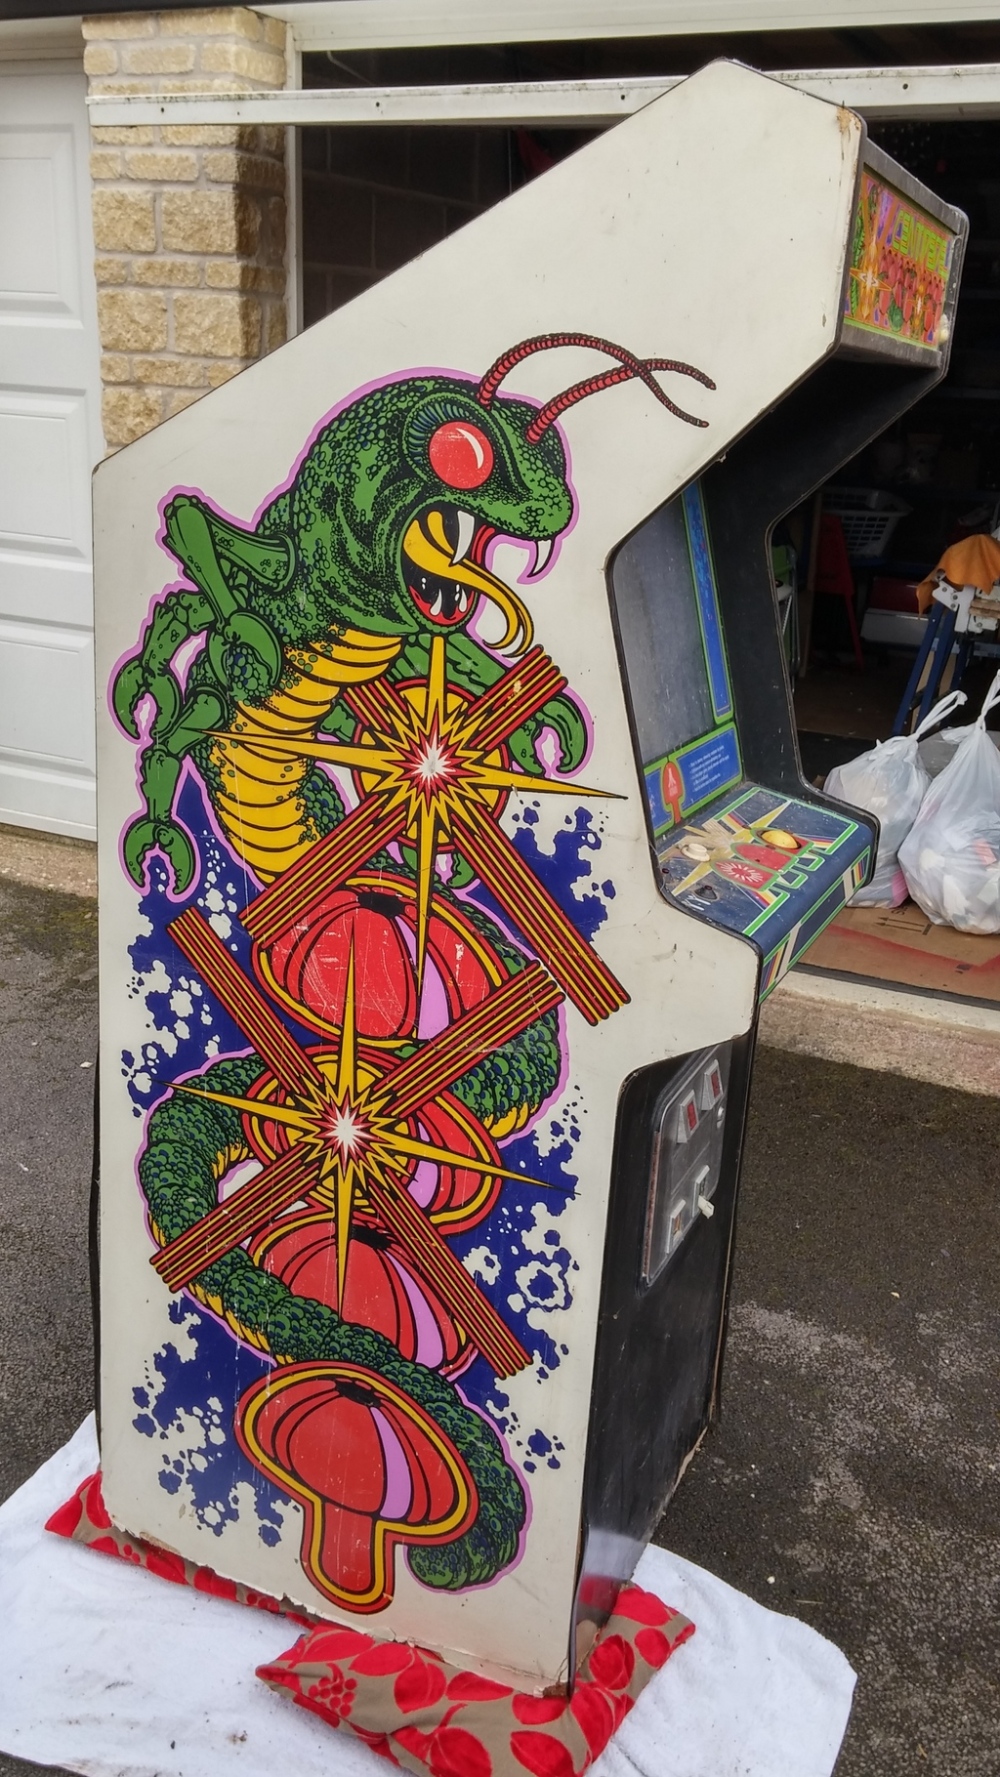
Well maybe I’m being harsh looking again at that picture. Everything is there. It is full of cobwebs and dead insects, a light smattering of bird shit adorns its top and control panel, and the bottom edges are pretty rough. But compared to some arcade machines I’ve come across, things could be a whole lot worse. It is complete, but the PCB isn’t working – I have sourced a replacement ready to drop in (the original PCB looks to have had previous repairs done to it, and the cost of a new one is about the same to get someone to start work on repairing the old one). Without knowing exactly the problem, the repair bill could get expensive. So in this case, the best option is to drop in a known working board.
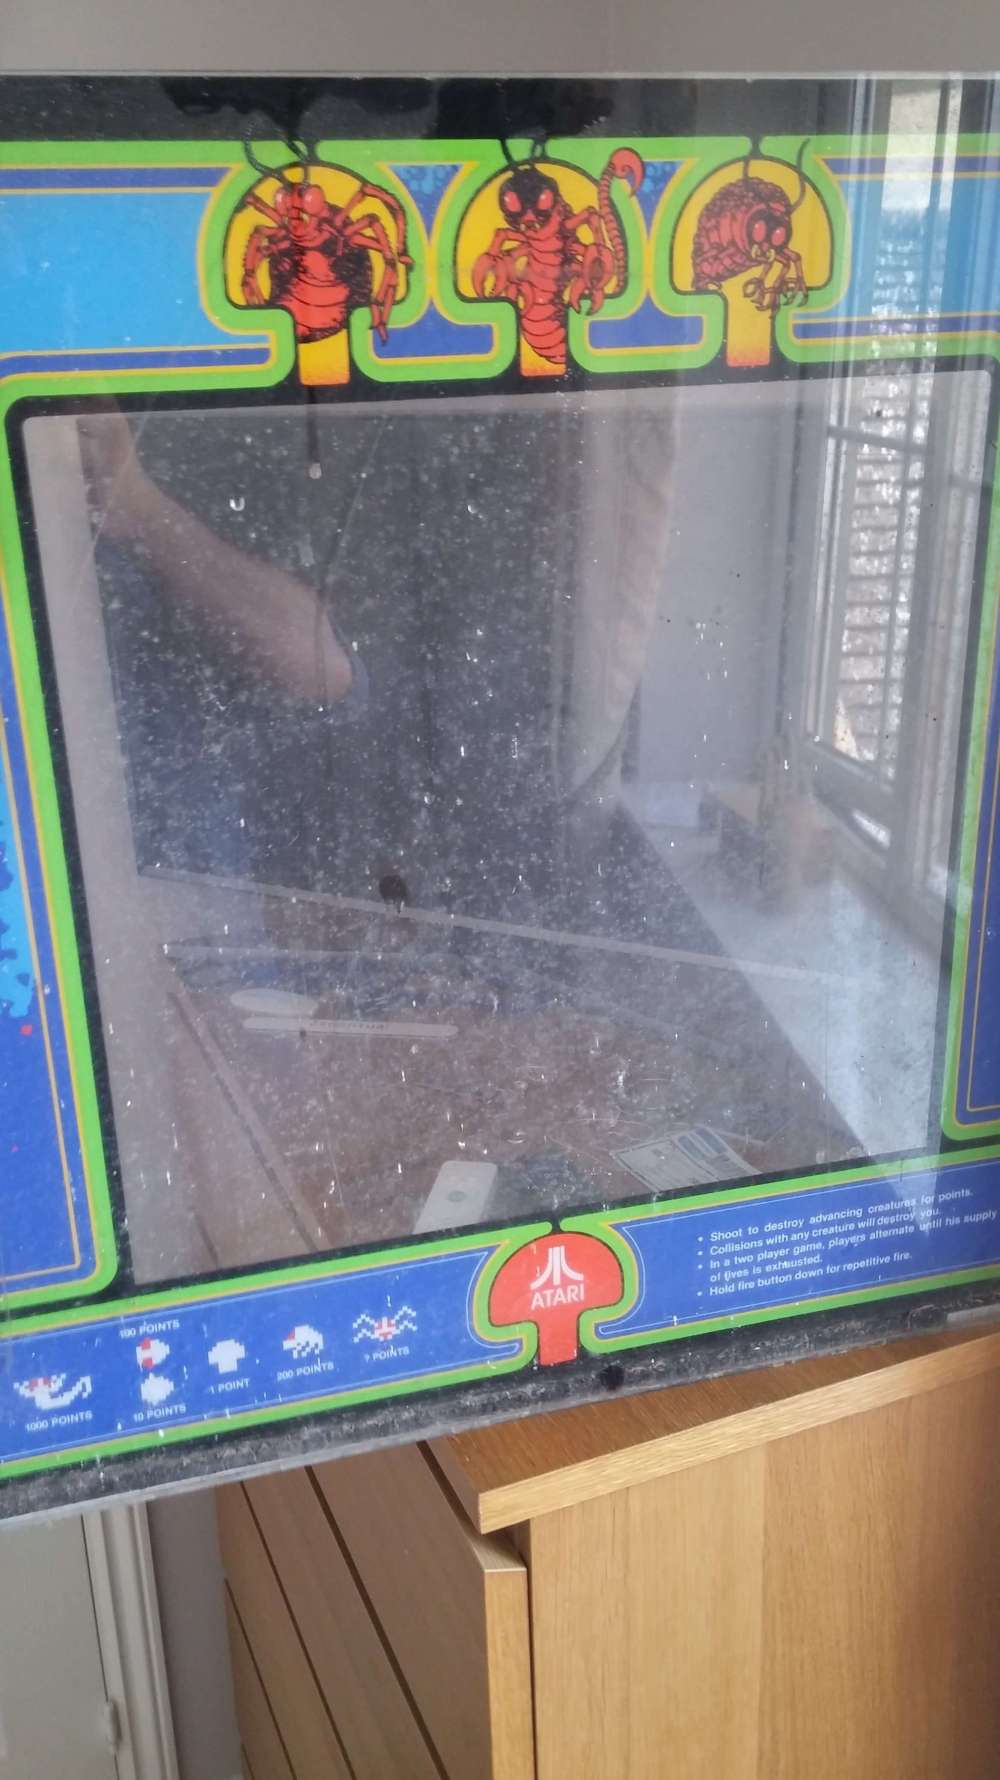
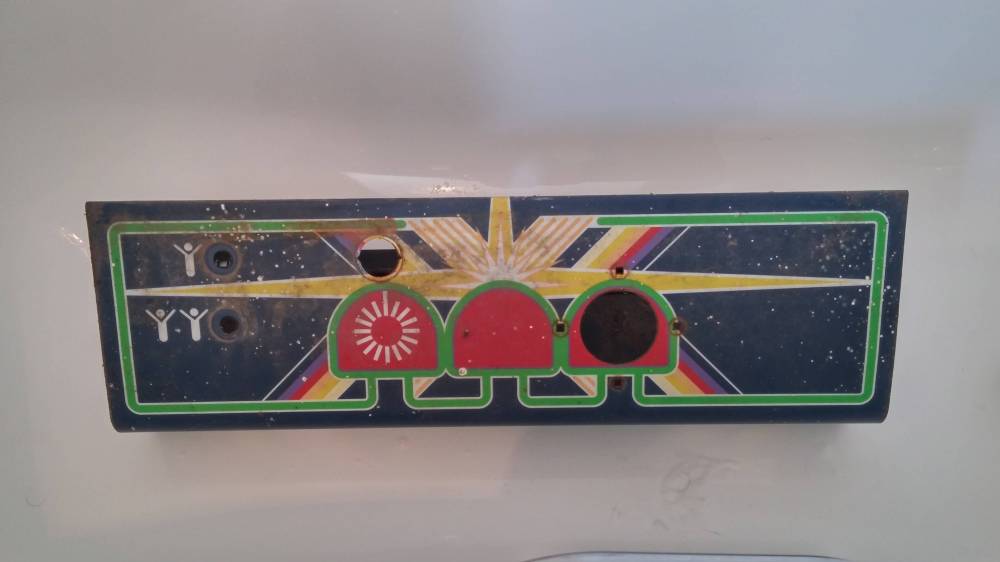
So where to start? Call me daft, but it’s often psychologically a good idea to begin with something simple that’s going to give you immediate results – that way you keep your motivation. In this case, I thought the bezel, marquee and control panel would be first up for the restoration treatment. As you can see, they aren’t pretty:
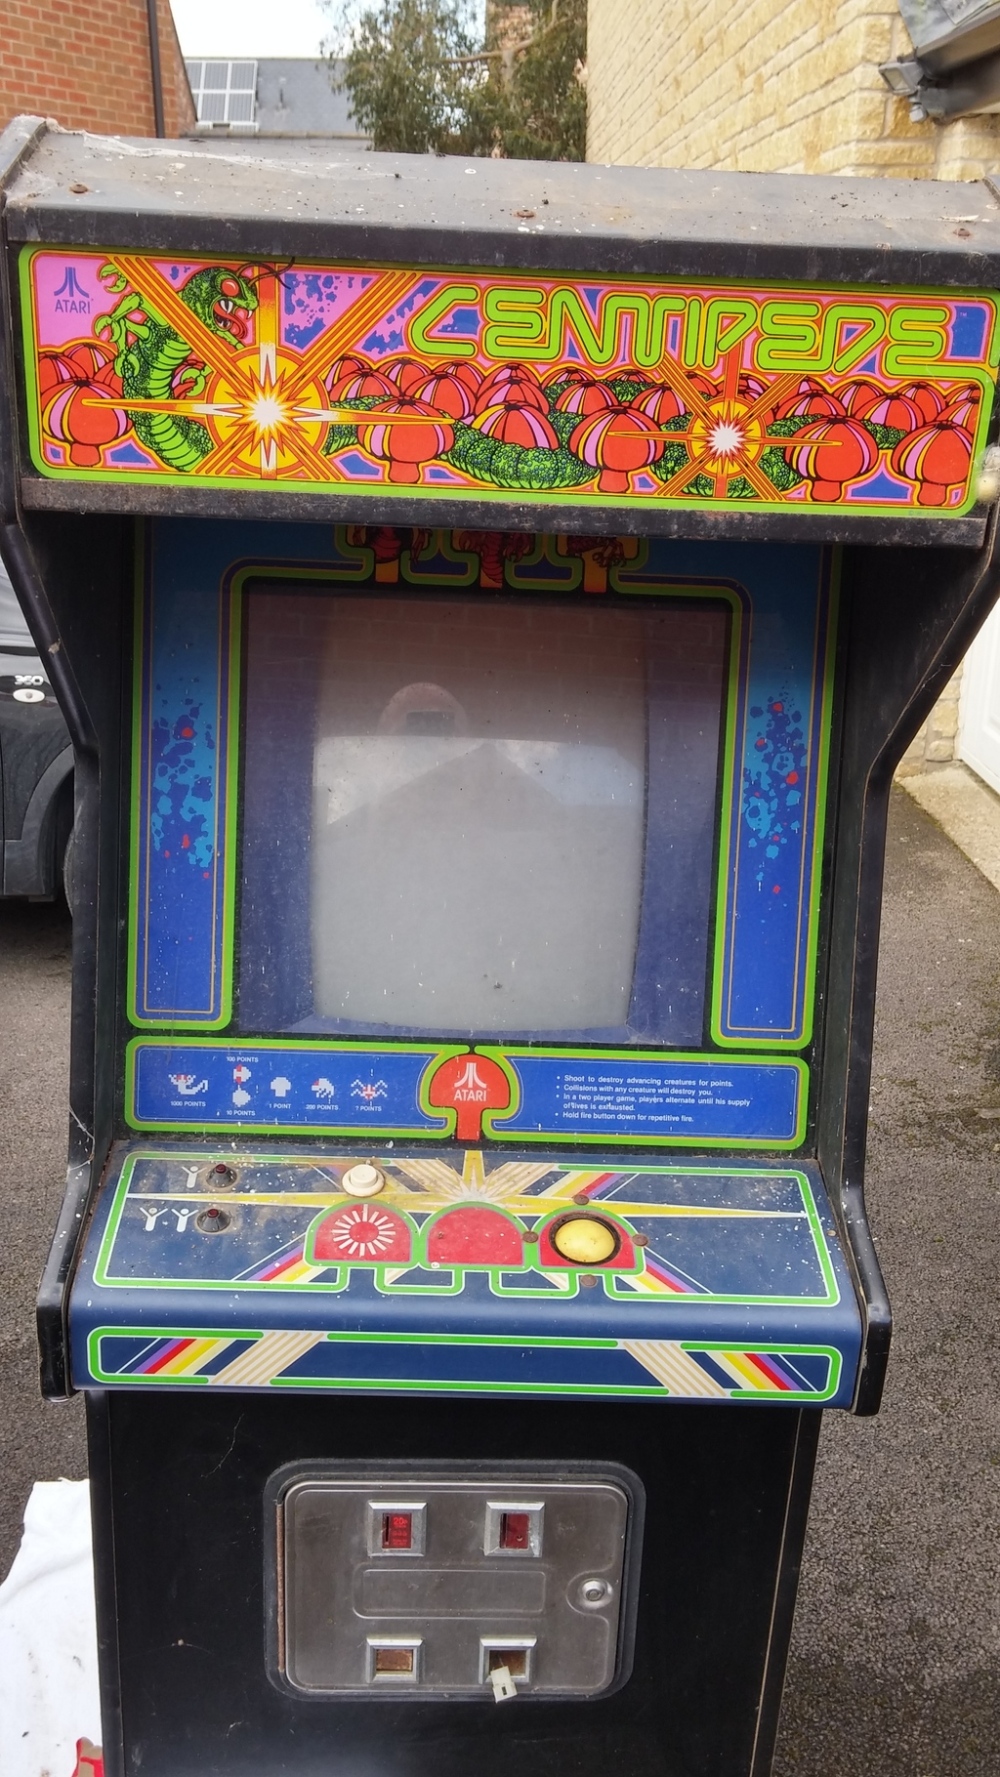
Nasty in fact. Rubber gloves ahoy and let’s get them off the cab. Remove the retaining screws and pull everything out. First up, the bezel. Here we go:
Got the shower hose out, some washing up liquid, a scrubbing brush and a cloth:
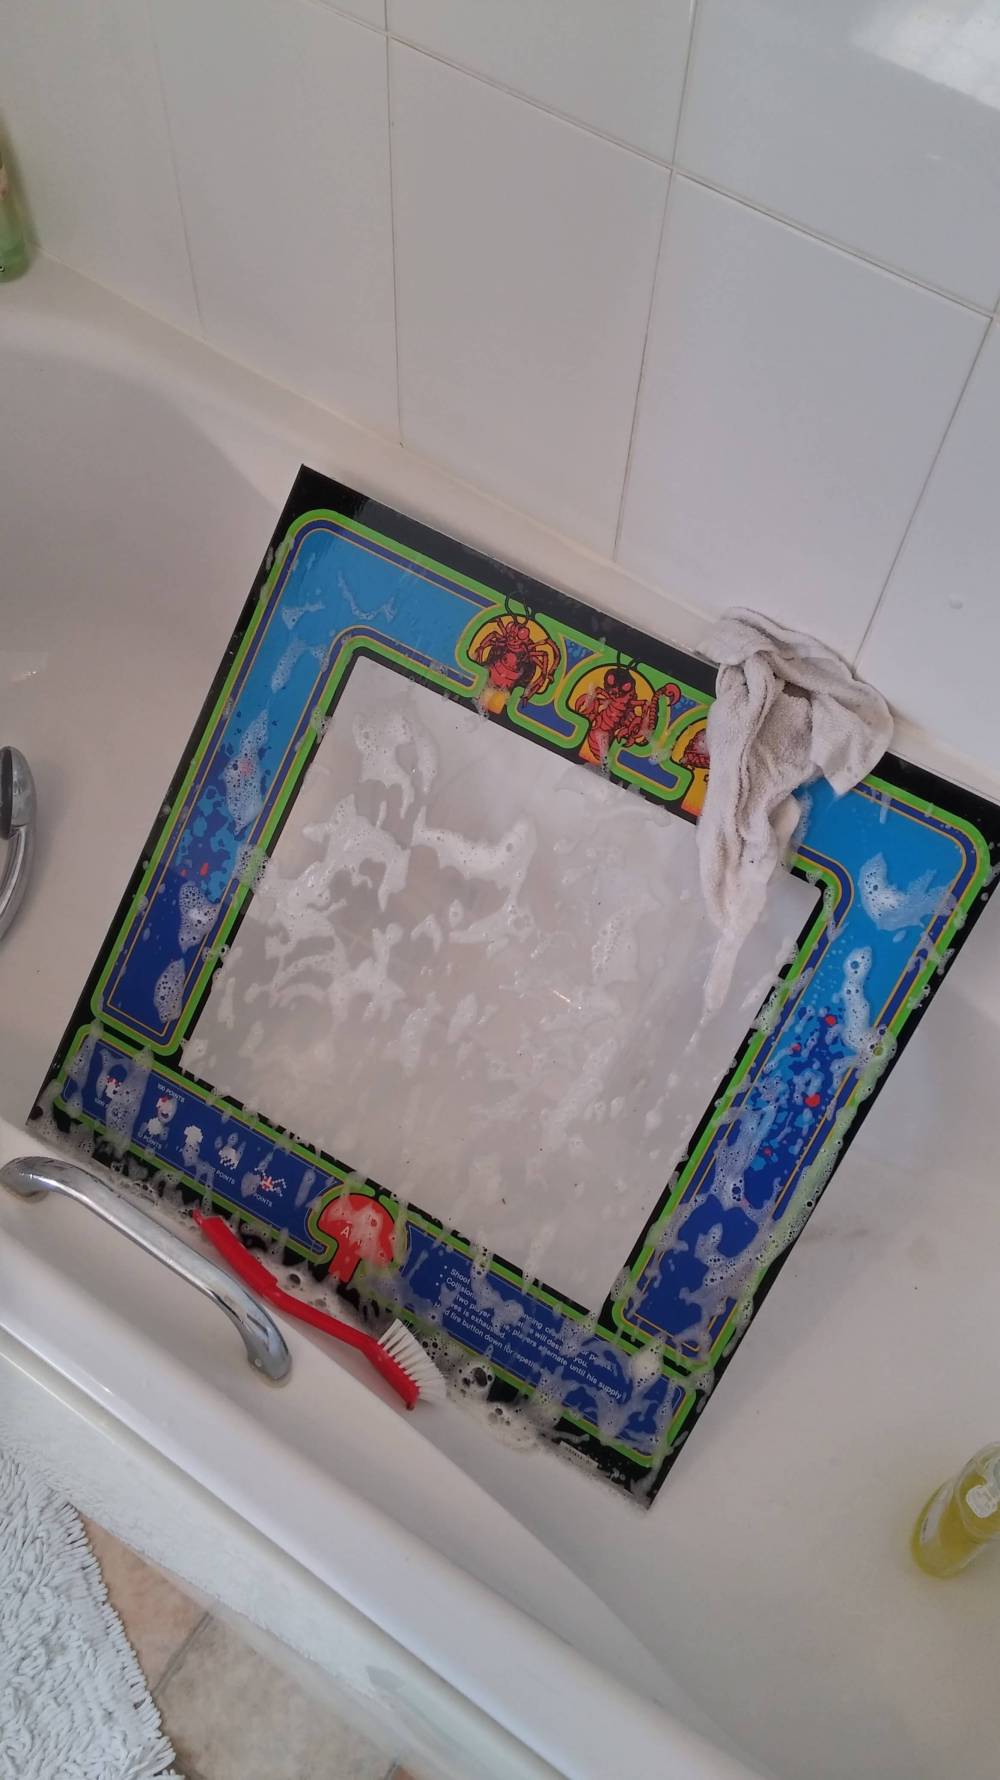
Pro tip: it’s a good idea to do this in the bath to maintain domestic harmony with your loved one – dirty, soapy splashes up kitchen tiles and across the floor don’t go down well. I learned the hard way.
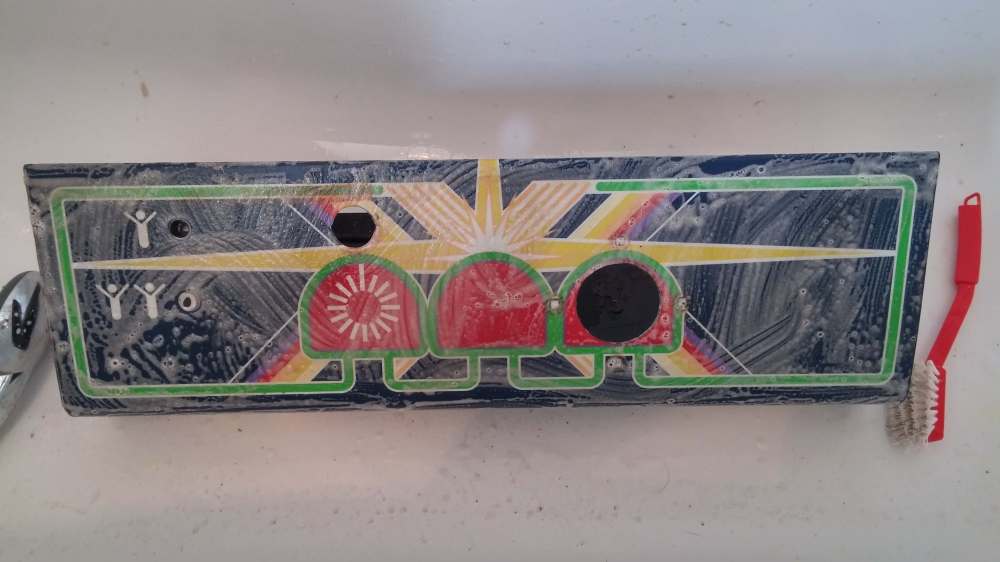
The marquee followed the same process. Next the control panel. Once stripped of its hardware, I got that in the bath too:
Gave it a good covering in detergent, got that agitated around with a scrubbing brush, and left it for 10 minutes:
A quick hose down later and we have a like-new panel:
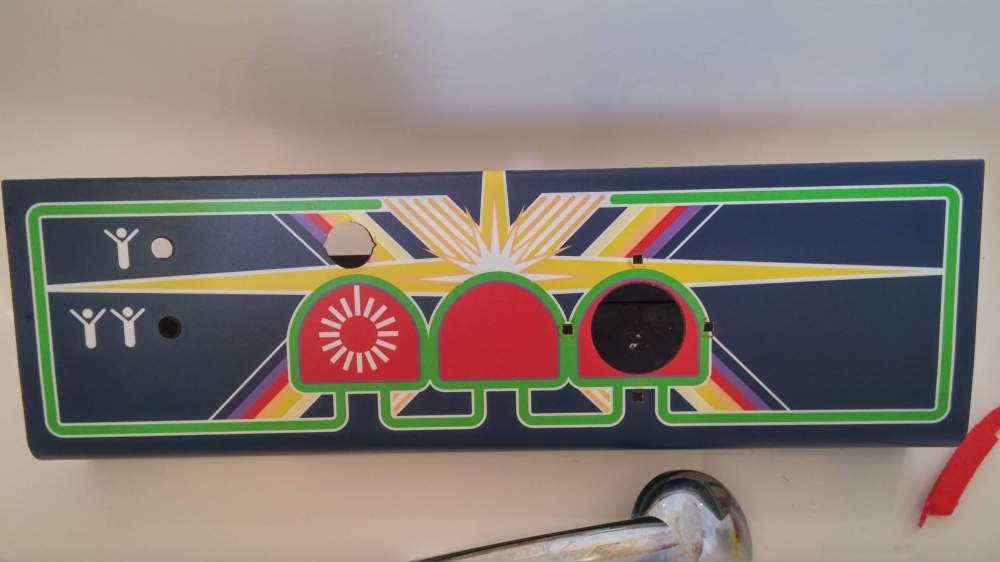
Pretty dramatic results! I got lucky – no cigarette burns are evident which is very unusual. This panel has come up literally like new. Thankfully, the surface crap was superficial, mostly made up of bird shit, dust and 35 years of gamer sweat and grime. Yuk. The weather was good, so I was able to leave things to dry in the garden:
Looking much better. That’s the coin bucket out to dry too which also had a soak in the bath. I’m pleased to report there was £2.80 in old ten pence pieces in there – the latest date on the coins was 1986 which is pretty cool.
So what about the control panel hardware I removed earlier? Let’s take a look inside that trakball:
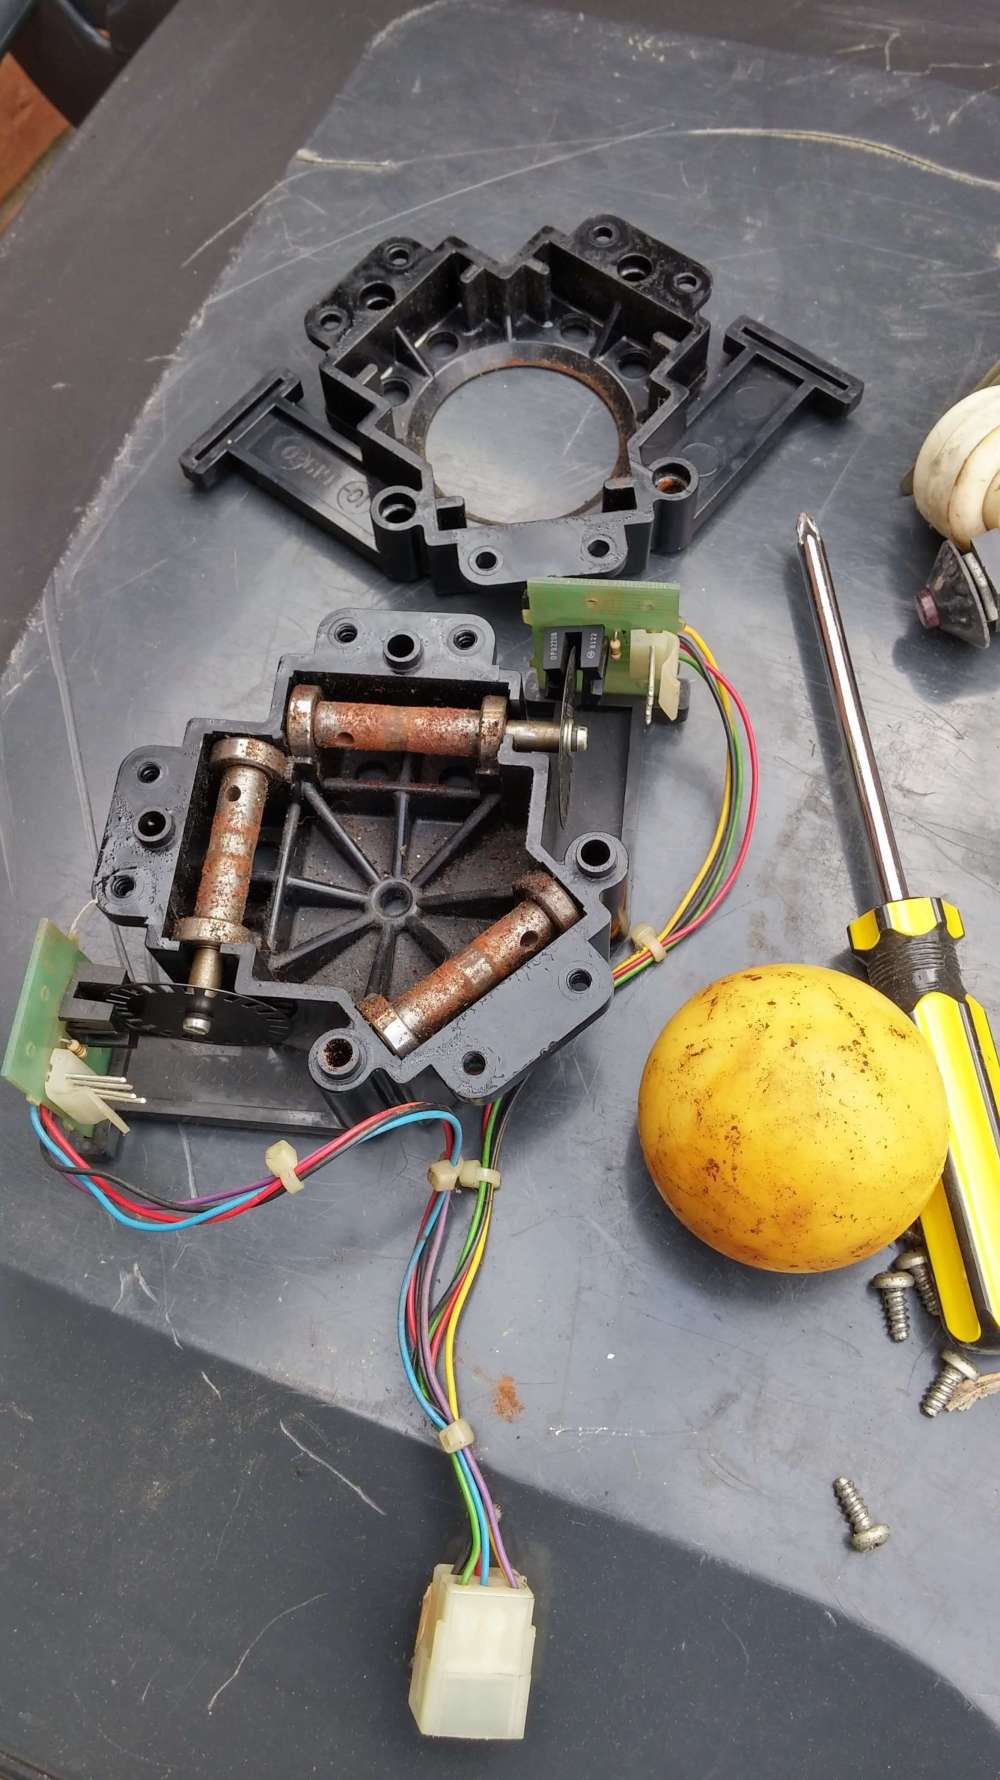
Oh. That would explain why the ball wouldn’t move. The rollers have rusted solid. This is fixable, but I’m debating whether for $50 or so, I shouldn’t just order a drop in new replacement from the USA. Makes life easier and is less painful than trying to ease those rollers and bearings in oil. Hmmm. Decisions. Anyway, for now everything can go in the sink:
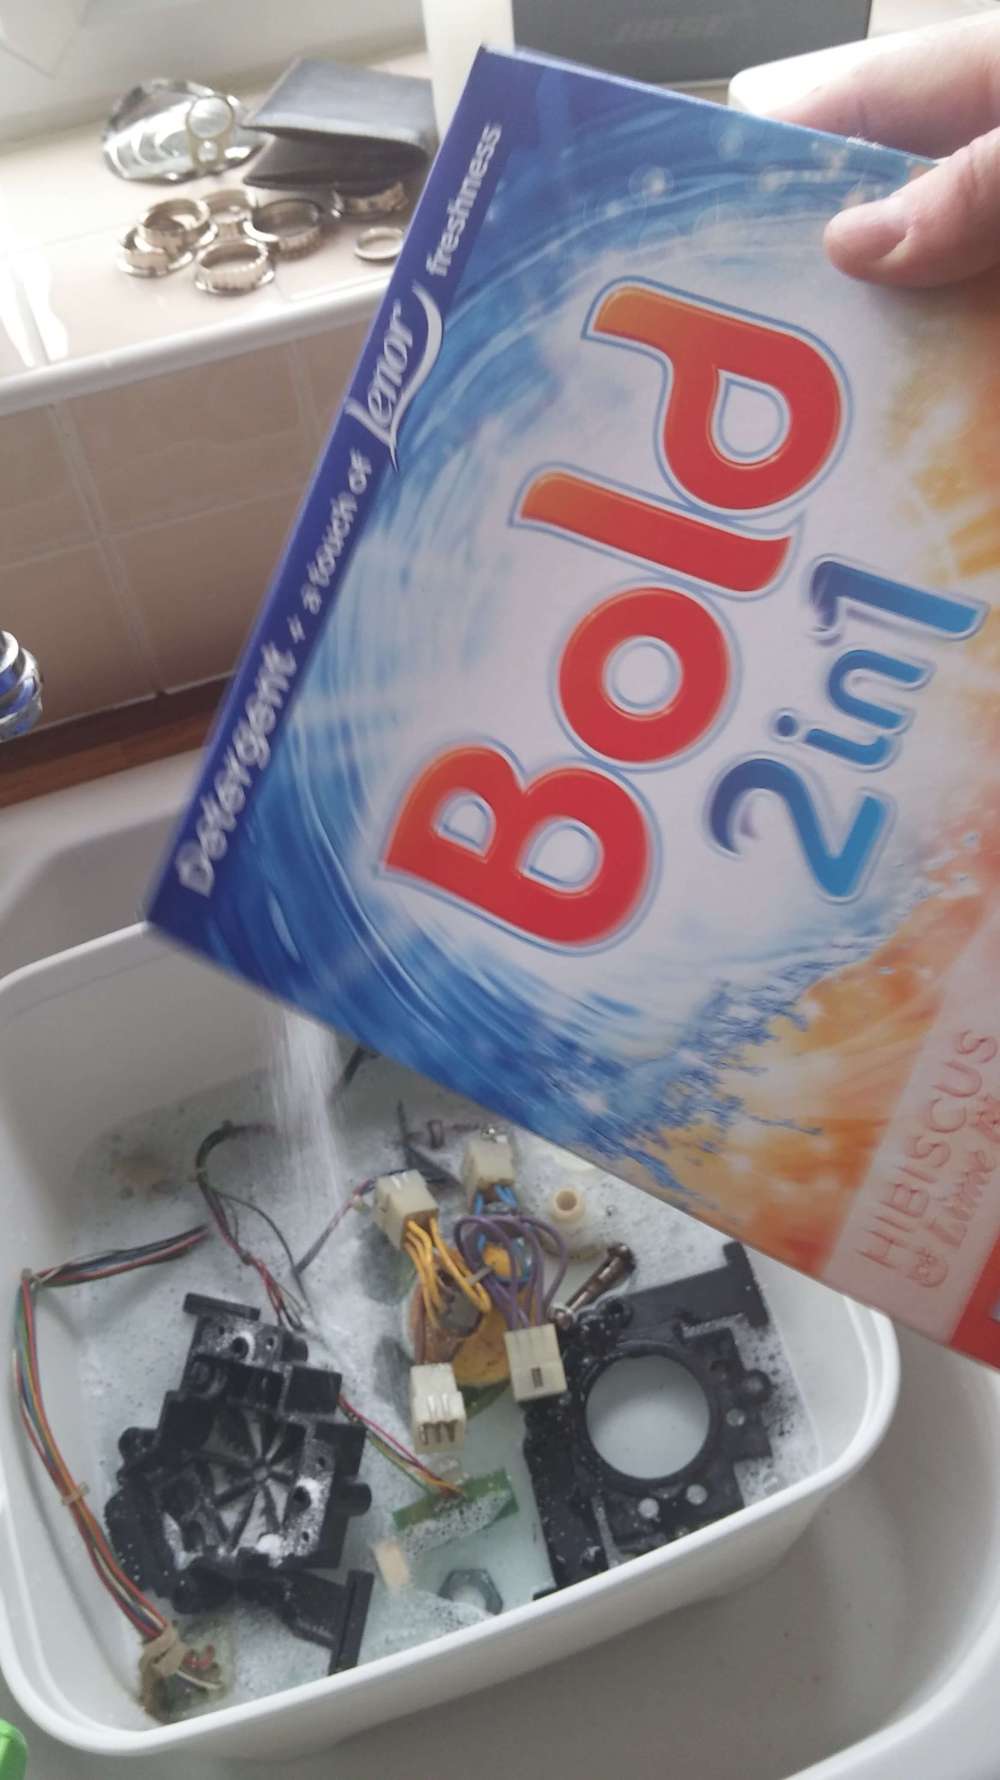
Yep – just drop everything in, including the wiring loom. Add some biological washing powder and hot water, then leave to soak for a half hour. Rinse off and hey presto:
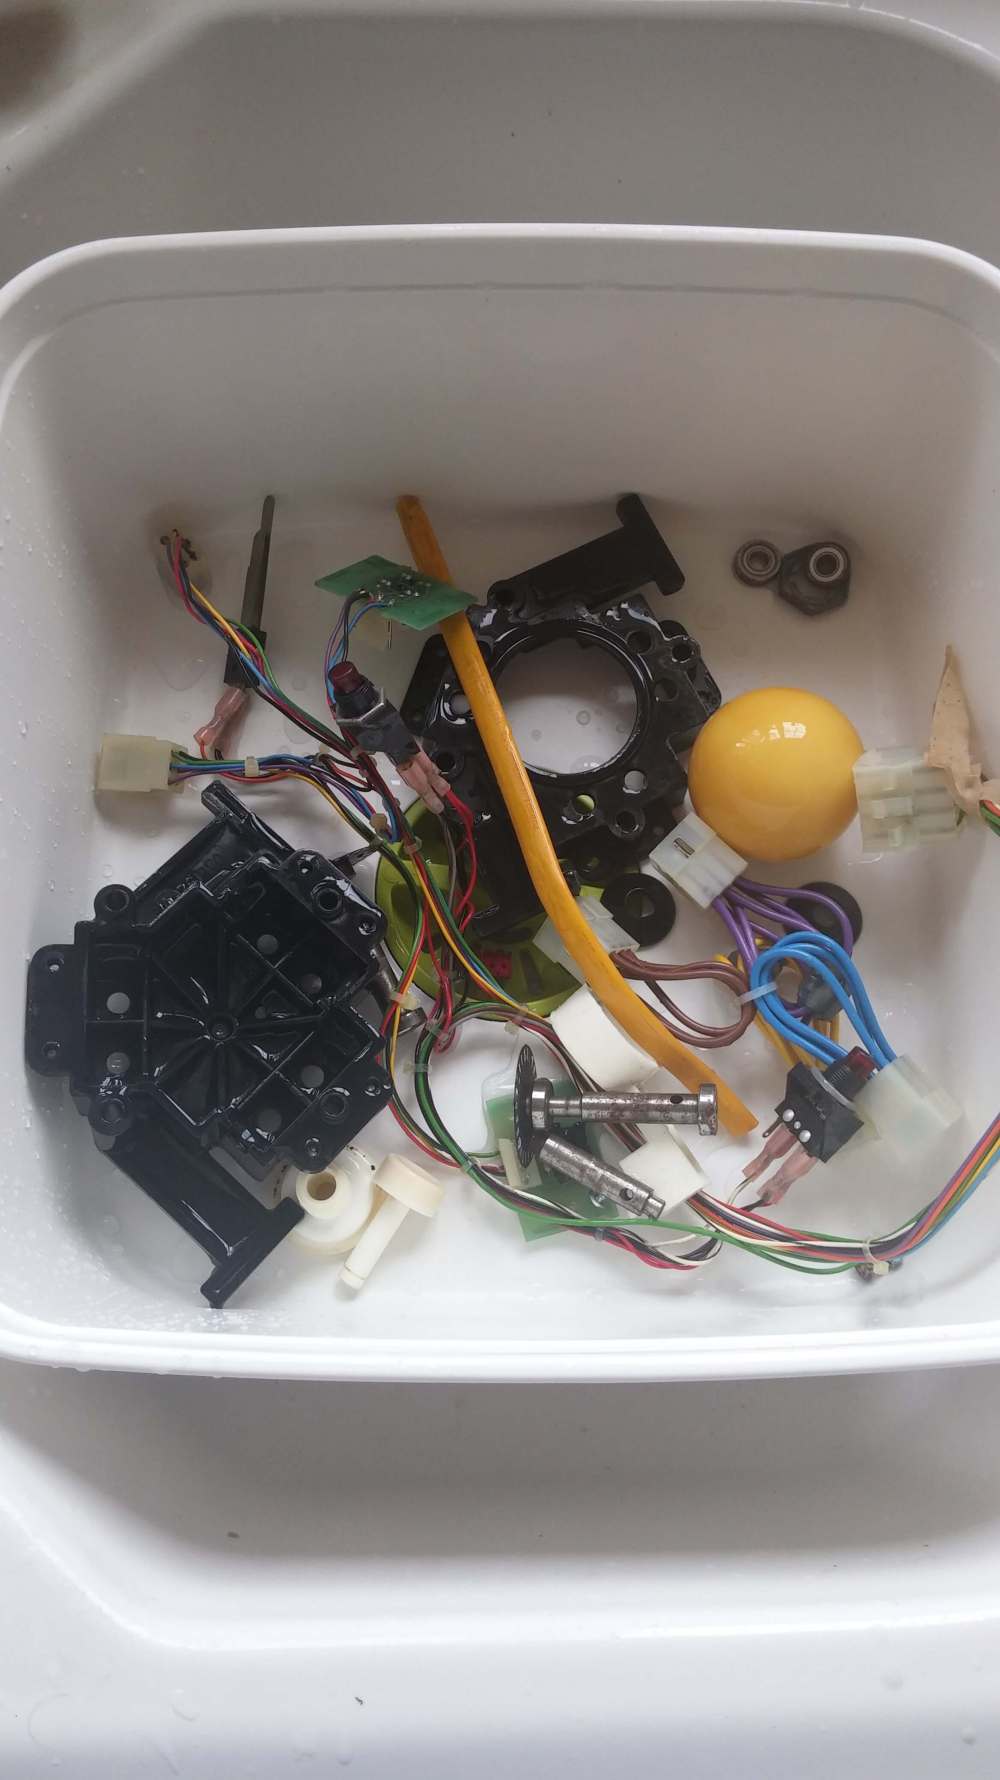
Nice and shiny again. We’ll come back to the trakball in Part 2.
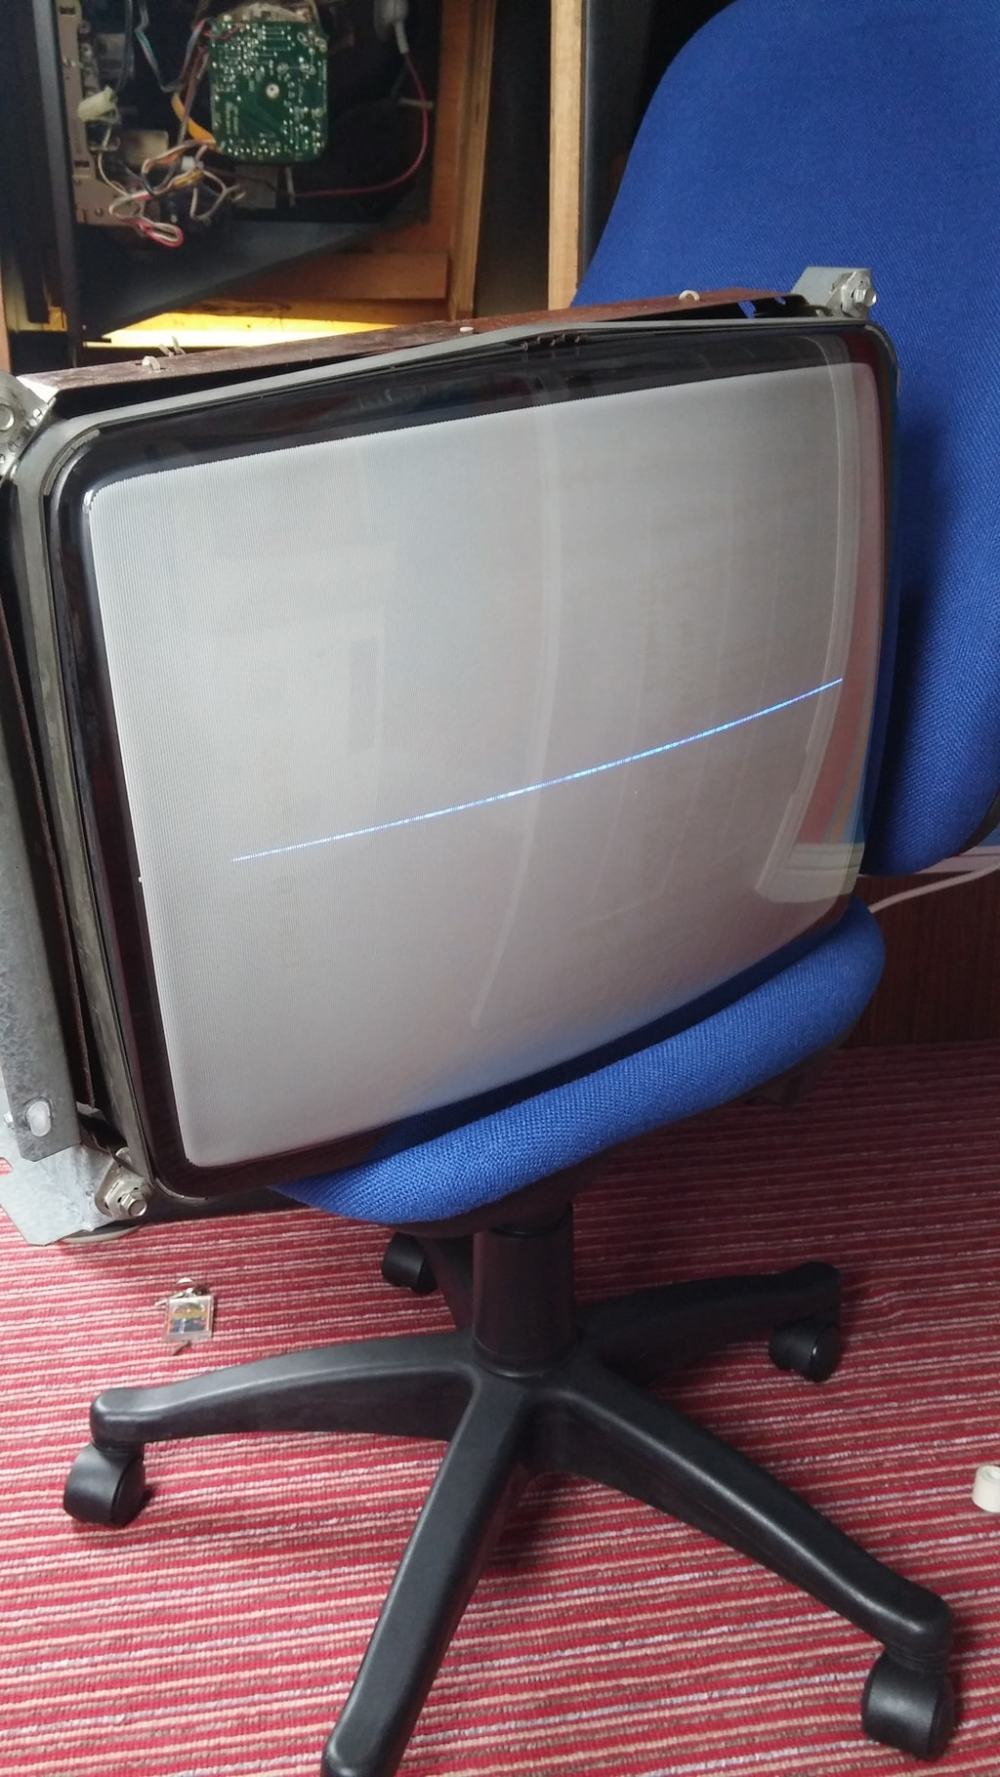
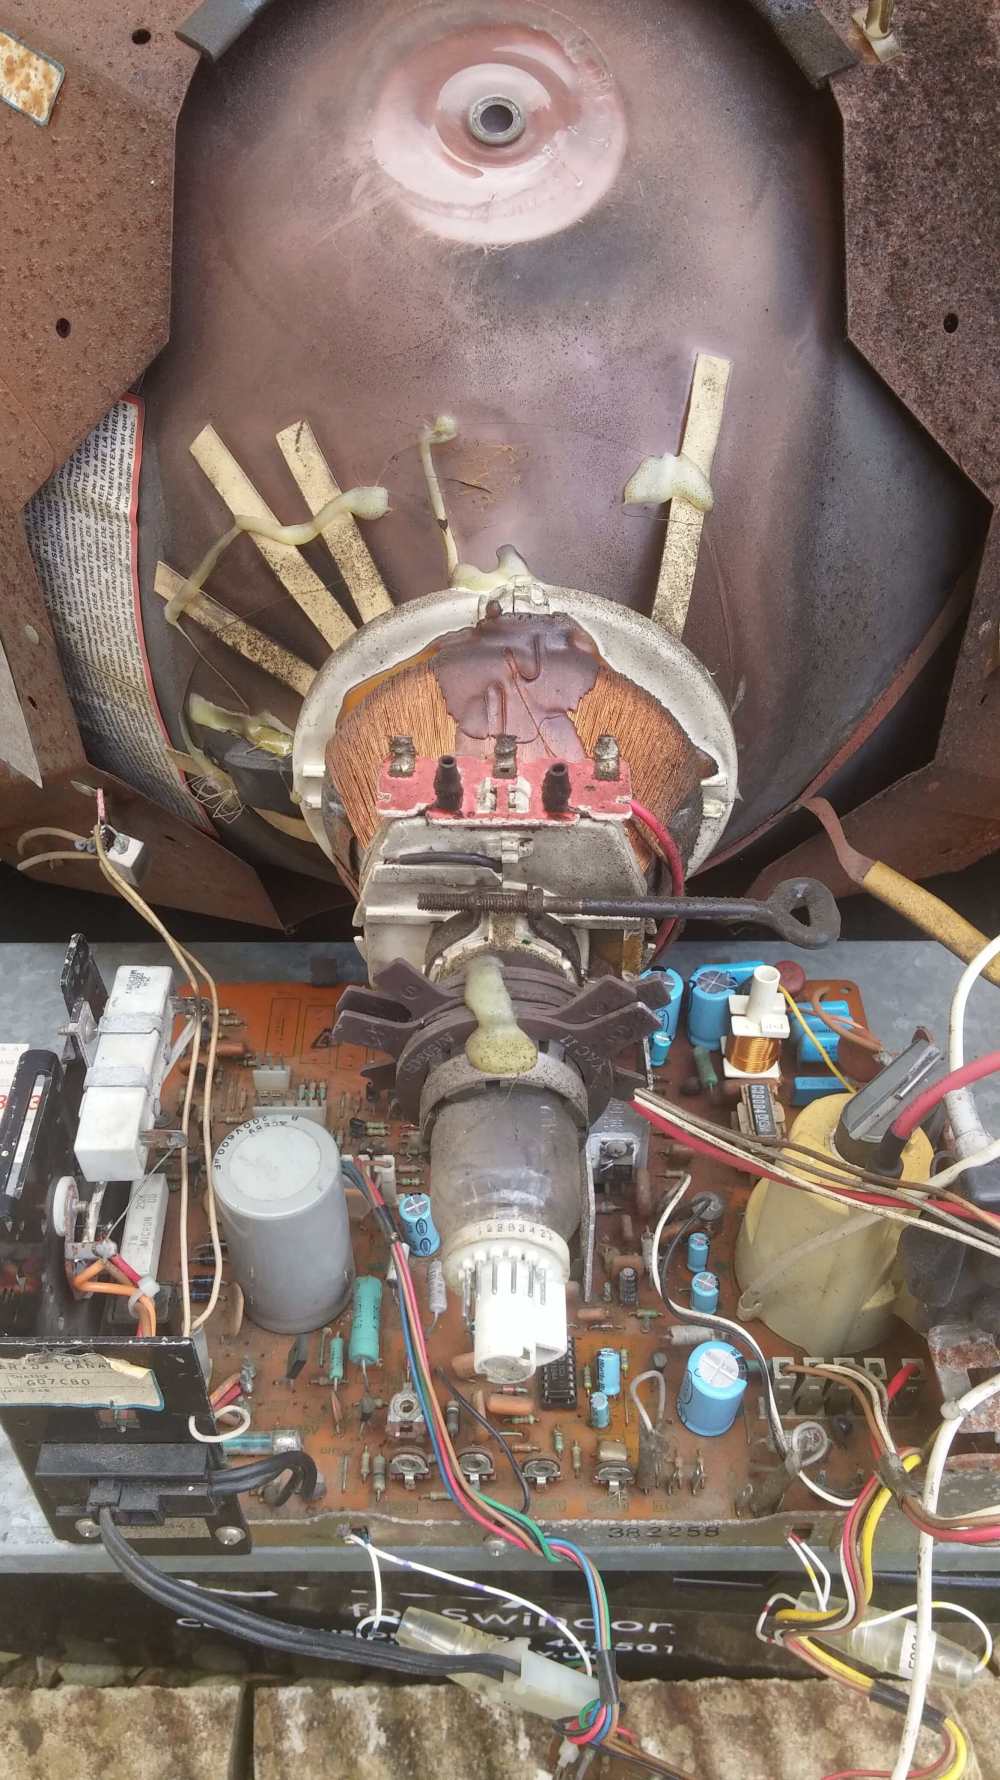
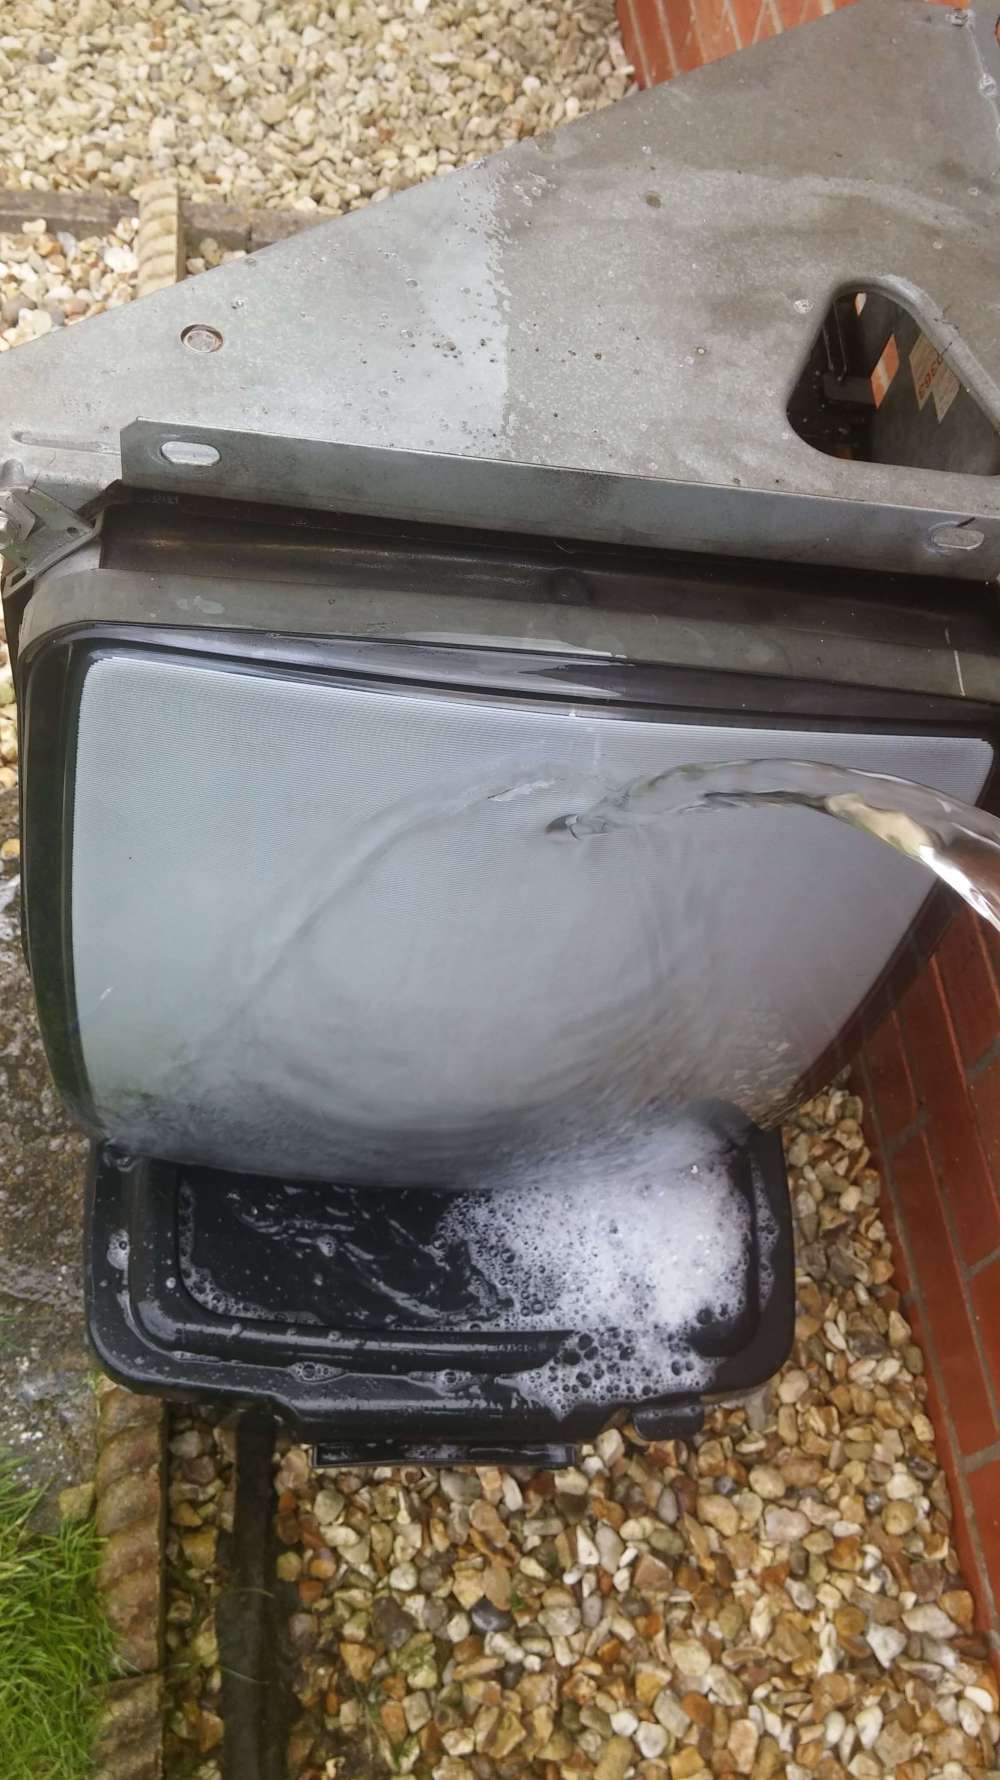
The monitor was next. Sadly, it is suffering from vertical collapse. What this means is the picture shows a straight line across the centre of the screen. It’s a common fault on a monitor of this age, and shouldn’t be too difficult to fix, as it’s usually one of a couple of things. With a bit of luck, replacing a couple of transistors will sort it out:
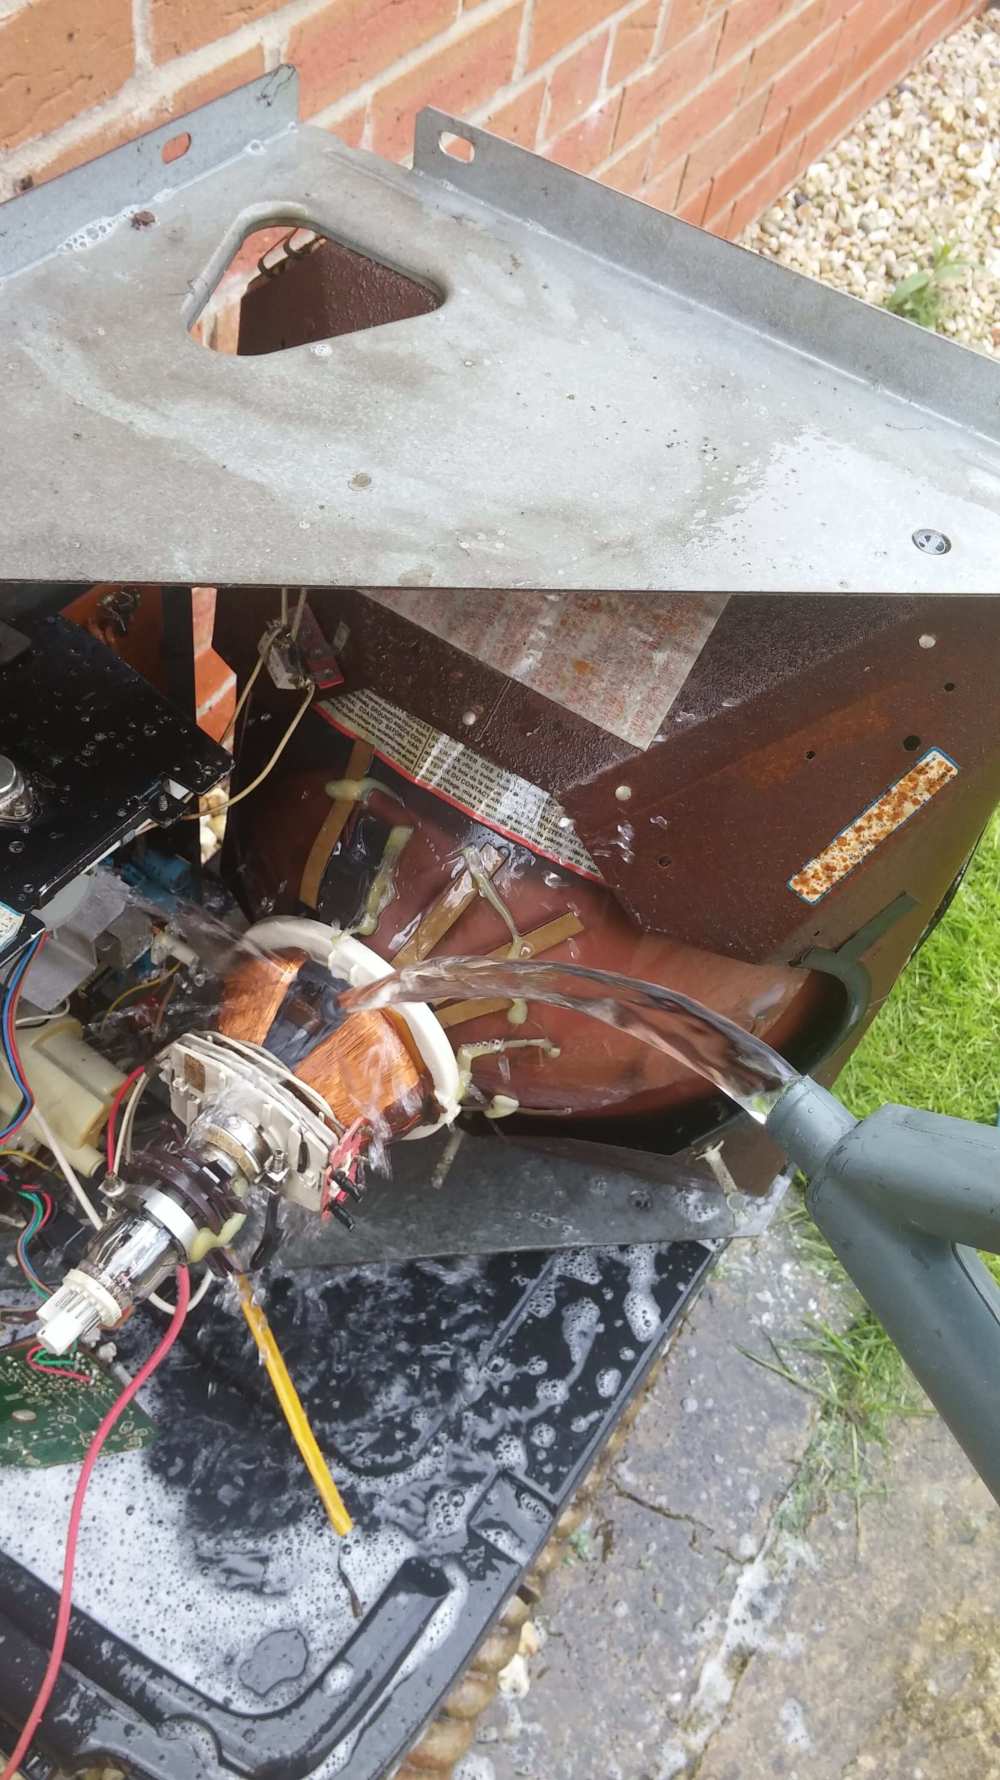
So before we start any repairs, let’s get it cleaned up. This process tends to horrify most restorers, as it involves dousing a high voltage CRT unit with soap and water. But the results are spectacular, and if you are careful, no lasting damage will come of it. Of course you should discharge the monitor fully first, and only do this on a day the sun is shining! Here’s our starting point:
That’s 35 years of arcade dust and grime. Spray some detergent over everything:
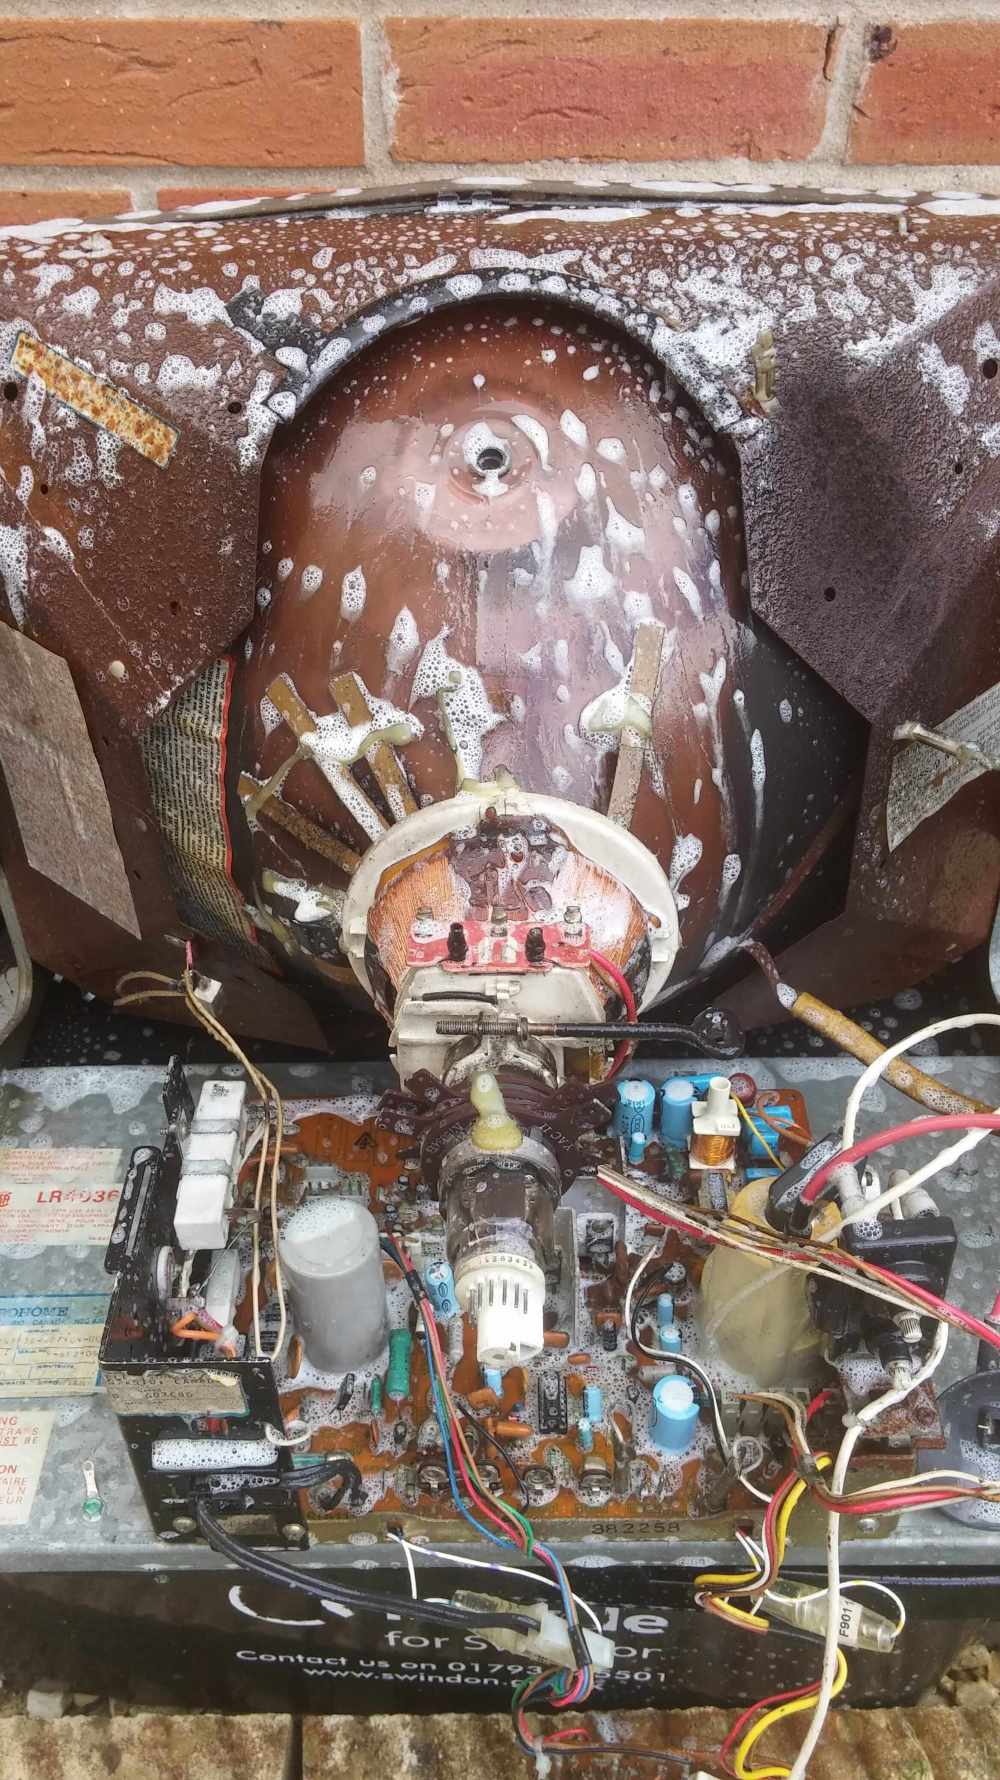
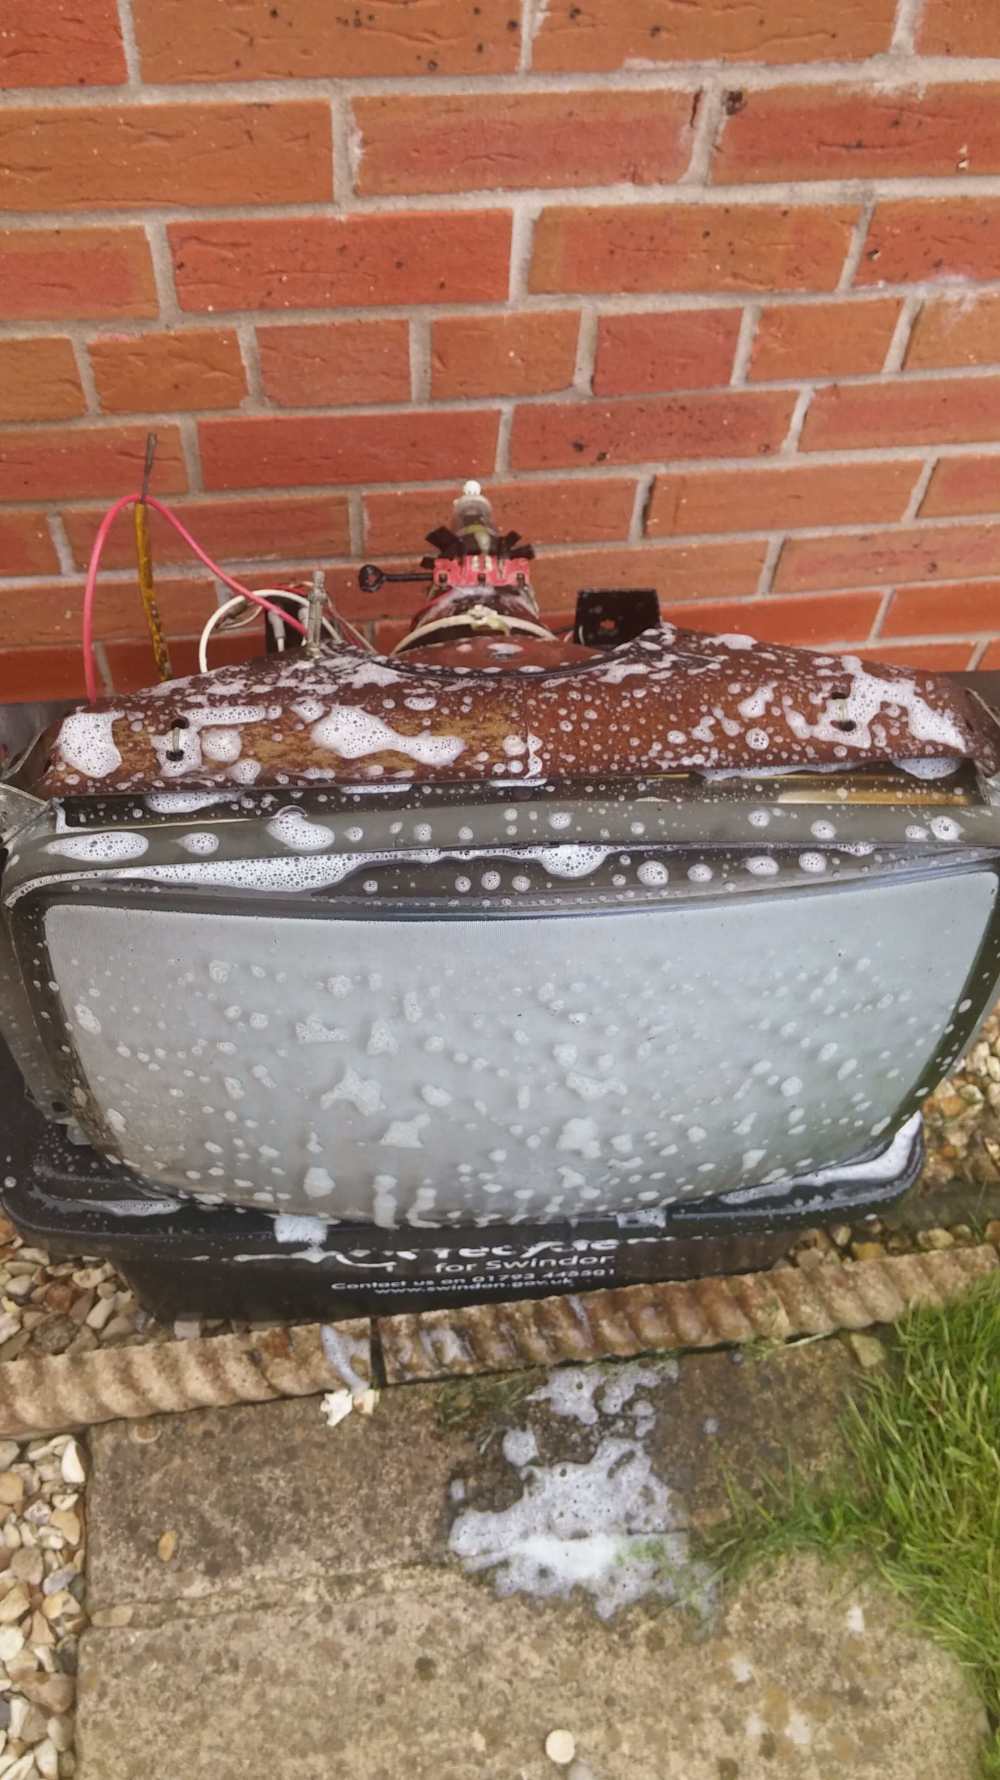
Agitate the suds with a soft paintbrush and leave for 10 minutes. Then rinse with a hose:
Then leave to dry for a full two days in the sun. Your monitor will be like new. That worked out fine – the monitor is back in the house, and still working (albeit with the fault) waiting for when I get some time to crack open the soldering iron.
Well that’s a good start – about 3 hours work so far. In part 2, I’ll let you know what I’ve decided to do with the trackball, plus I’ll be tackling the inside of the cab, including the loom, and we’ll take a look at the state of the wood and hopefully make a start on some repairs to that bottom edge.
If restorations are your thing, do take a look at the Restoration Archive via the link at the top of the page, where you can view my previous arcade machine restorations.
Leave a comment below if you have any questions, and consider subscribing to updates on the blog. If you do the social media thing, please consider sharing this article using the button below! Phew!
Thanks for reading this far – see you next week.
Tony


Looking Good Tony. It’s amazing what household products like bold can do. Looking forward to seeing more progress
LikeLike
Holy Cow! You are driving me insane with the water and the hose! I would never dream of doing that. Can’t wait to see more. Please tell me why this isn’t going to ruin anything – or cause further corrosion. I am absolutely riveted by your story and can’t wait to see how this turns out. Keep it going! Thanks.
LikeLike
There is something strangely compelling about watching a man wash a telly. Nice work. As always.
LikeLike
Another quality installment. I love all your posts but restorations will always be my favorite. I remember when I bought my first, very dirty cab and someone told me to put all the stuff in the dishwasher! I still find it hard to comprehend. Then here you are hosing down the anode cap! Do you stand on a rubber mat wearing two pairs of wellies when you switch this back on! #braveman
LikeLike
Bloody awesome stuff Tone, you’re the Heston Blumenthal of the arcade restoration scene.
LikeLike
Hi Tony, I’m loving the blog. Read every article and restoration. You inspired me to decide to jump on a resto myself. Just bought a complete and working Millipede for $300 that needs a thorough cleaning, some patching, and new overlays, but otherwise should clean up nicely. The artwork is great other than some scuffs (to be expected). It even has the original manuals for the machine, including the manual for the 19″ CRT. For $50 more, he threw in the shell of a Centipede. It does have the PS and marquee but no CP, PCB, CRT, etc. So, I’ll be following this resto with much anticipation. Thanks for a fun blog. I like your writing style and humor!
LikeLike
Thanks Wolf – good luck with your restoration! Sounds like a nice project – Millipedes are nice looking cabs.
LikeLike
Thank you! The Millipede will be fun. The side vinyl/art is proving to be caked with cig tar. Nasty. So, i’m going to dig into the guts now. Vacuum, probably remove components, give the loom a wash (never would have thought of that if it weren’t for you). I just saw that all of the manuals are 1st edition. Pretty cool that it still has those.
LikeLike
I can’t wait for part 2!! Thanks for sharing, and yeah, people shouldn’t be afraid of washing arcade monitors, the end result totally is totally worth the effort.
LikeLike
Looking great Tony, keep up the good work! Right up my street this blog is!
LikeLike
I got a Neo Geo that had a Similiar “vertical” collapse. I took it to a TV shop to get fixed, but now the Black colors in the background are hard to discern from the black images of the characters
https://i.ytimg.com/vi/7SHhqna28Po/maxresdefault.jpg This image bleeds together, Unable to see the ref clearly.
Would washing the CRT Help with the color pigmentation?
LikeLiked by 1 person
Hi – sounds and looks like you just need to adjust your monitor using the pots at the back. Try this guide: http://wiki.arcadeotaku.com/w/How_to_Correctly_Set_Up_Monitor_Colours_and_Brightness
LikeLike
I used to wash monitors in the dishwasher before working on them, I eventually stopped because sometimes it causes the labels to fall off. People freak out about water and electricity but most of the components are completely sealed so as long as everything is dry before you power it up it won’t hurt anything. When circuit boards are manufactured they go through a washing machine that removes all the soldering flux and other cruft.
LikeLike