You’ll recall a few weeks back I wrote about the acquisition of this great cabinet, released by Nintendo in 1984. This particular example is in great shape, and I was very fortunate to be able to snag it and bring it back to Arcade Blogger towers. If you missed out on the original post, have a read here.
So I got the thing working, which was a great start, but I really wanted to strip the cabinet down, give it a good clean, and do something about the lack of red displaying on one side of the cabinet.
Let’s start with the cabinet itself:
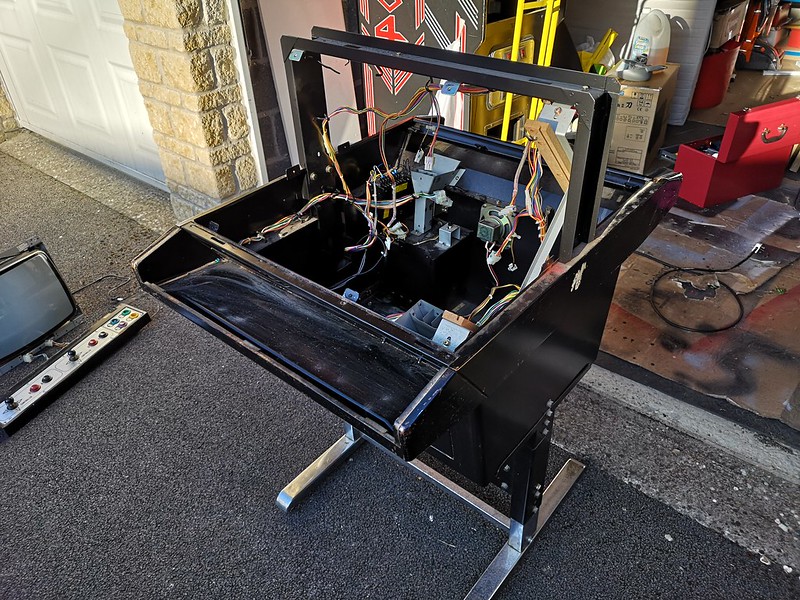
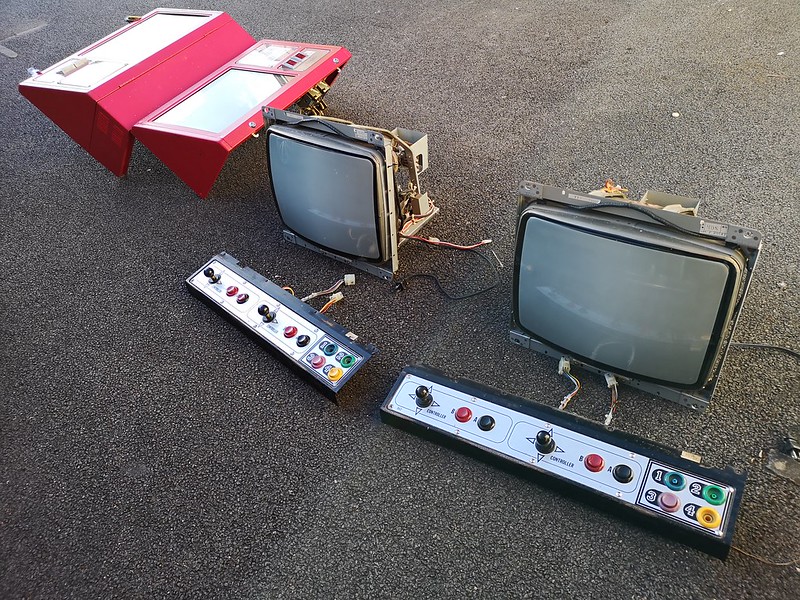
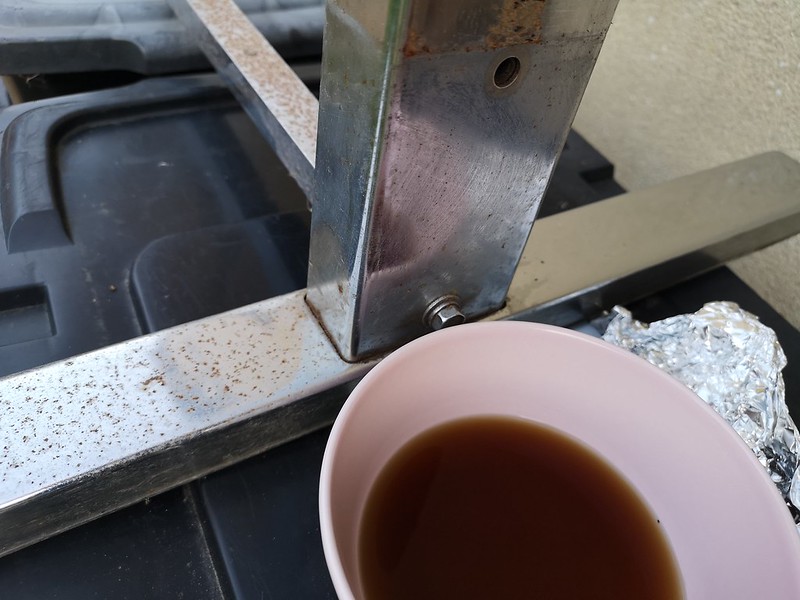
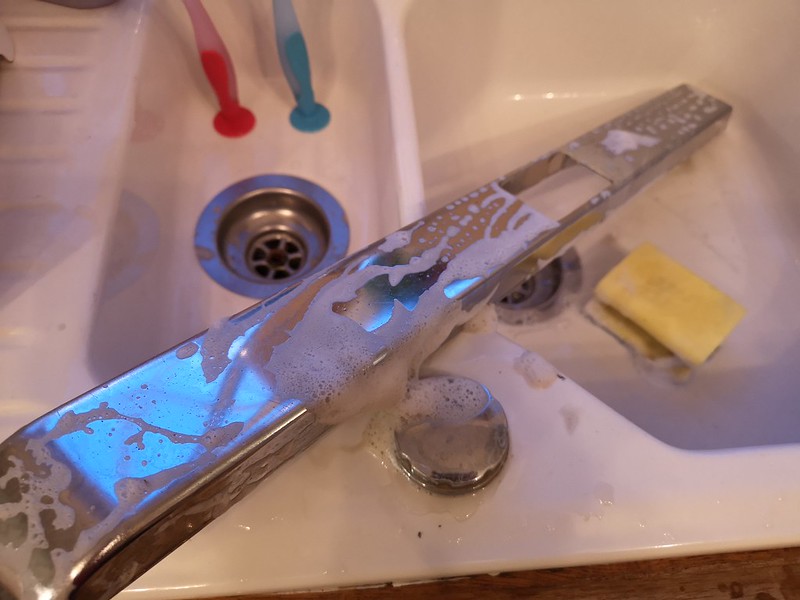
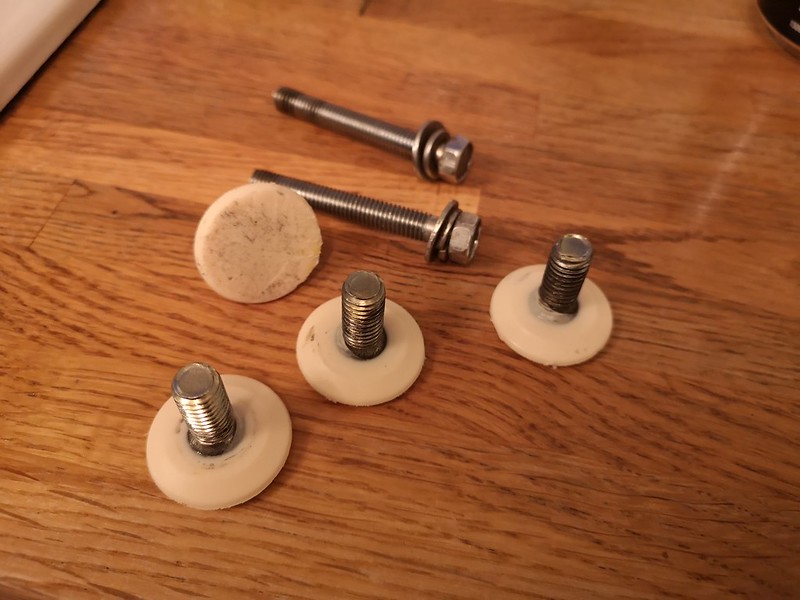
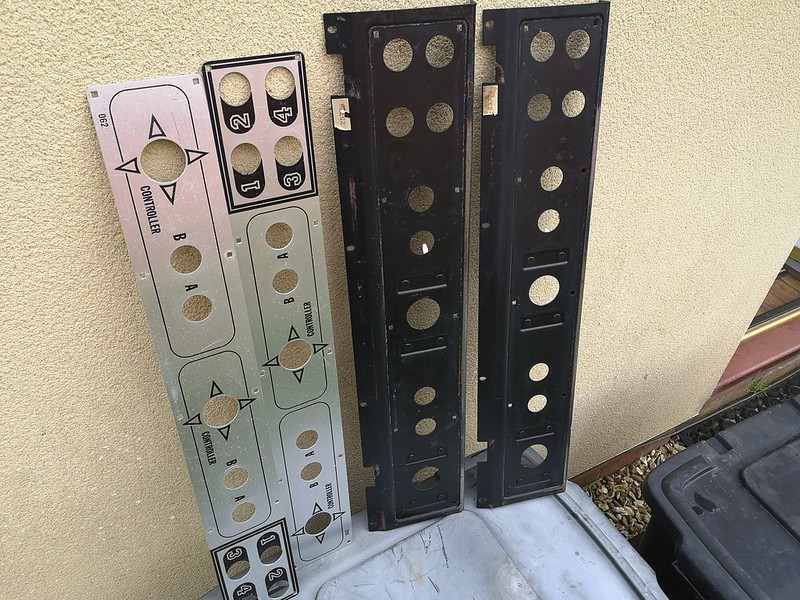
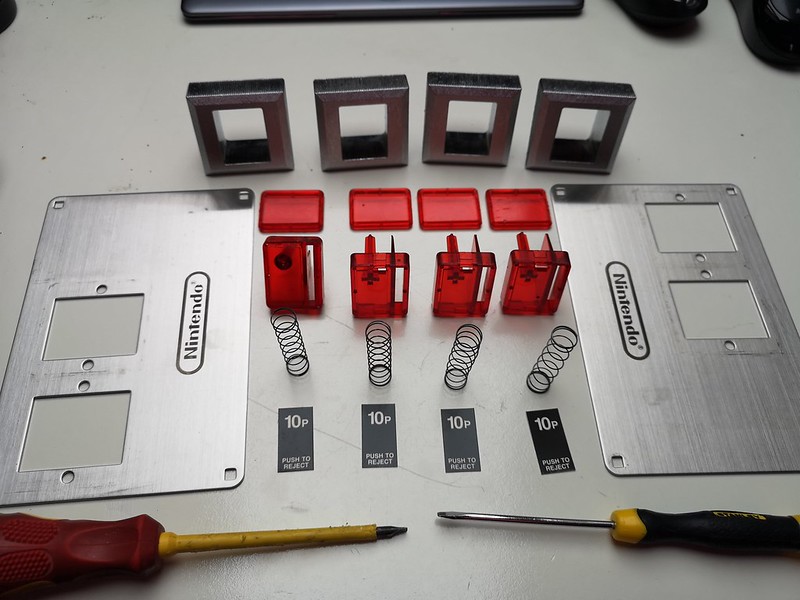
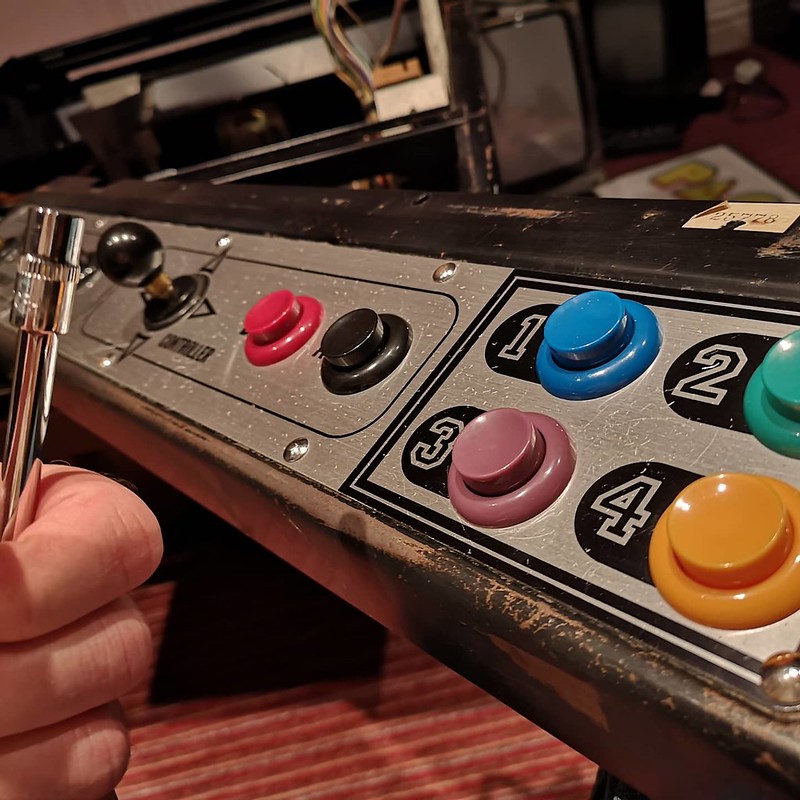
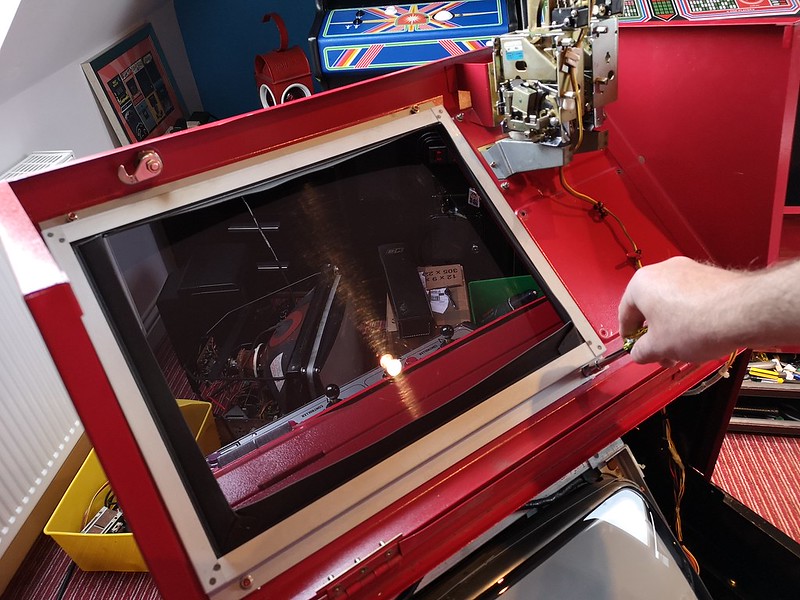
The Red Tent is a well-built cabinet, constructed entirely from metal. Each side opens up and is easily accessible. The first job was to strip everything outThat’s the monitors, the red “tent” and control panels removedWorth noting the monitors here. They are very difficult to find now. Built by Japanese manufacturer Sharp, they are an odd size, with 18-inch screens. On close inspection, both have no noticeable burn which is amazing considering their age. I’ve been very fortunate hereHere’s the steel legs removedYou can see the pitting that’s present here on this close-up pic. This is probably due to the sea air where the machine was located for its whole life on the West coast of Ireland. I decided to tackle this using Pepsi and tin foil. Dip your foil in the cola, and rub away the rust!Top leg done, bottom one still to doThen into the kitchen when Mrs Arcade Blogger wasn’t looking, and give them both a good hot washAnd there we go – a huge improvementA quick mention of the feet! These too needed a good clean. But it’s very unusual to find these intact and complete.With the legs done and drying out, it was time to strip the buttons and joysticks from the panels. Took a long time this – lots of nuts and bolts.With the panels clear, I was able to give them a wash also. I mentioned in my last post that I had a complete set of repro buttons ready to drop in to replace the damaged originalsBack to the main cabinet shell. I removed all the old dust using a dry paintbrush and vacuum head to suck everything up. Then a deep clean with detergentSame process for the Red Tent lidCoin mechanisms next. Again, just a case of stripping everything down and washing in detergent and hot water. The coin slots were particularly grimy as you’d expectBut everything came up like new. Spent a good hour reconstructing everything and getting them back onto the cabinetHere’s our control panels rebuilt. Long job this, but worth investing the time to get things right and working properly againI cleaned up the monitors before dropping them back in. A large amount of dirt came off each screen, and the chassis needed little more than a dust with my paintbrush and vacuum nozzleDecided to dismantle these screen protectors also. They come in two layers – a glass overlay and a light diffuser pane all mounted in a frameGlad I did. Lots of muck around the edges. Hot water and glass cleaner got them looking spot onThese instruction cards can be found online. I printed a couple off and also ordered new clear vinyl from a local company online who shipped them back with bolt holes pre-drilled too
So with the cabinet rebuilt, I wanted to figure out why one side was refusing to show any red. I was worried that one of the monitors was faulty, which would have been a long repair road. To test it, I swapped the monitors around, only to find that red was still not being displayed on the same side. This was good news, as it eliminated the monitors as being suspect!
So I had a PCB problem. I did some research online, tried a few things, but still the lack of red remained. Figuring I was at the end of my knowledge, I got in touch with a friendly collector who was prepared to take a look at the PCB for me. Long story – it turned out to be a broken trace, which was hard to pin down, but easy to fix:
One Fixed Vs PCB!
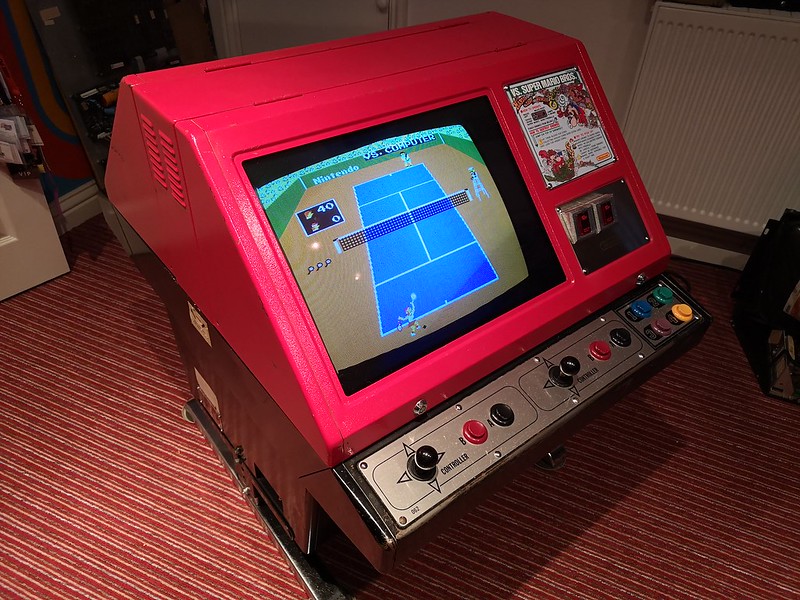
So a few days later, I had the repaired PCB in my hand – time to fire the game up!
Notice I decided to remove the leg extender. This can be added at a later date if needs be. For now it’s stored in my garage. I prefer the look as a traditional cocktail table. Besides, space in the arcade loft is getting scarce, so needs must!Here’s player 1 side. With the red output working, the Sharp monitor gives a great pictureAnd player two side. All correct and present.
A slightly different restoration for me this. The game was mostly complete and working and showed signs of wear. I could have resprayed everything to make a mint cabinet, but I wanted to preserve it’s provenance and interesting patina found across the cabinet which showed its history as a workhorse for the last 40 years in an Irish coastal arcade.
I’m very pleased with how it came out – this one’s a keeper.
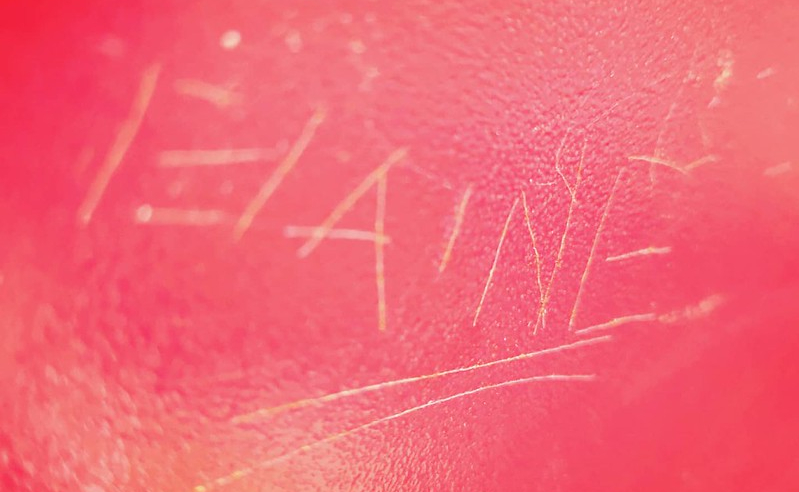
I’ll give the final word to “Elaine” who carved her name into the side of the Red Tent at some point. I guess we can leave that there too
So there you go – my new Nintendo Red Tent arcade cabinet. I currently only have Vs Tennis to play – but this is a good fun game. I’ve had four of us on the cabinet – and it makes for great multiplayer larks. I’ve reached out to a few collectors and have a lead on burning some ROMs for new games, which I plan to get hold of soon.
I really love these step by step restoration articles. There’s something so satisfying about seeing these games get closer and closer to like-new condition. Thank you for sharing! You better hope Mrs. Arcade-Blogger doesn’t read your blog…or you’ll be sleeping in the kitchen sink for a while! 🙂
Tony, A remarkable find in the condition it was in. Congratulations on it and the restoration you did to it. I would have done the same in this case. Another coin-op saved! Mike Basal.


I really love these step by step restoration articles. There’s something so satisfying about seeing these games get closer and closer to like-new condition. Thank you for sharing! You better hope Mrs. Arcade-Blogger doesn’t read your blog…or you’ll be sleeping in the kitchen sink for a while! 🙂
LikeLiked by 1 person
Tony, A remarkable find in the condition it was in. Congratulations on it and the restoration you did to it. I would have done the same in this case. Another coin-op saved! Mike Basal.
LikeLike
Thanks Michael – it was a fun one to work on! Must find some more ROMs for it now!
LikeLike
A classy piece for a classy restore. Congratulations Sir Tony, you are a true honor to retro gaming lovers.
LikeLiked by 1 person