A few weeks back I wrote about Automatic Services and the arcade cabinets that a group of us were able to acquire, after its owner Mark Shepherd passed away. If you missed that post, go here.
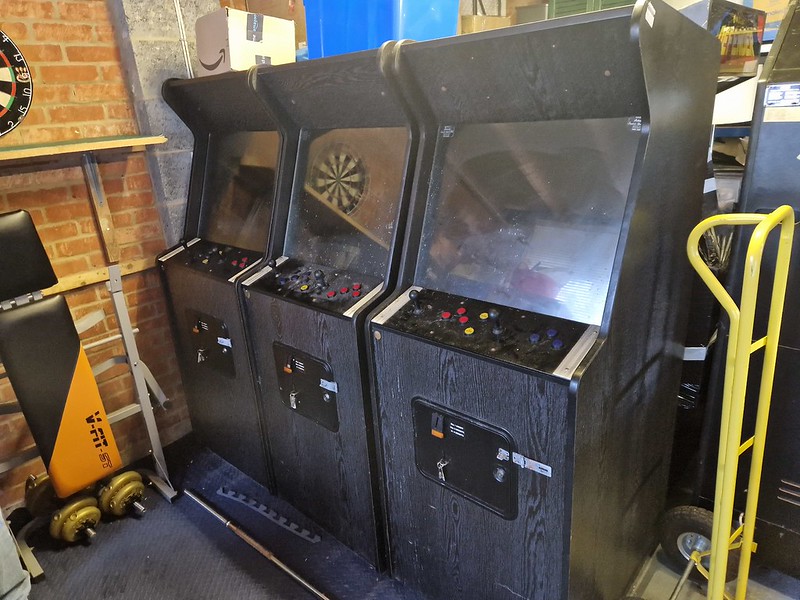
This week, I wanted to follow up by taking a closer look at one particular cabinet from the haul we took away with us. You may recall that I made reference to the Universal cabinets that were designed and built by the company to be placed out on location. We discovered 25 or so of these, and managed to rescue most of them – I ended up with three which have been sitting in my garage for a few weeks now.
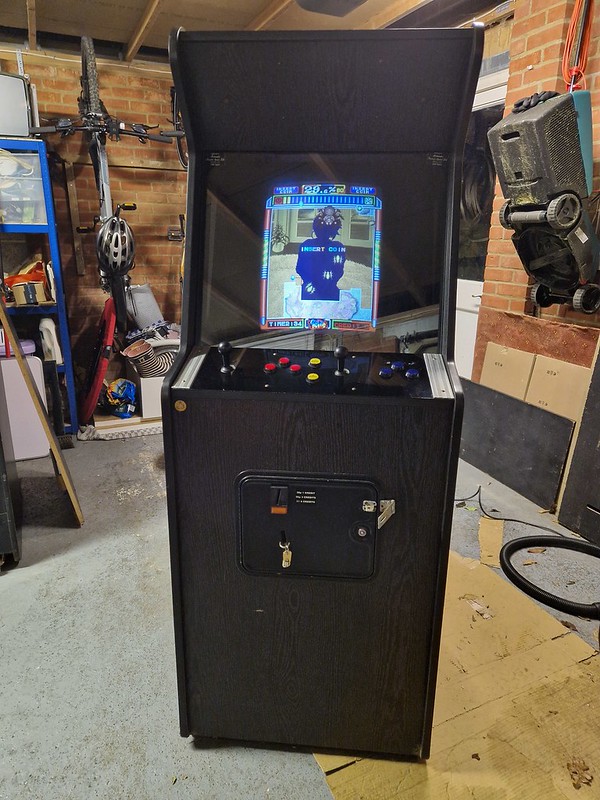
The Automatic Services Universal arcade cabinet
I remarked at the time that first impressions were that these were very well built cabinets. They don’t look particularly pretty, but these were built as work-horses and were designed to withstand the knocks inevitably dished out by enthusiastic players during the 90s. Our guide on the day Drew, told us he estimated that several hundred of these were hand built in the workshop. Every cabinet was so precise, that you could interchange any of the panels, and not notice. Everything was constructed to the millimetre.
I’m picturing a row of ten of these, all switched on, each playing a different game in a dimly lit Yorkshire arcade…
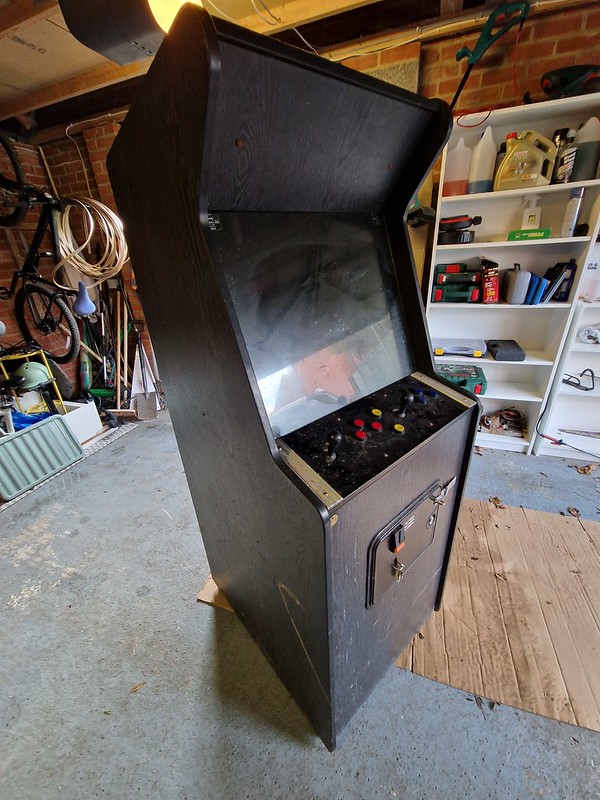
Inspired by some of the other guys who also grabbed some of these cabinets and have already started to clean them up, I decided this weekend to pull one out and take a closer look myself.
And here it is
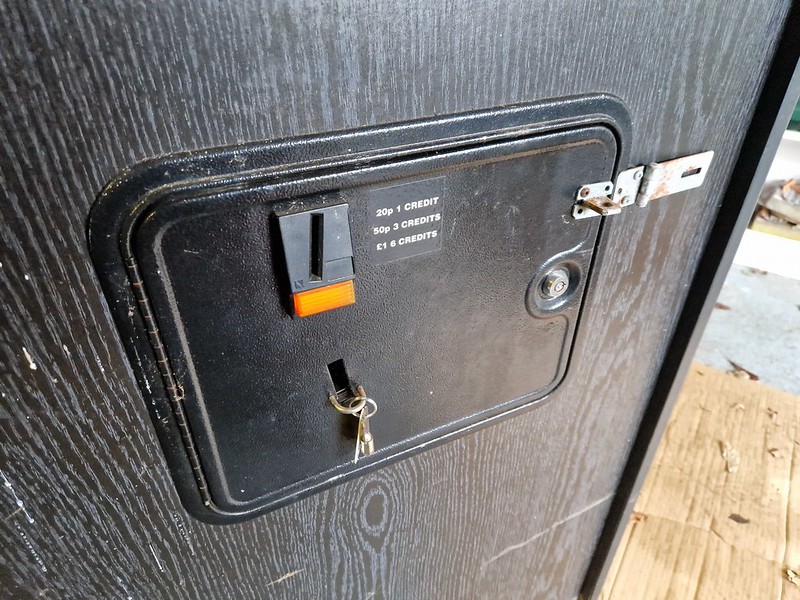
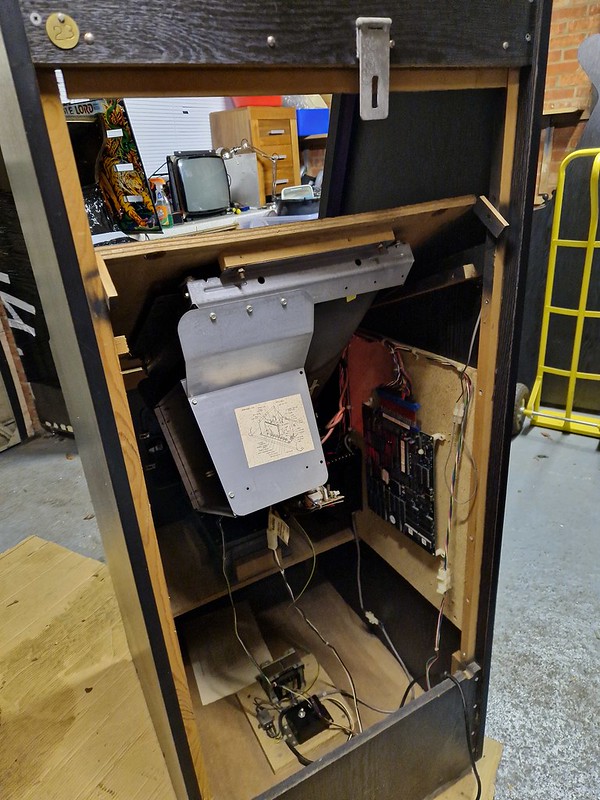
Just my luck that the one I chose was the only one of the three that didn’t have a back door key. Undeterred, I grabbed the drill, and after one ruined drill bit, we were soon in business…
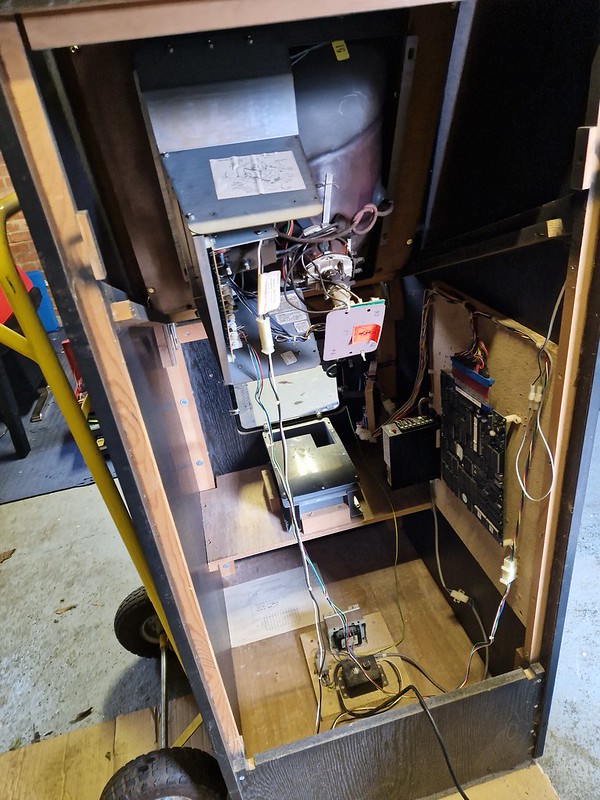
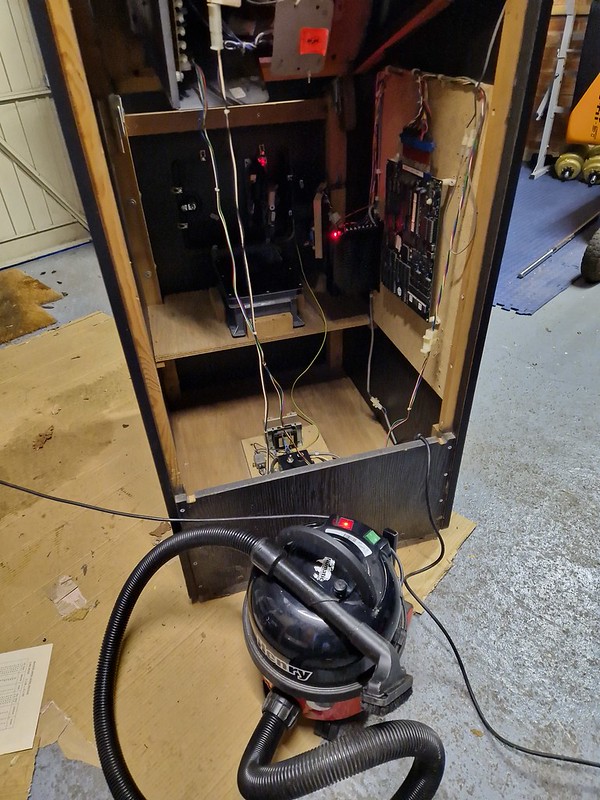
It was pretty dusty in there, but everything is laid out logically – power supply at the bottom, space for a PCB board on the right, switching unit mounted next to it, and a coin box and monitor. First impressions were pretty good
Control panel. Again, not very exciting – no one likes those buttons, but hey, it was the nineties and they tend to be more reliable than leaf switches used in most games released in the previous decade. Those metal rails at the side were there to solve the problem of cigarette burns, typically found on cabinets of this age on and around the plexi control panel overlays. The idea being, you could place your lit cigarette on the metal rail, and play your game without damaging the cabinet!
Talking of inside, here’s the underside of the control panel. What jumps out at you is how neat and well put together this is. This is a very solid control panel, built with care and precision. It was made to last.
What’s particularly interesting about these cabinets, is the use of Induction joysticks, rather than traditional switch/leaf ones. These give a really nice feel to gameplay, with a short throw distance. The joysticks require a 5V line to operate and have magnets in them to facilitate the movement and centering motions. A potentiometer is accessible inside to easily switch from 4 to 8 way. Very unusual – I’ve never come across one before. There’s a thread with some detail on these sticks from way back which you can read here if you’re interested to learn more about them.
Coin door, with Pricing sticker still present!
I was hoping to find something exciting inside the cabinet, but it was not to be! This is a Gal’s Panic PCB, released in 1990 by Kaneko, a Japanese video game publisher founded in Suginami, Tokyo, Japan, by Hiroshi Kaneko. Kaneko published a number of games both under its brand and other companies, such as Air Buster, Nexzr, Shogun Warriors, DJ Boy, Guts’n, and the Gals Panic series. The last game released by the company was Gals Panic S3 for the arcade in 2002.
So let’s switch on and see what we get:
Well, as usual, its good and bad news. The good news is the monitor works! The bad news is we don’t appear to be getting a signal from the game
Time to investigate!
I was pretty quickly able to identify the culprit – this switching power supply was completely dead. Which wasn’t too surprising as the cabinet has been sat in storage for a couple of decades. I removed it from the cabinet, dismantled it but couldn’t find anything immediately awry.
Remembering I had a spare in the loft, and to save time, I grabbed that and got to work replacing the old one. These are pretty cheap parts and ubiquitous today, so this was the easiest solution
Grabbing the multimeter and testing the voltages. After dialling in the 5V line, I was happy to hook up the PCB loom ready to switch on again
Another unique feature of these cabinets, is the bespoke loom created by Automatic Services. These were built pre-Jamma, and have their own pinout on the connector. This commits the operator to Automatic Services (only games supplied by them will work in the cabinets). To hook up a game using the Jamma standard pinout, with became ubiquitous after these cabinets were designed, an adaptor PCB is required, which sits between the Jamma PCB and the loom connector, which in turn is powered by our new switching power supply
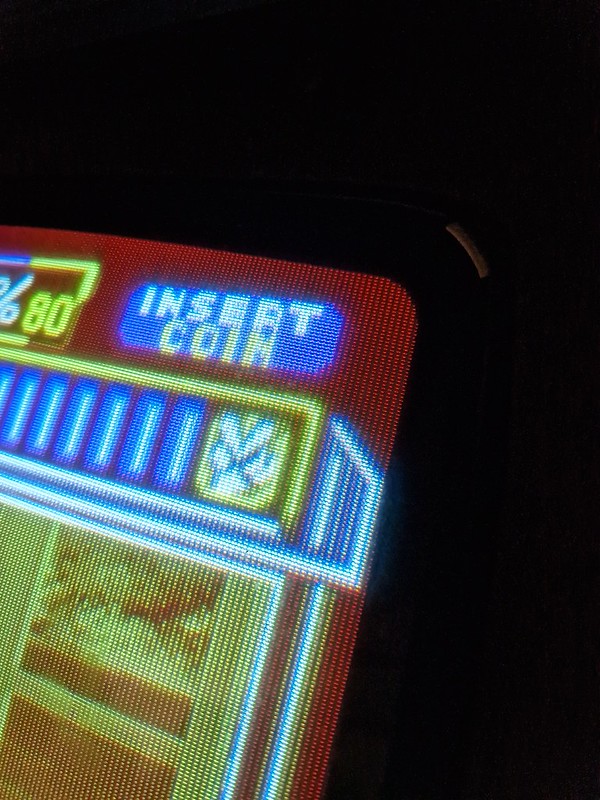
We now have signs of life!
Although the game is appearing on screen, we seem to have a lot of red bleed
Let’s take a look at the monitor. Its a 19″ Wells Gardner (I’ll put the model number here once I’ve identified it). And by sheer coincidence, this is an anniversary of sorts – it was manufactured in February 1988, so the CRT monitor is exactly 36 years old this month!
What I was finding was it was impossible to adjust the pots and see the screen at the same time, but then I noticed something…
At the top of the monitor’s mounting board inside the cabinet were two wing nuts either side, which you can undo, and drop the top of the mounting board down to rest two tabs at the back of the cabinet! So you can now make adjustments and see the screen at the same time. Very clever, and another great design idea implemented by Mark.
As I write this, I realise that I didn’t try to rotate the monitor. But I wouldn’t mind betting that the mounting board is exactly square, meaning it can be pulled out, rotated 90 degrees and dropped back in along the rails, making it horizontally mounted for games that require that setup. Very clever.
Here’s how that monitor service mode looks from the front. I suppose you could even leave the monitor like that if you wanted to, as the back door still fits with it laying down.
After a bit of fiddling around, I got an acceptable picture. Colours are vivid and bright and no screen burn either!
So with things up and running, it was time to grab a bucket of hot water, a cloth, the vacuum and glass spray and get to work!
Here’s the panel all cleaned up. The only damage are some cigarette burn marks above the P2 buttons on the right, where the two metal rails were ignored by smokers. (Who’d deal with the general public eh?). Nothing too bad – I might be able to get to improve those marks with a magic eraser
I didn’t mention the screen’s bezel – this is made of of two pieces – a smoked Perspex sheet mounted behind a real glass screen. Both were filthy but came up sparkling with some elbow grease, detergent and Windex. Both drop in behind the control panel, which locks down inside the cab to keep them secure
This is cabinet number 23, and was last tested by Automatic Services in 1994
Henry the hoover made quick work of the insides, removing all the dust
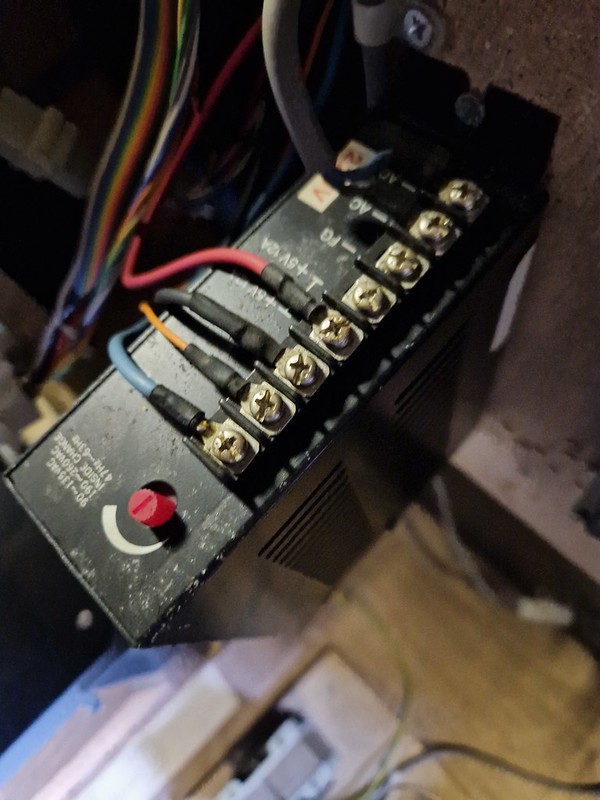
Although not the power supply from this particular cabinet, here’s another identical one that I grabbed from the clearout for reference, all cleaned up recently. Notice now neat and logical it all is. We have our line filter, transformer and a fused on/off switch. The grey lead powers a switching power supply of your choice, and the multi coloured connector powers the monitor/degauss circuit. These are so well put together!
Another small observation of some of the detail: Automatic Services included this angled plate to make coin adjustments easy to change when required, easily accessible via the coin door at the front. They thought of everything…
And there you have it. One Automatic Services Universal cabinet – good as new!
I tested the game and had a few goes (sadly, Gals Panic is not the greatest game ever made!), but everything works perfectly and the machine accepts a 20p and 50p coin and credits up the cabinet.
I have to say, I’m very impressed with these cabinets. I’m not really a fan of the big wooden Jamma style cabinets that we had here in the UK during the 90s, but this is the best built one I’ve ever come across and the work that went into them is really evident. Very high quality parts were used (like those induction joysticks) and the quality of the work is astonishing, considering they were hand built in a small workshop just outside York. These are very solid and I can’t see them disintegrating like other Jamma cabinets.
They are a great testament to the levels of attention, care and thought that Automatic Services and their creator, Mark Shepherd, put into these revenue generating cabinets. I’m delighted to own them.
Quite where I’m going to put all three is up for debate (Mrs Arcade Blogger isn’t really up for a debate and I am totally out of space!), so I may well move a couple onto other collectors (if you’re in the UK, drop me a message if you’re interested).
Fellow collector Jon made up a bunch of these identifier plates so that we can detail the provenance of these cabinets for future owners, and of course to keep the legacy of Arcade Services alive
And on the cabinet. The QR codes link to the video and blog article written up about our experience in saving these cabinets
I’ll look to get the other two fired up in the coming weeks – I am confident that they’ll be as robust as this one!
So there you have it. Hope you enjoyed this deep dive into a unique, hand built arcade cabinet that was operated during the 90s. These things were clearly built to last!
Great little piece Tony, and a nice follow up to the earlier thread.
As you point out, they are not going to win any beauty contests, but they were never designed with that in mind. What they are, however, is possibly some of ‘the’ best designed and built cabinets out there.
Clearly, Mark and his Team, had spent some considerable time, noting all the issues Ops had with other cabinets, that made the life on an Op, just a little bit harder than it needed to be, and then, redesigned each part of their cabinet to eradicate or ease, each of those issues.
They just look like they will work. And of course, they do, still!
To help you find space for them, I’ve done some measuring up, and figure that if you remove your bath, you will be able to fit all 3 in it’s footprint. Best ask MrsT first though……
It’s a really awesome cabinet even if you don’t like the game it’s still awesome, It’s great that it and the others were saved for posterity. From your two articles on this now it’s obvious that these were indeed really well built and I am sure in part is why they have survived so long.


The Automatic Services Cabinet really does make a plain style look good!
LikeLiked by 2 people
Great little piece Tony, and a nice follow up to the earlier thread.
As you point out, they are not going to win any beauty contests, but they were never designed with that in mind. What they are, however, is possibly some of ‘the’ best designed and built cabinets out there.
Clearly, Mark and his Team, had spent some considerable time, noting all the issues Ops had with other cabinets, that made the life on an Op, just a little bit harder than it needed to be, and then, redesigned each part of their cabinet to eradicate or ease, each of those issues.
They just look like they will work. And of course, they do, still!
To help you find space for them, I’ve done some measuring up, and figure that if you remove your bath, you will be able to fit all 3 in it’s footprint. Best ask MrsT first though……
LikeLiked by 2 people
“Congratulations, Tony,
It’s a really awesome cabinet even if you don’t like the game it’s still awesome, It’s great that it and the others were saved for posterity. From your two articles on this now it’s obvious that these were indeed really well built and I am sure in part is why they have survived so long.
Mike B.”
LikeLiked by 3 people
Thanks for sharing this. Particularly liked the identifier plates too. Regards
LikeLiked by 2 people
And here I was thinking I was the only one who played Gals Panic on a cabinet.
LikeLiked by 1 person