So here we go then with part 3 of the restoration of this Centipede Upright cabinet.
Some good news to start off with – the monitor is back from the repair guy (thanks again Grant!). You’ll recall we had vertical collapse on the screen. It turned out that all of the High Voltage caps were bad, along with a resistor. While he was there, he replaced a red gain pot and tidied up the fuses which had been bypassed at some point. Anyway, all is well, and the price was very reasonable. After putting the Chassis back into the monitor screen, and with a few adjustments, here’s the monitor running 100% on my Centipede cabaret in the arcade loft:

I soak tested it for 5 hours – I think it’s safe to say that our fixed G07 monitor is now bulletproof, which is great news.
So back out to the garage. I made a start on the wood repairs to the base of the cab. I have not been looking forward to this. After brushing off the loose parts of the broken particle board with a wire brush, I got prepared with some glue mix. For this, take some regular PVA glue, and mix it with one part water in a suitable container:
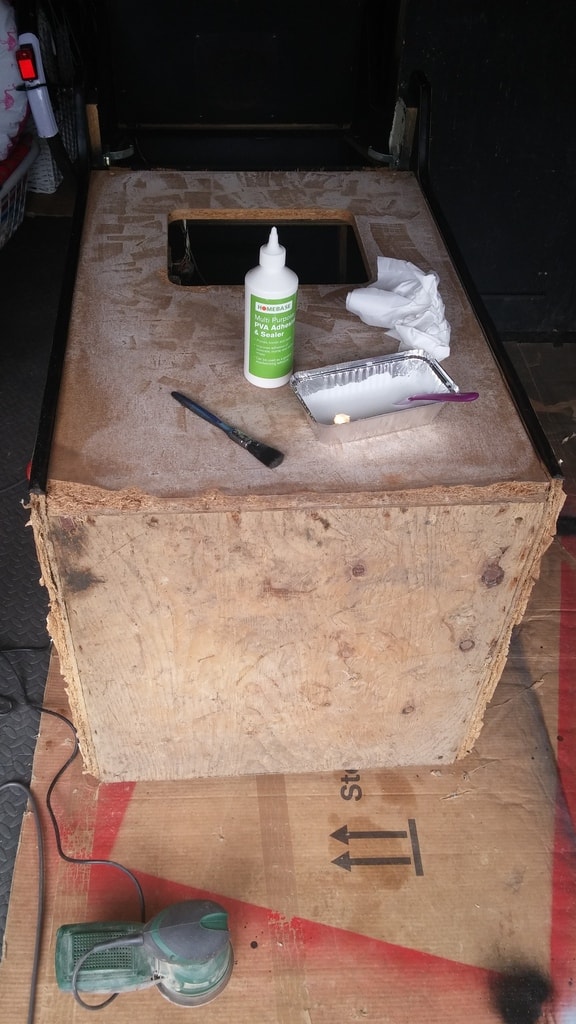
Grab an old paintbrush and work the mix into the damaged areas of wood.
What this will do is soak into the wood and when dry (it will dry clear by the way), will firm up the loose wood chips and give us a nice solid base for any required filler work to grip to later on:
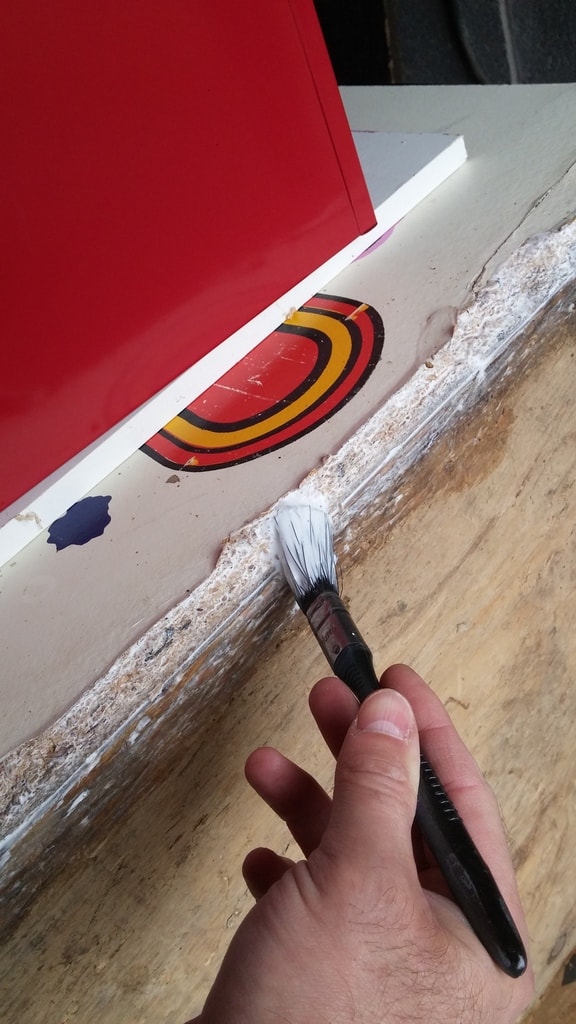
I’m thinking that I’m going to cut away the broken area of vinyl you can see on the top there, which should smart things up, and use filler to get a nice 90 degree edge back to the base of the cab. Once the glue was nicely worked in, I got a piece of wood and used my heavy toolbox to weigh it down, so that when the glue dries into the wood overnight, any swelling will be pushed back flat again. I left this for 24 hours to ensure everything had fully dried:
The following day, I turned the cab over and gave the other bottom edge the same treatment, and while there, treated the base of the cab with wood hardener:

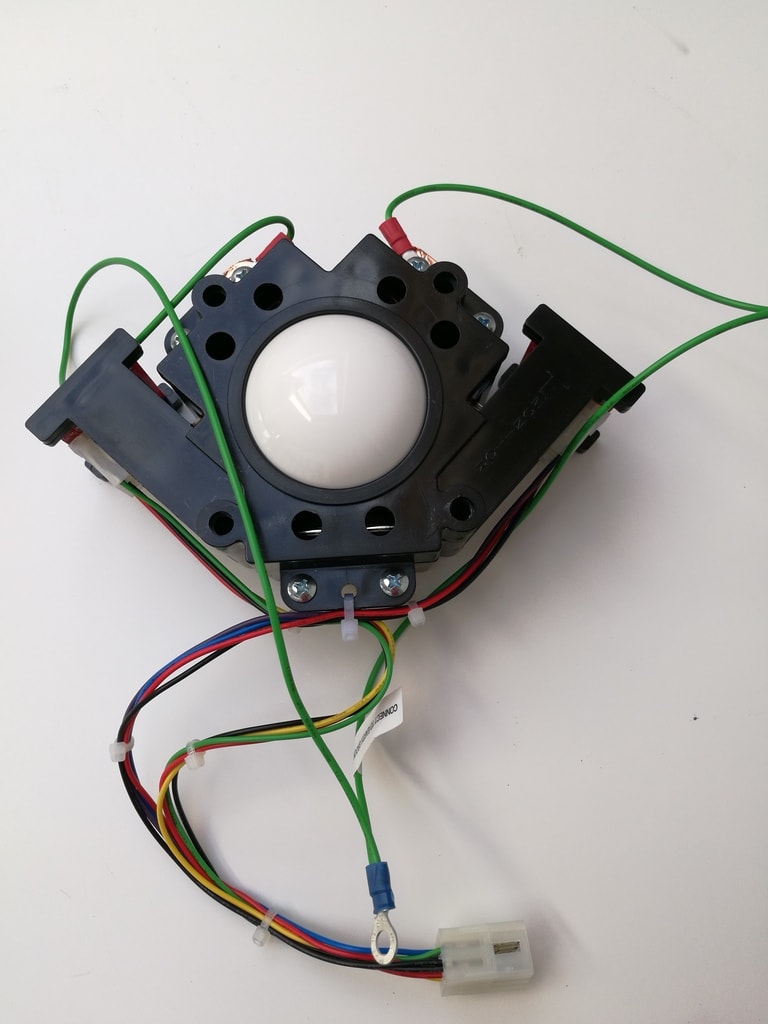
While all that is drying out overnight, it was time to put the cleaned up trackball together:
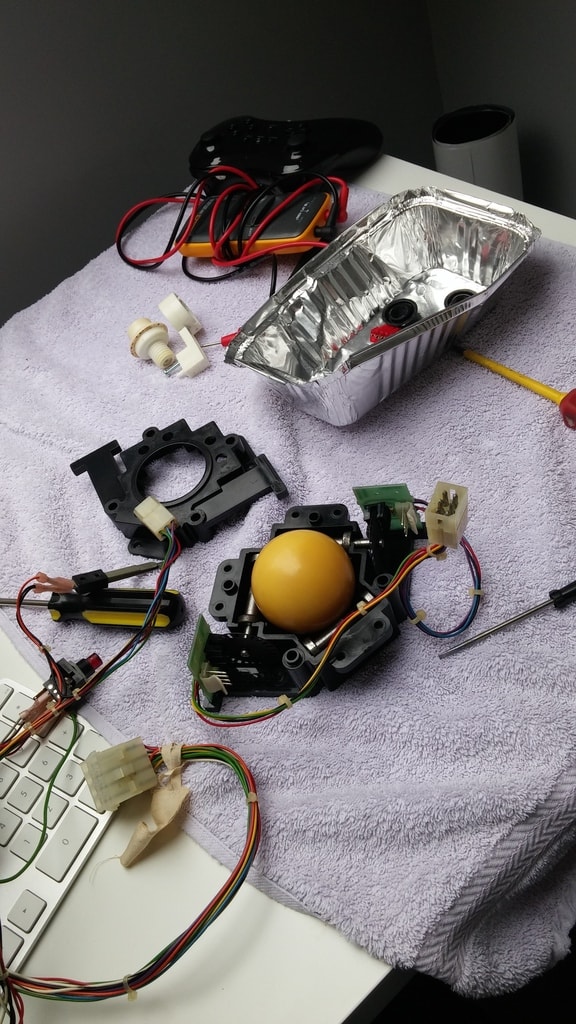
I was able to test it in my working Centipede cabaret:
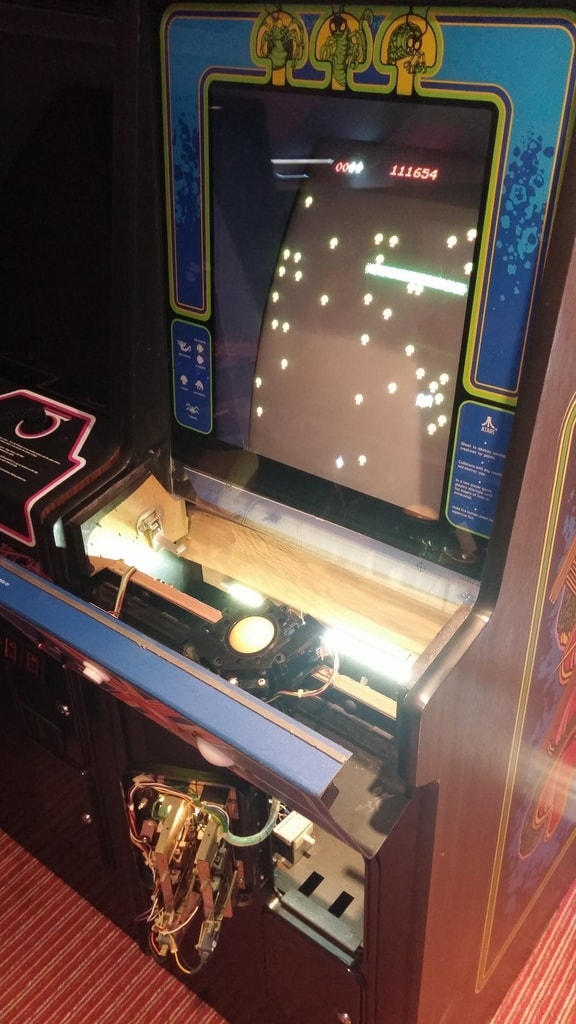
It’s a huge improvement (it now actually spins!), but isn’t as silky smooth as I’d like it to be, even after the long soak in 3 in 1 oil. Something to revisit later.
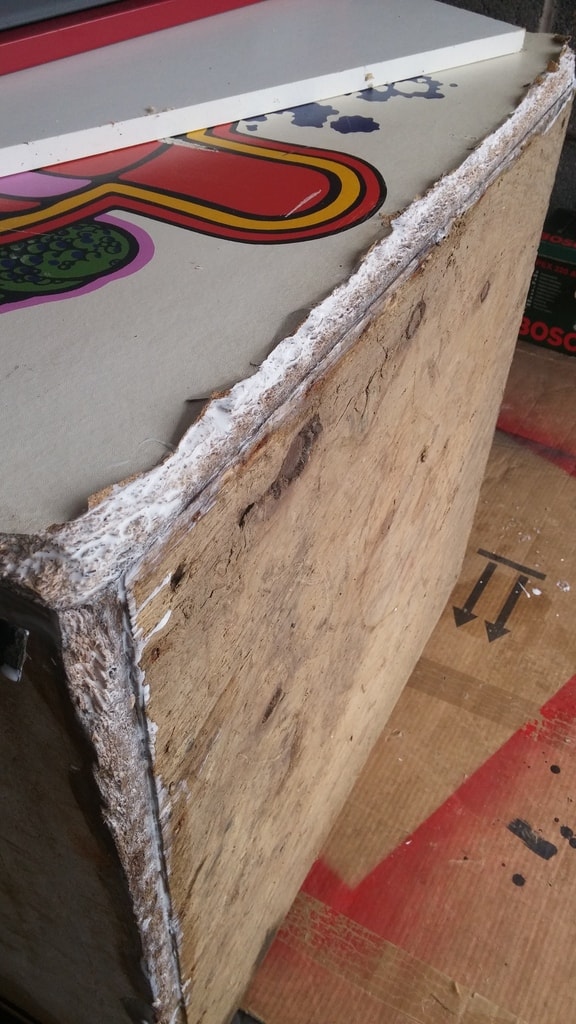
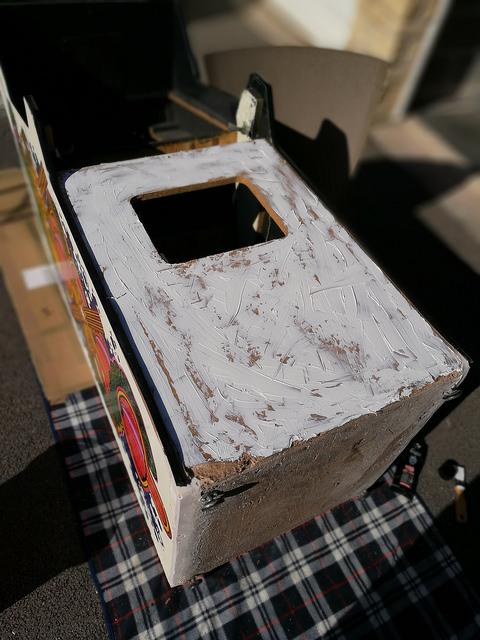
Heading back out to the garage, we need to start some filler work to the base of the cab. With the glue mix dry, the situation isn’t quite as terrible as I first thought. The cab is solid down there, so we are really only filling for cosmetic rather than structural reasons. I could arguably leave it, but we’ve come this far anyway…
So I’m using Bondo (known as P38 over here in the UK), which is a motor panel filler. This stuff is great because it doesn’t shrink when drying, and is easy to sand into the shape you want. So here’s the filler on and drying:
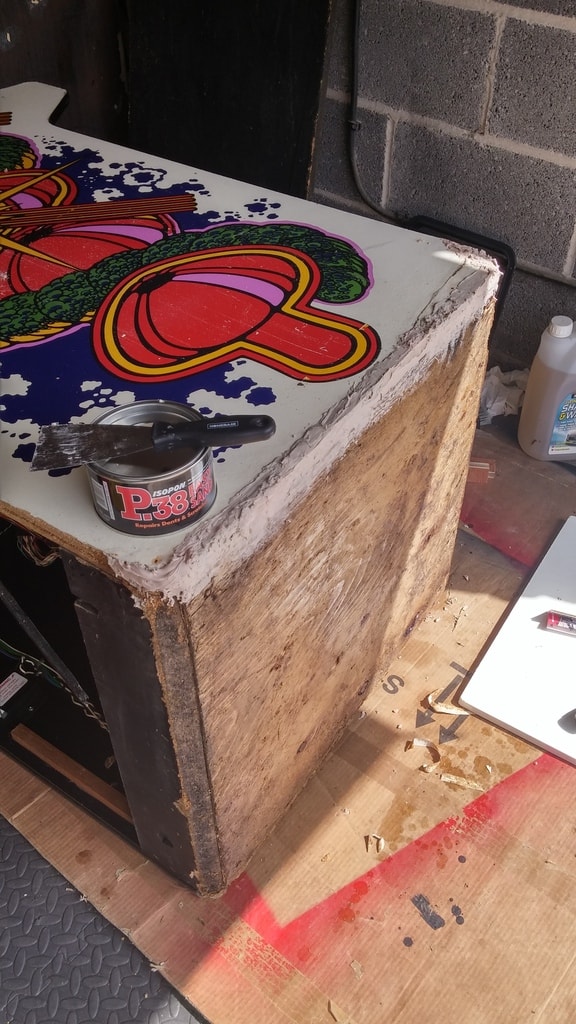
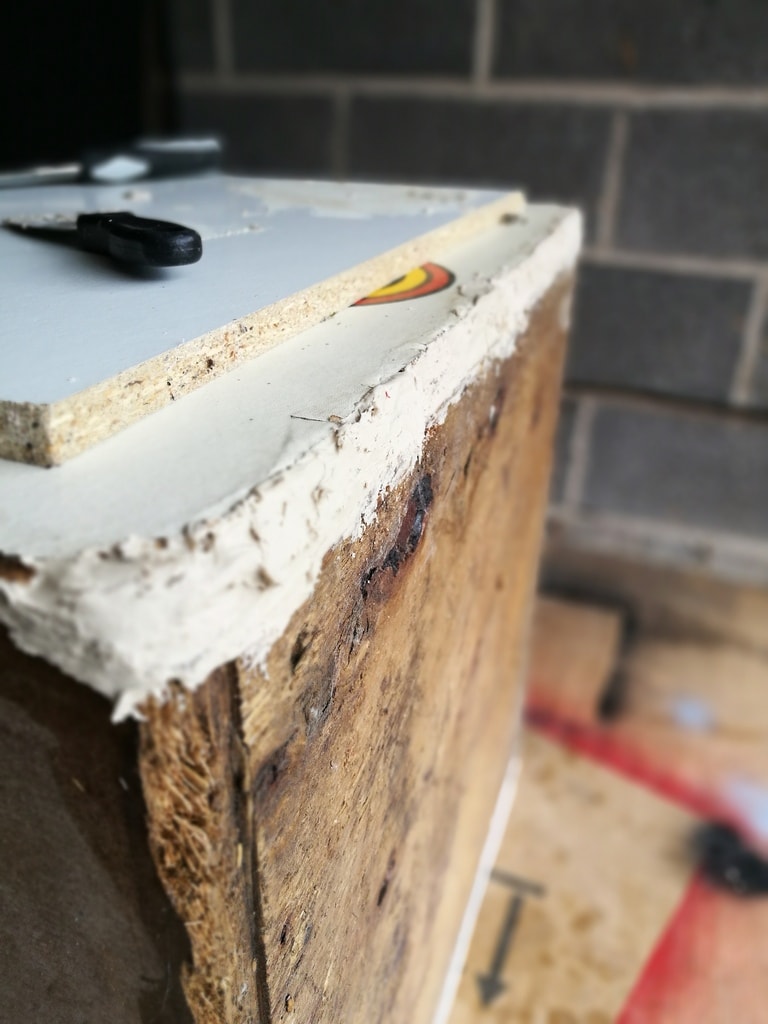
Looks messy! But after a couple of hours, it dries solid, and we can grab our sander and get to work getting it to look presentable:

It’s not quite finished here, but you can see what we’re trying to do. That’s an initial sand with the electric sander, I will finish things off by hand. Then turn over and fill the other side. This one isn’t as bad as the first. So less filler was needed:
Again, we’ll leave that to dry overnight and crack open the sanding gear and get both sides sorted.
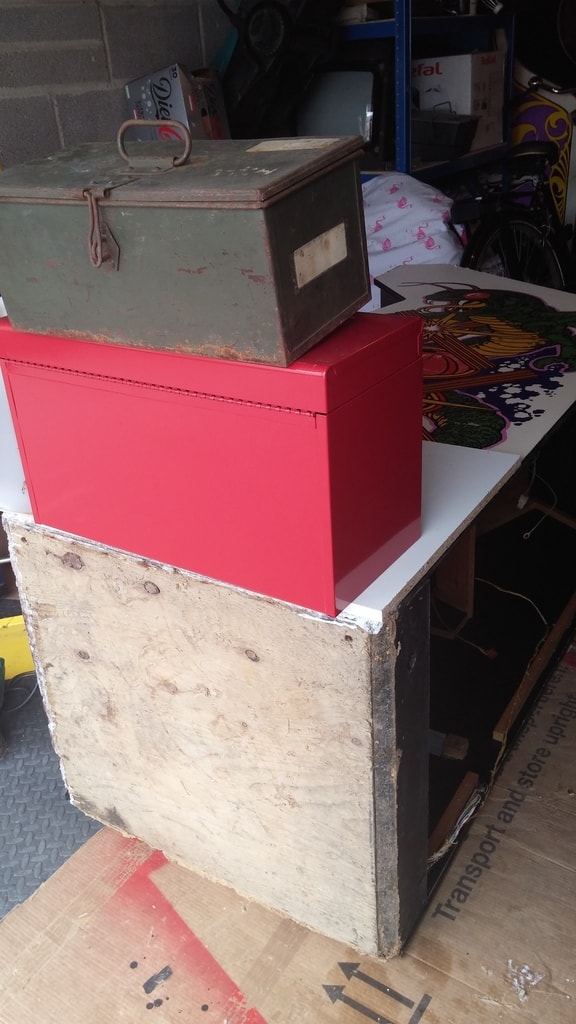
Back to the trackball – I decided in the end to buy a new replacement from the US. I found one at a good price, and managed to sell on the original trackball to a fellow collector looking for a test bench trackball, so the old one from this cab fit the bill well. Over all, it meant I was able to replace with a new one for about £25 – pretty pleased with that. Here she is ready to drop into the control panel:
So with the internals all sorted and ready now, it’s back out to the garage to finish off the sanding making that bottom edge a bit neater, and sort out some of the remaining cosmetics.
I won’t bore you with images of me in a mask holding a sander, but suffice to say, the edges are now smoother than they were, and the bottom of the cab looks better than it did. Not a perfect job, but then the sides aren’t perfect anyway. I just wanted to tidy things up a little. This will give the new owner the choice of leaving things as they are, or go all the way and replace the whole lot with new side art.
While I was there, I managed to screw in four metal Atari feet that I had lying around from an old cab. This will help any future moving around without adding damage to the cabinet, which was its major achilles heel when it came to me.
Back to the front laminate panel. You’ll recall we removed this in part 2 as it was cracked and badly torn. I gave the front a brush to remove any remaining dust and wood particles, then coated it with a strong adhesive. I used a wallpaper scraper tool to smooth the glue around as best I could:
Once that was done and the adhesive became tacky after five minutes or so, I carefully placed the laminate on top, making sure everything was lined up properly, then grabbed the coin door (which was the perfect width – obviously) and placed it on top. On top of this, I placed another coin door, and finally a boxed Sanyo 20-EZ monitor! Plenty of weight to give us a strong bond between the wood and laminate:

You get an idea of the improvement to the bottom edges from these last two pictures too. The glue is set after an hour, and will be permanently set after a day, which will allow me to cut a hole for the coin door!
So. Here’s a list of what’s left to do:
- Cut the coin door hole into the laminate.
- Apply new t-molding all round.
- Drop in the monitor.
- Replace hardware – coin door, marquee, plastic bezel etc.
- Rebuild the control panel with buttons and trackball.
- Make a new cardboard bezel, as the one that came with it is particularly nasty.
- Do a “pre-flight” test before powering everything on.
- Cross fingers.
- Power everything on.
So, I reckon, given the list of jobs left to do, we should be complete by the end of part 4.
Thanks for tuning in. We’re nearly there with this Centipede.
If you missed the earlier parts of this restoration, take a look at the series here.
See you next week.
Tony


Great work!!
LikeLiked by 2 people
You do a wonderful job, keep going!
LikeLiked by 2 people
This restoration is coming on a treat. I have a restoration underway on an old conversion cabinet, had to PVA glue the base edges too but never thought to use wood hardener on the whole base – great idea, thanks.
Looking forward to the rest of the restore – keep up the good work pal.
LikeLike