The Capcom Mini Cute arcade cabinet was launched in Japan during 1991; which for older readers of this blog is probably a frightening thought: 30 years ago! Primarily aimed at kids, it stands at just 1300mm tall, resulting in one of the most diminutive arcade cabinets ever released. As a result, this all-steel games machine has a unique appearance and design which creates an aesthetic charm that’s hard to resist for many collectors.
Today, the Mini Cute’s minimalist design and form factor make it an ideal candidate for home use. It looks great and takes up a tiny amount space – something which is at a premium certainly in my games room. And using the Jamma standard, it is capable of running pretty much anything released in the 80s and 90s. A MAME setup in one of these is an attractive proposition.
It’s a rare beast indeed, and as a Japan-only release, they are difficult to come by. Once acquired, people just don’t let them go. As a result, very few come to market. When they do, they tend to change hands at something of a premium.

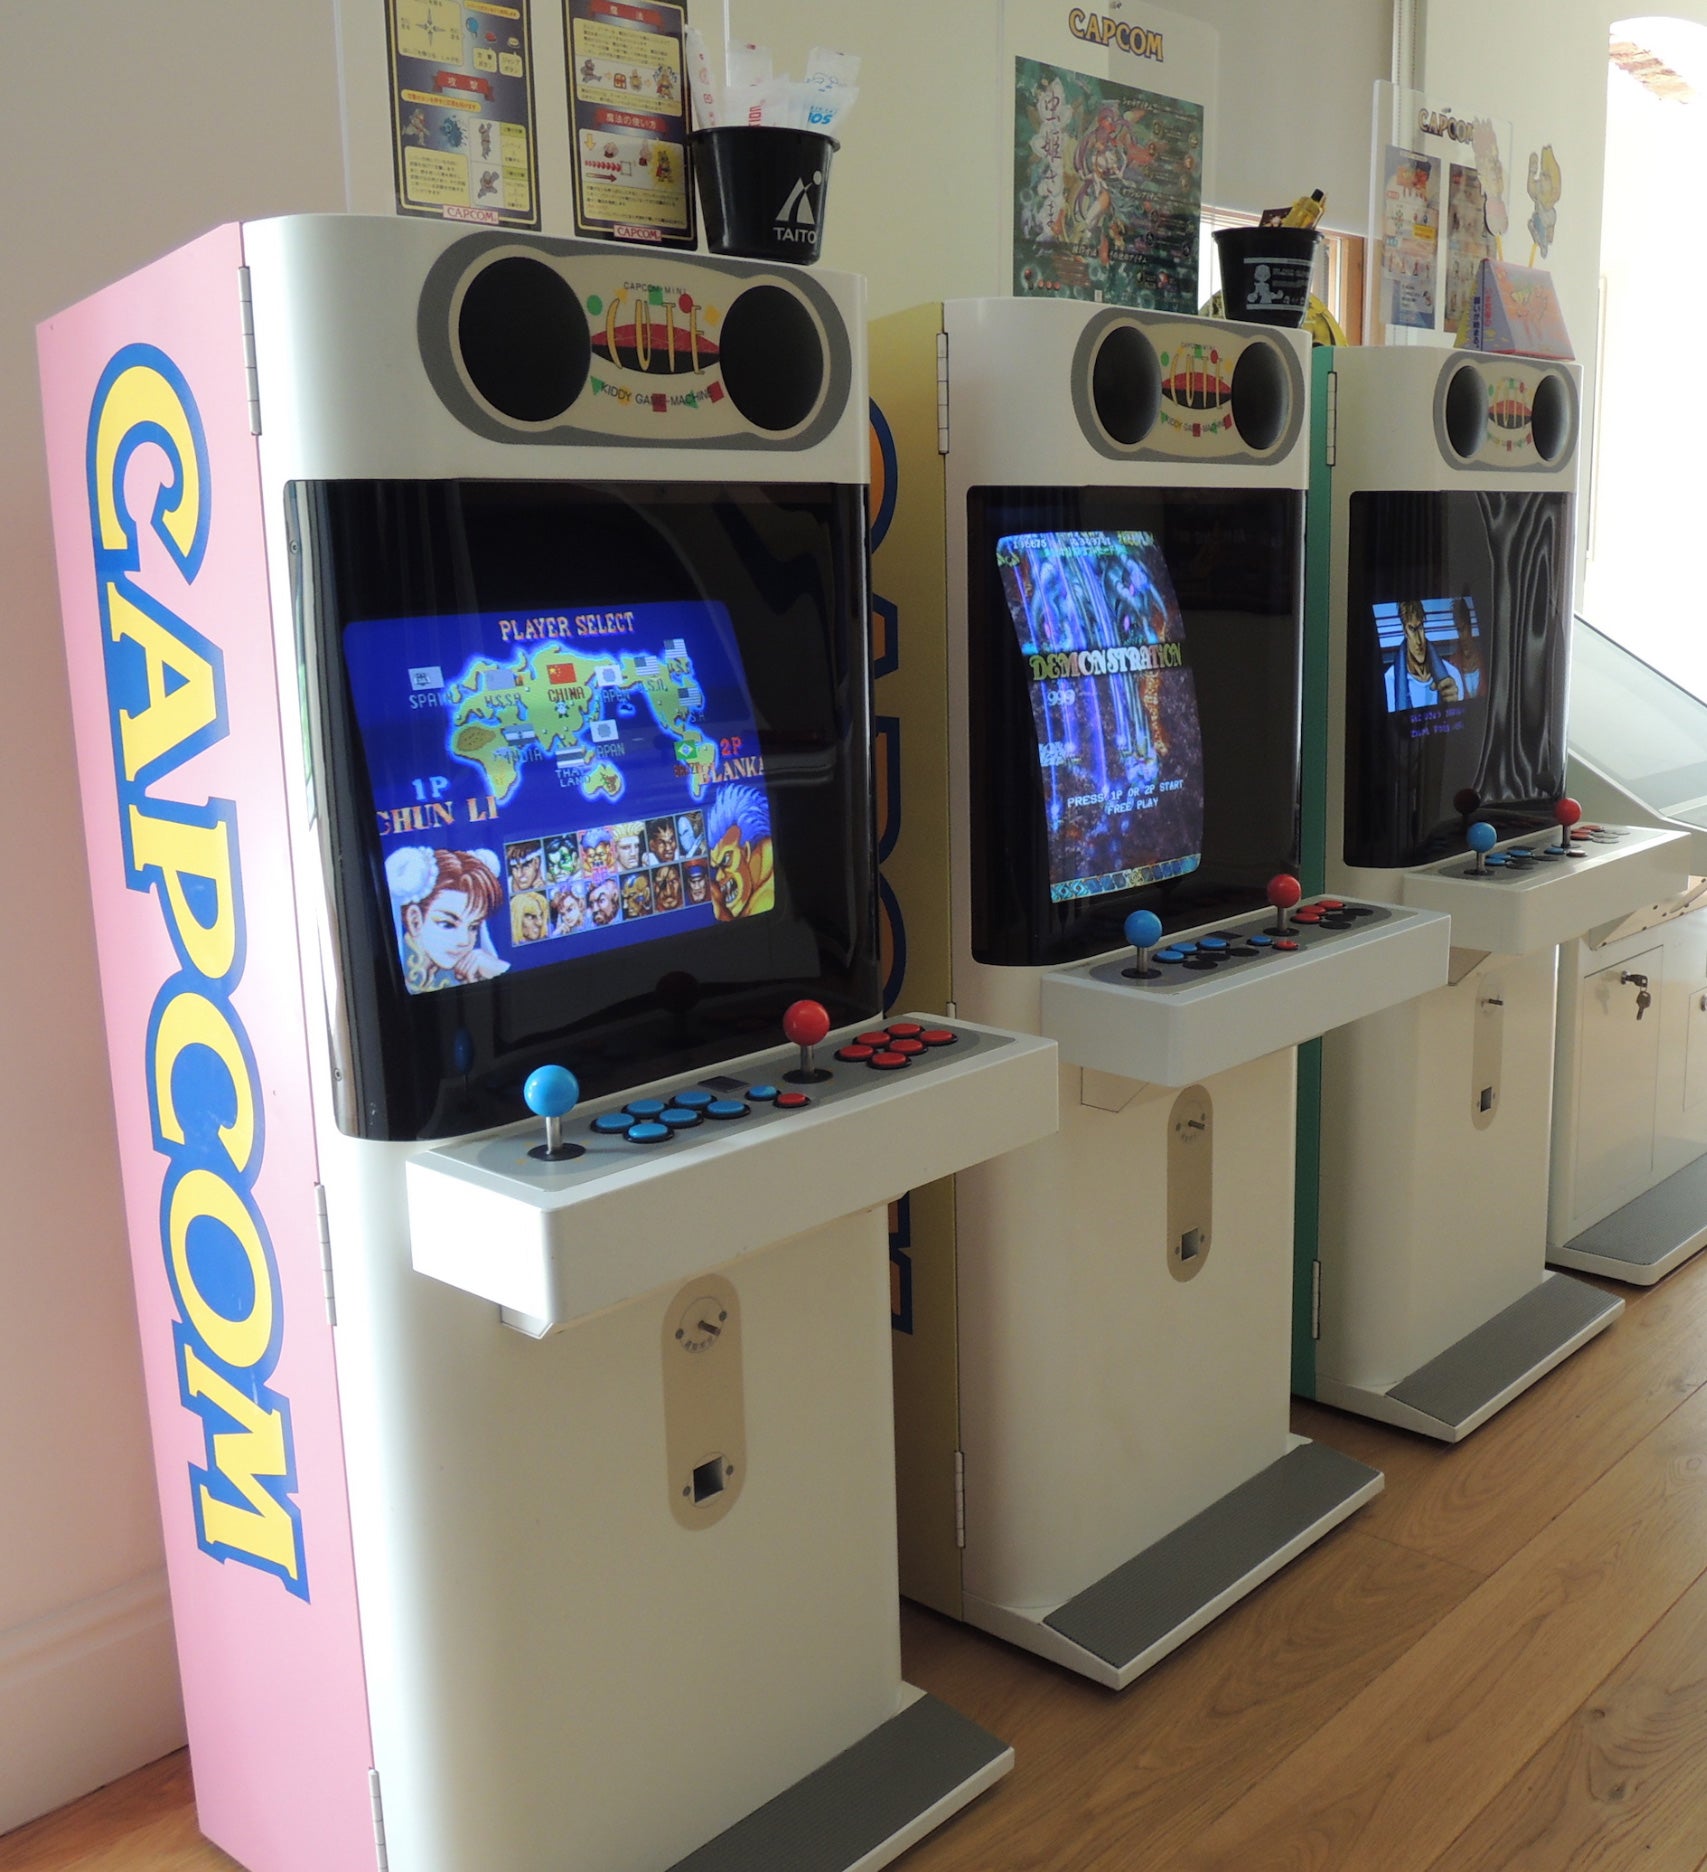
The cabinet was manufactured in three different flavours – pink, yellow and turquoise, and their modular design allows for some beautiful setups. If you’ve been fortunate enough to see a group of Cutes together, you’ll know what I’m getting at. I’ve always wanted one, and still kick myself for not buying years ago when they were relatively affordable. Today, they command eye-watering prices, with nice examples changing hands for thousands of pounds/euros/dollars.
I’d say its a marmite thing. Many collectors don’t understand the need to pay the premium price for what is ostensibly a Jamma cabinet. For others, the form factor and design is where the value is and this outweighs any concerns over the price.
I’d long given up hope of ever owning this classic Capcom arcade cabinet. Having pretty much given up the idea of getting my hands on one, I figured I was out of the market. But late last year, what should appear for sale? A Mini Cute project over here in the UK! Suffice to say, my interest was piqued.
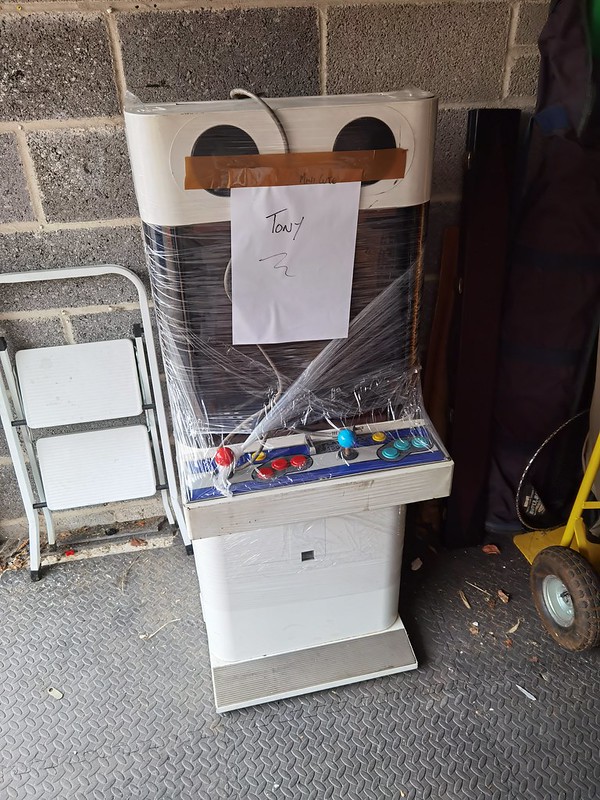
However, this is what was on offer:
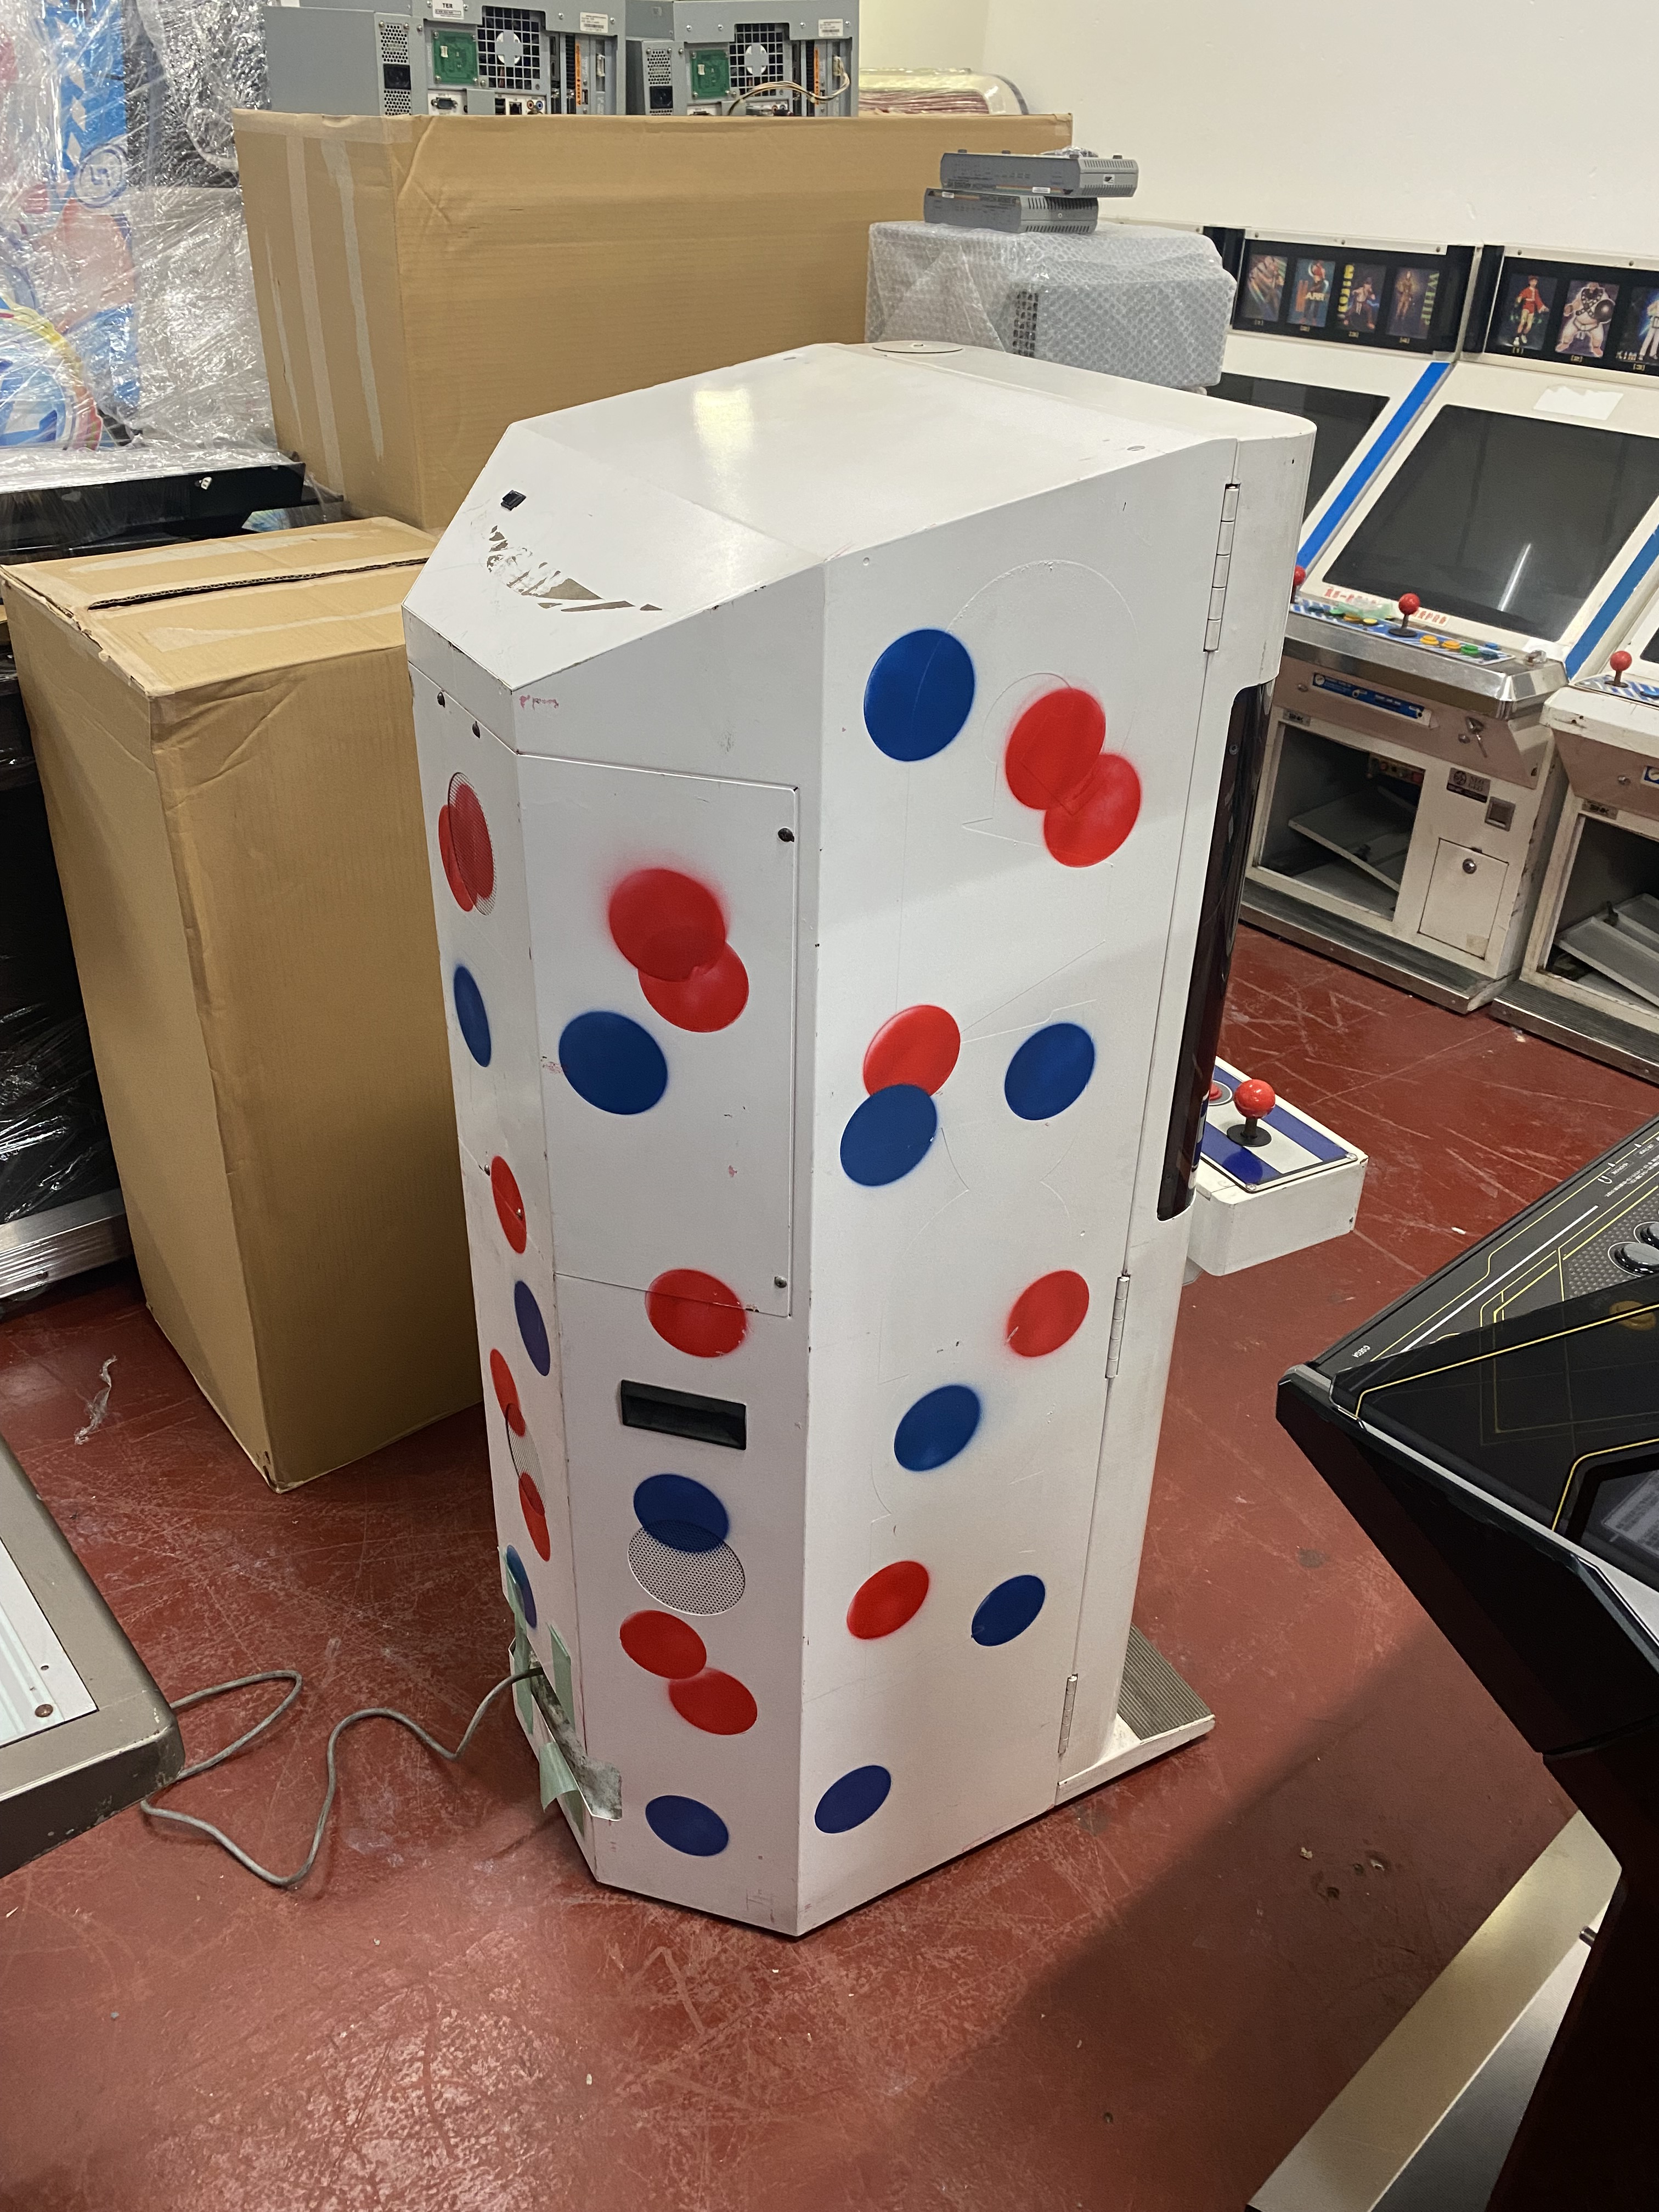
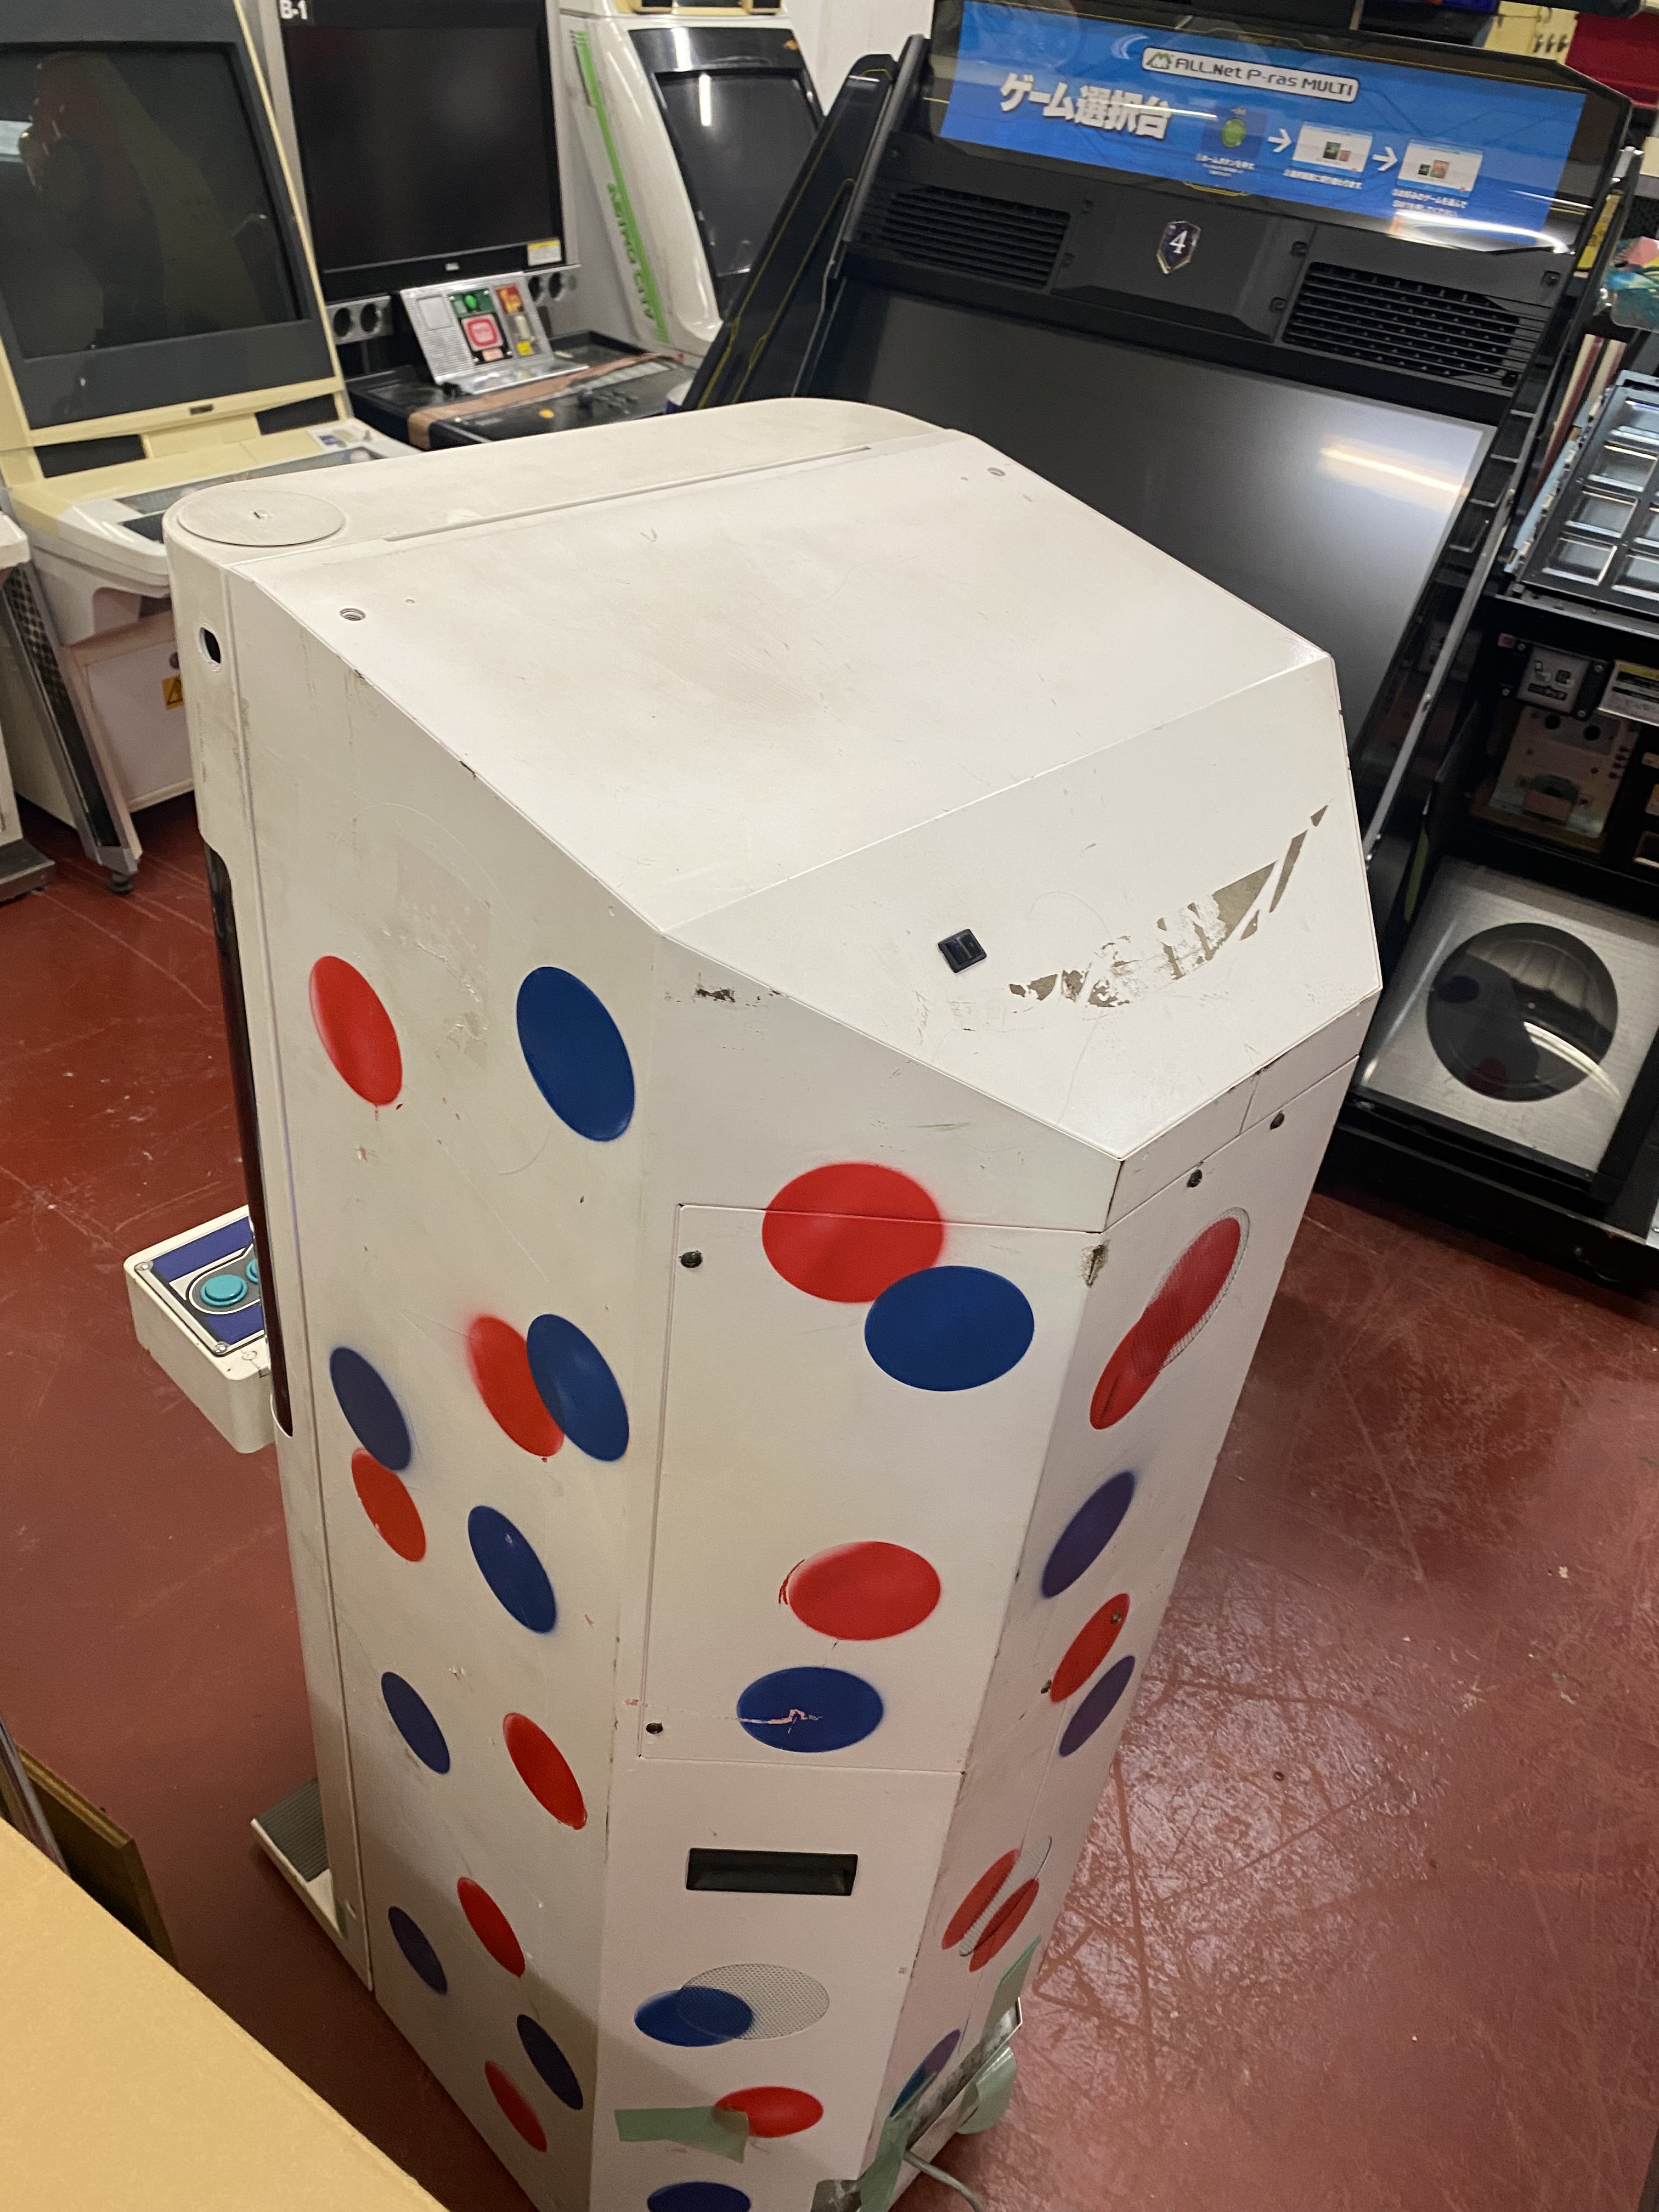

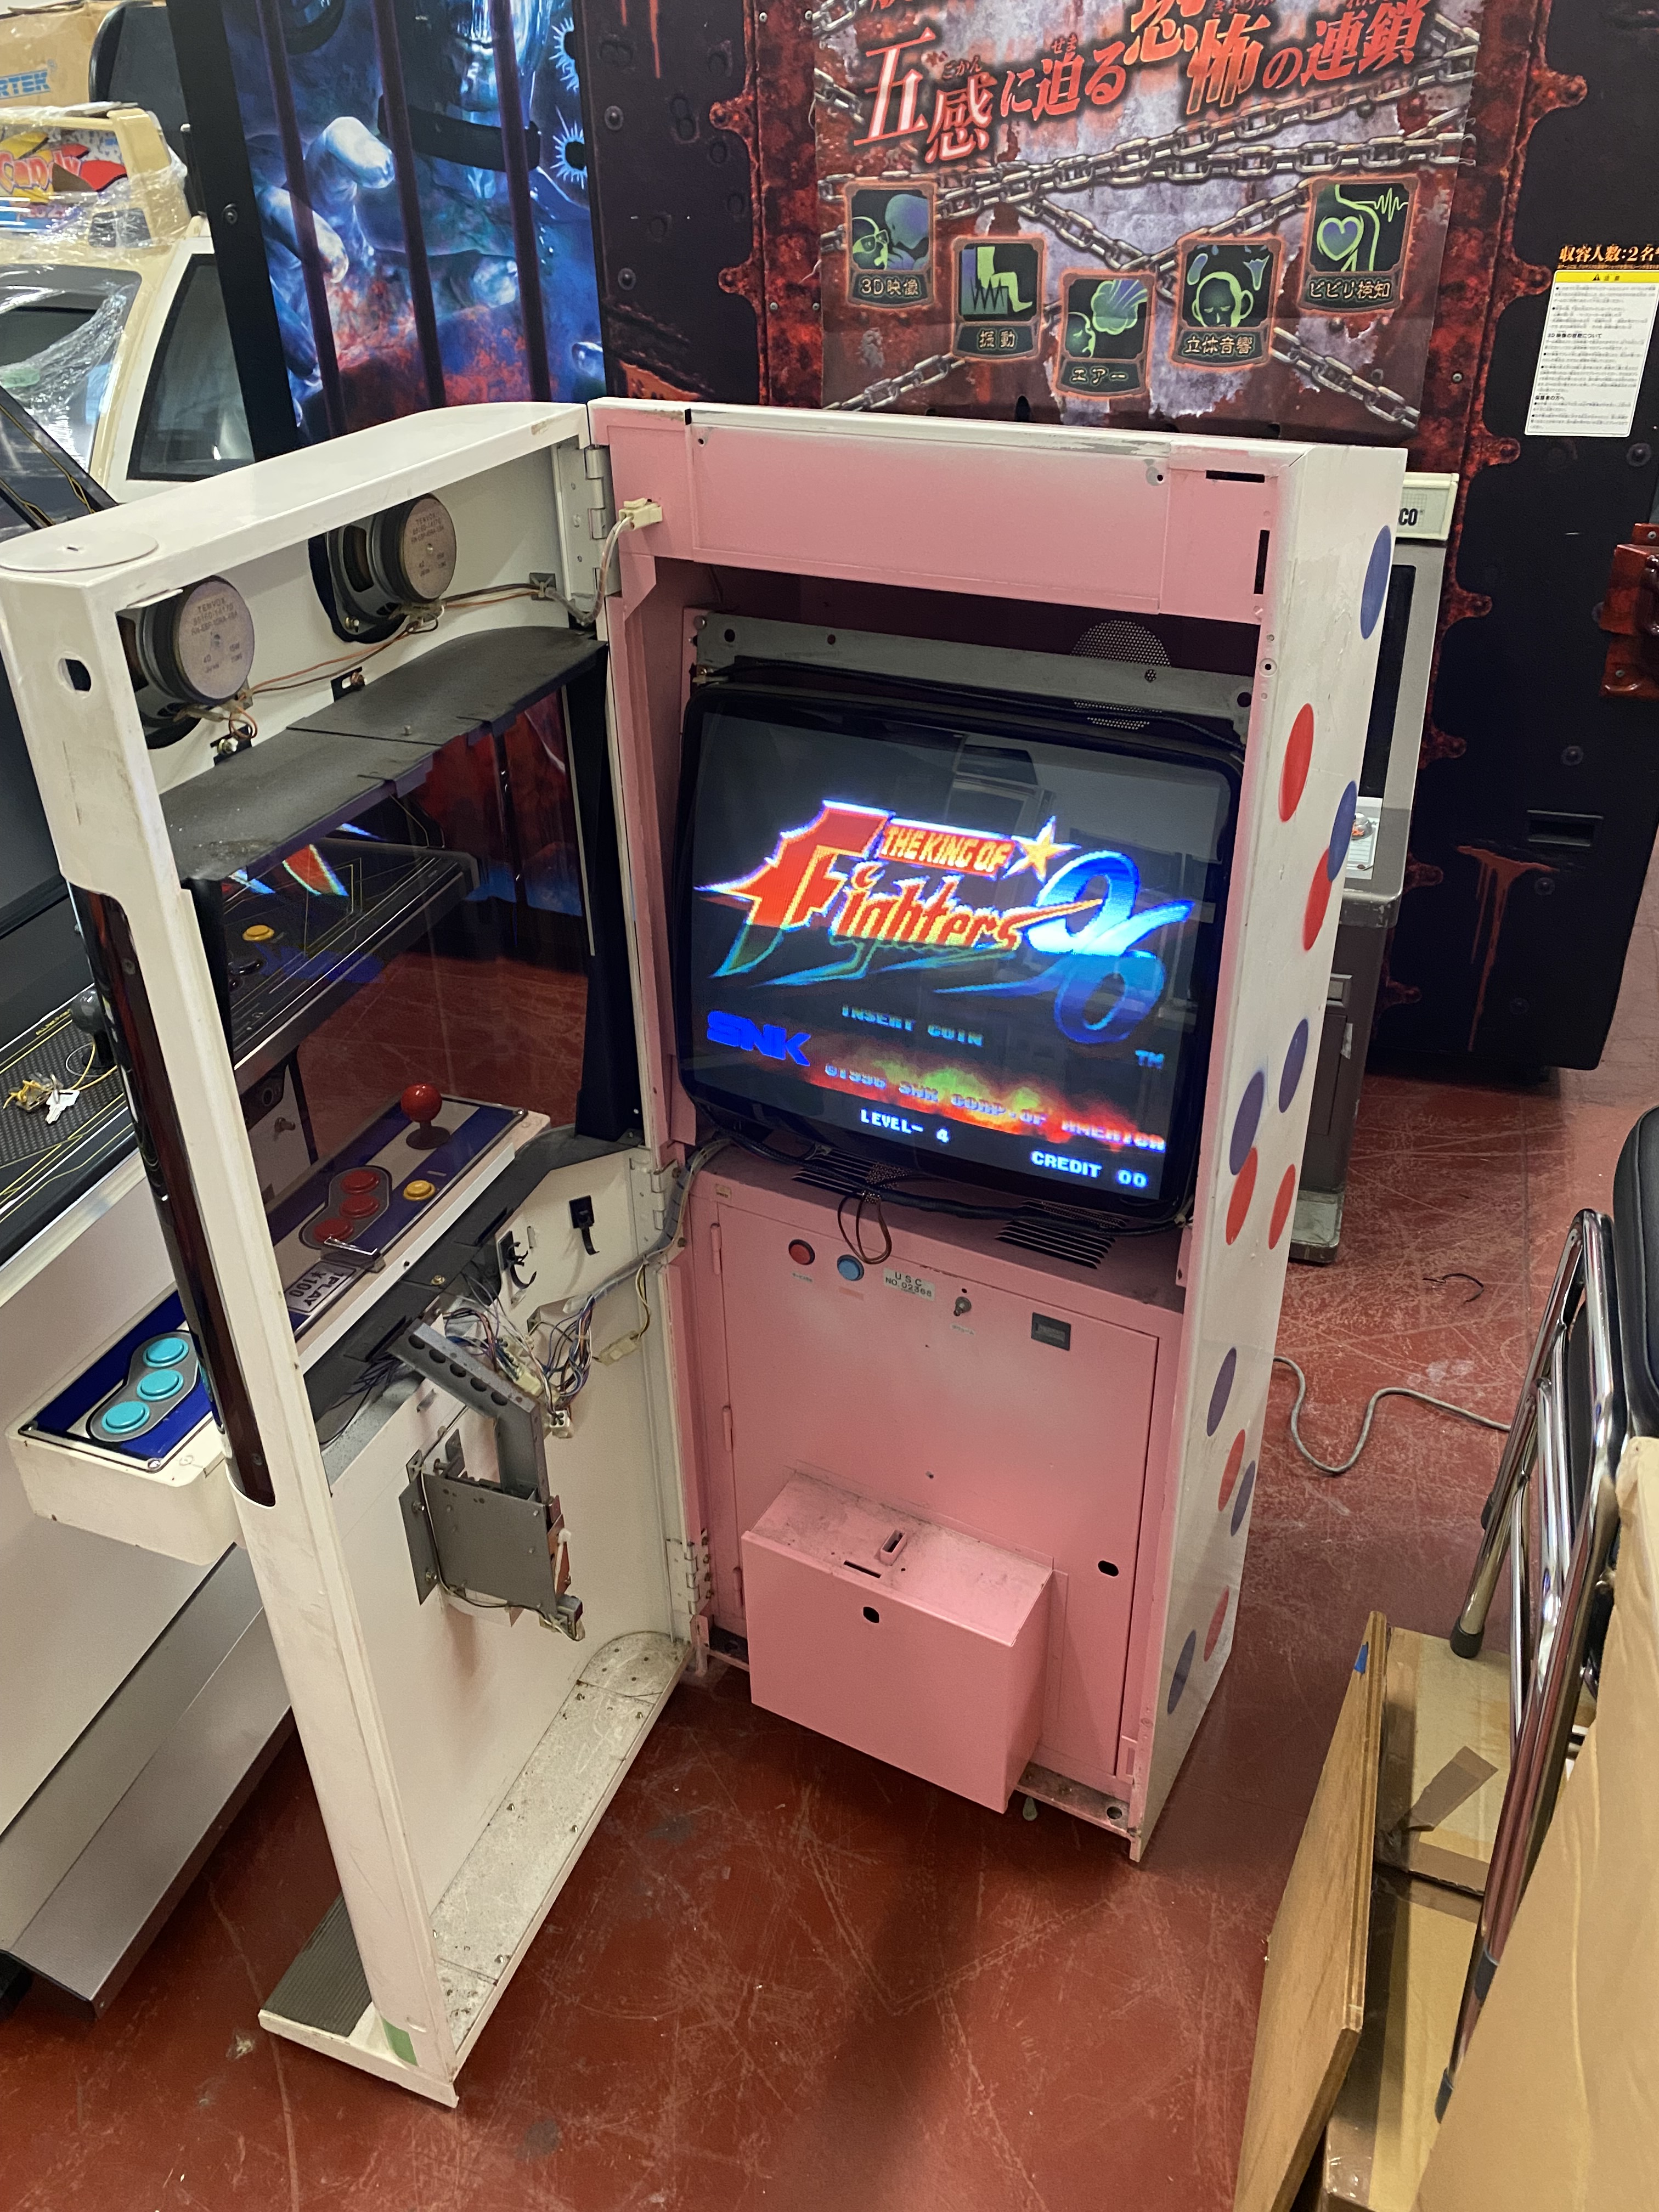
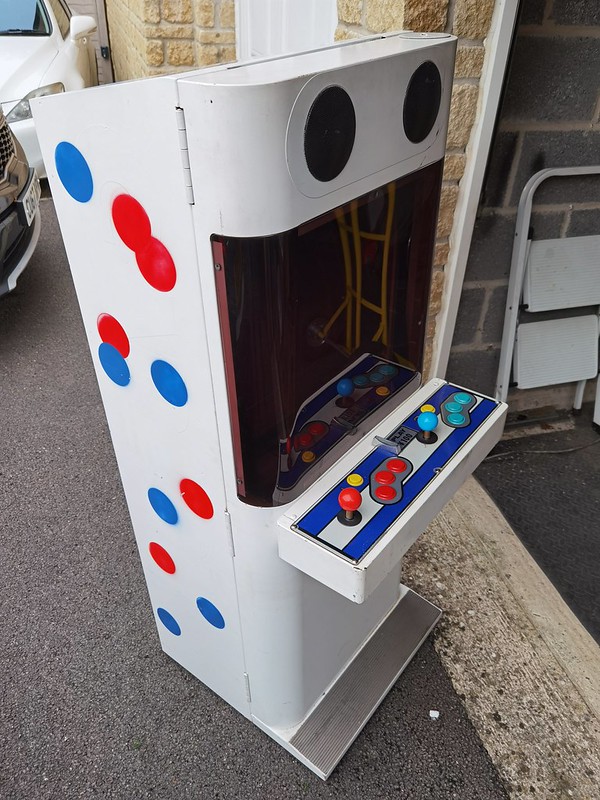
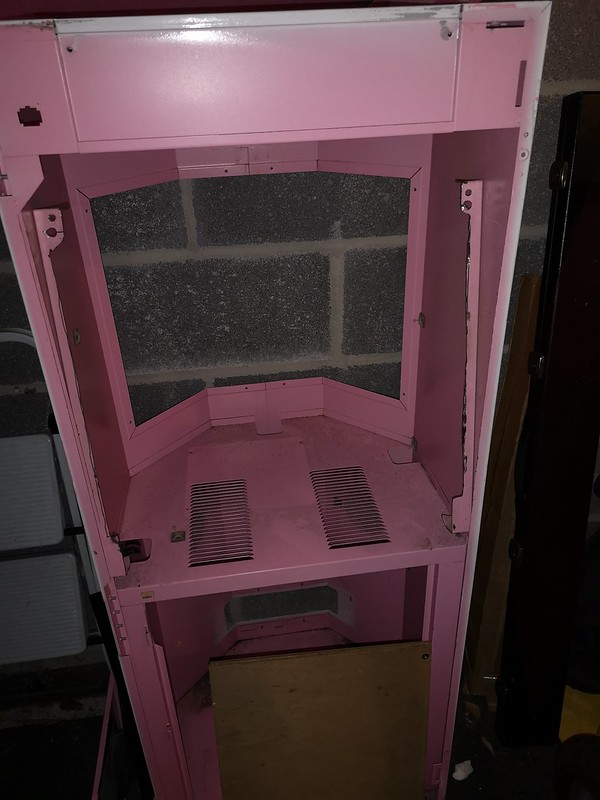
I know. It’s hard to imagine what the thought process was here. In short, someone (probably a Japanese operator), decided to go at the cabinet with a white spray can, and then added the red and blue dots all over the place. The spray job has been done crudely. You can even see the original “Capcom” logo sideart is still visible underneath. They didn’t even bother removing it first!
Furthermore, that control panel doesn’t look right at all. Despite initial appearances, this is a bit of a disaster. I mean it works, and if you didn’t know better, you might not think anything was amiss…

The good news is the cabinet was otherwise complete. All the original looms were there (it runs standard Jamma boards), and most, if not all of the difficult to replace hardware was intact, and everything works.

So what’s a collector to do? This is a very rare cab, but the amount of work required to get it back into shape is massive, and none of it would be particularly easy to do. But someone had to save this poor thing and restore it back to its former glory, and I figured that person should be me. So after agreeing a price with the seller, the cabinet shipped and arrived at Arcade Blogger Towers a few weeks later, and I was able to delve a little deeper into what I had shelled out for!

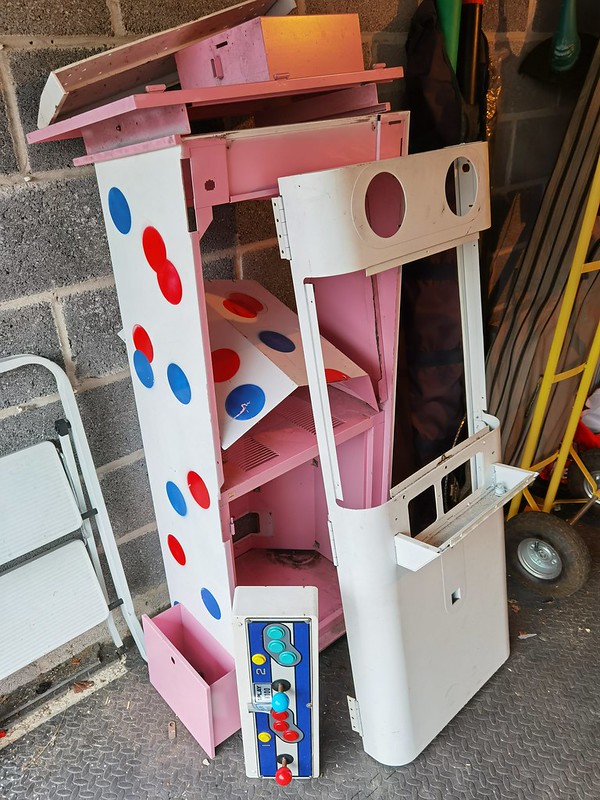
The task ahead is huge – there is a TON of work to be done here to put things right. With so much to figure out, I just dove straight in and started dismantling everything. As always, the thing to do with a cabinet that requires so much work is to break it down to individual tasks. In this case I figured that the the first job has to be getting this dreadful paint job stripped back and repainted.


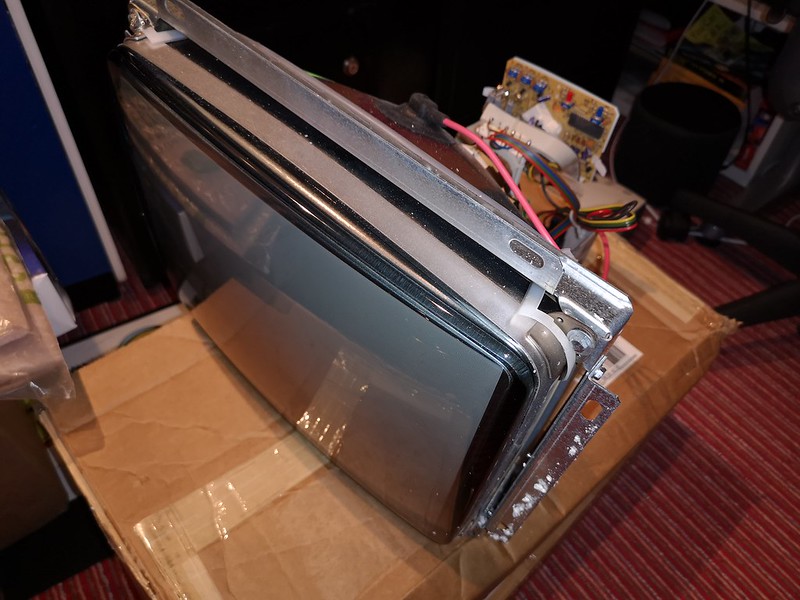
The screen burn doesn’t bother me too much, as it is pretty much invisible behind the large smoked Perspex that sits in front of it. What is concerning, is the realisation that this is not the correct monitor. Mini Cutes notoriously use a 18″ screen – a size that was very uncommon not only back when this cabinet was built, but even more so now. Sourcing a replacement is going to be impossible… Anyway:

Let’s take another look at that control panel:
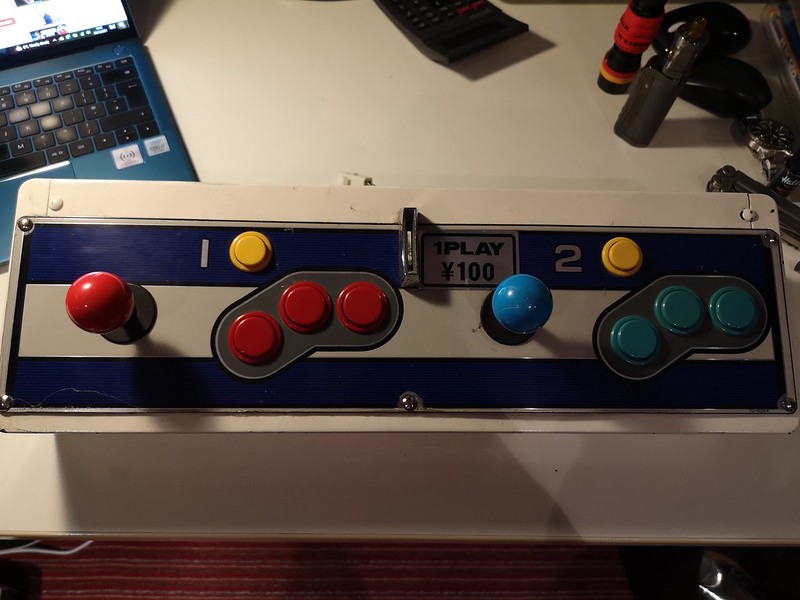
What happened to the original correct panel is anyone’s guess. I can only assume that it was stolen or damaged beyond repair. The arcade operator presumably had the Aero City panel lying around and decided to bolt it on there….yeesh.

Quite where a replacement panel is going to come from I have no idea at this point. I’m not adverse to have something bespoke created (maybe even a 1P custom panel?).
But I’ll admit at this point I wondered what I’d taken on and whether I had the stomach (and wallet!) to see it through. But I’m committed and just giving up isn’t an option. So let’s crack on!
I wanted to look again at how exactly the 19″ monitor had been mounted to the cabinet. If the operator was prepared to to hack the controls and respray the whole thing, what had he done to shoehorn a bigger monitor in there, that the Cute wasn’t designed to accommodate?
So I got to work trying to figure out what I was going to do about the monitor. I didn’t have a spare 19″ screen, and the one in there I wasn’t too happy about due to the burn. Plus due to the shoddy work done to fit it, it can’t be rotated (a must-have feature of any candy cabinet, and especially a Mini Cute). As mentioned above, finding the correct replacement 18″ screen would be impossible (not to mention uneconomic). But what I did have was a 17″ NOS Hantarex monitor that I purchased a few years ago and stored away, waiting for a suitable home for it:
Although smaller than the 18″ intended for the cabinet, the diagonal screen measurement isn’t that much different, and I figured this would fit nicely in such a small factor cabinet. And I can finally put it to good use! If I’m putting the effort into restoring this Mini Cute back to its former self, why not treat it to a new monitor?
But the big question is how am I going to hang the thing inside the cabinet securely?


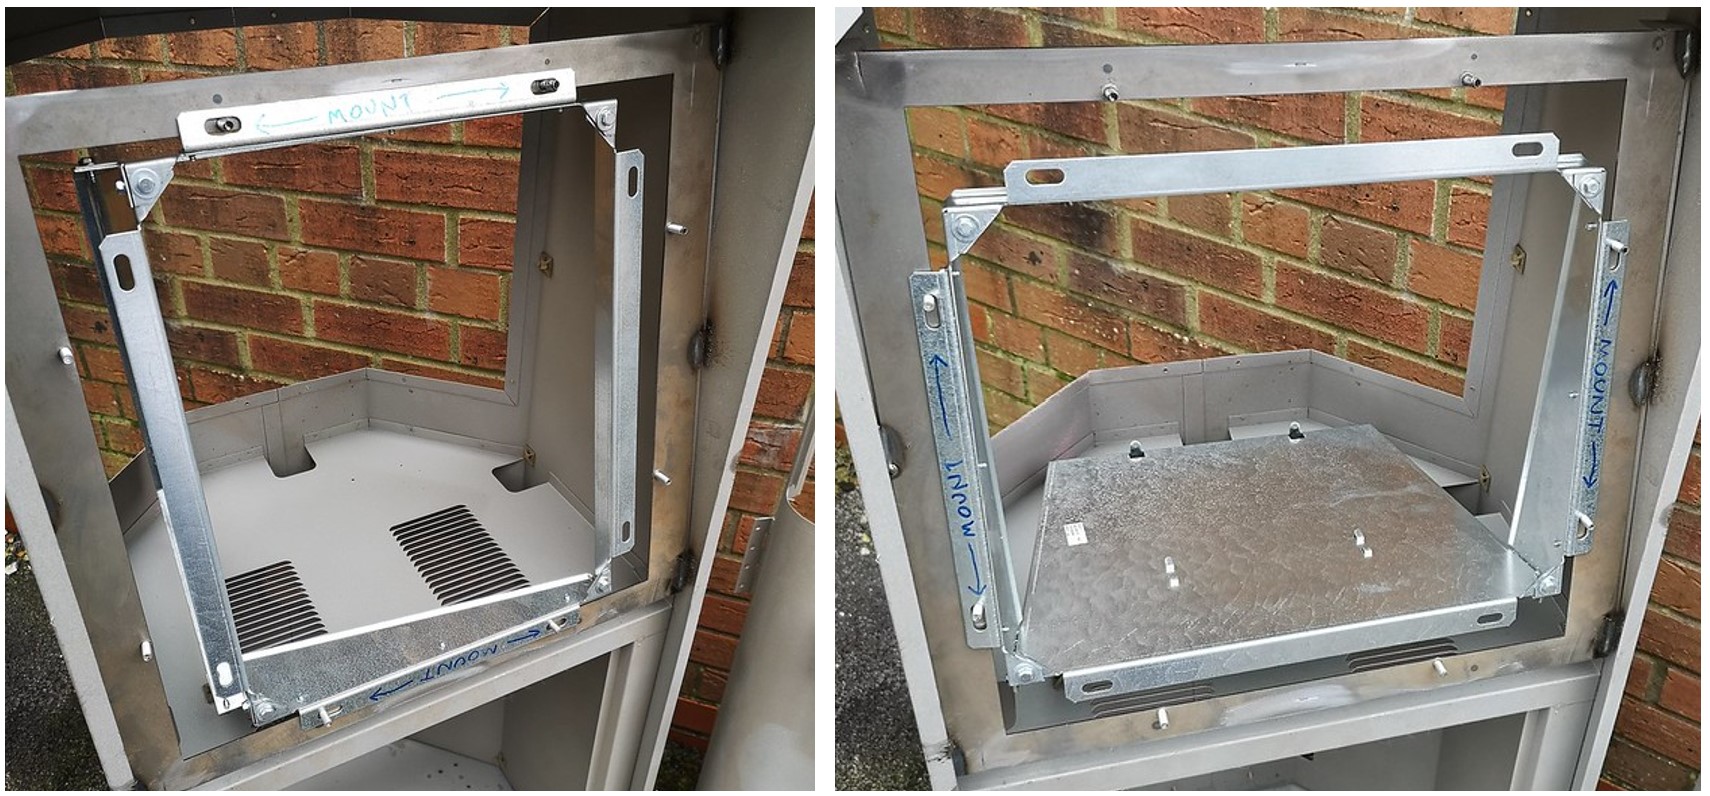
So armed with my monitor plans and cabinet parts, I was able to approach a local company specialising in metalwork and shot-blasting. They were able to do both jobs for me as a favour (and at a great price), and in the process, repair the damaged control panel. A few days later they called to say the work was done and I could pick up:

Let’s take a look at that new monitor mounting bracket. This came out better than I expected:

That new square mounting plate bracket will allow me to quickly rotate the monitor to play vertical shooters and horizontal scrolling games all in the same cabinet. All I have to do is unscrew four bolts, turn the monitor, rehang the new 17″ monitor onto the other set of opposite screws, and reattach the bolts. Here’s the test:
So the next step is going to be paint. Of the three options available, I’ve decided to go with the blue/turquoise colour. I guess we could debate this – the original colour was pink, and there’s an argument to keep it that way. But given everything has been stripped and needs completely respraying (and properly this time!), I might as well go for a colour I want. The correct matched RAL paint codes can be found online with a bit of hunting around, so matching up paint colours to the originals shouldn’t be a problem. I’ve found a local guy who has agreed to do the work, and respray the main body of the cabinet for me. The white front door I’ve decided to powder coat, to give a more robust finish.
So that’s where we’ve got to. To summarise:
The bad news:
- There’s a long way to go!
- I’ve not sourced a control panel (if you’re reading this and you’ve got a spare – please get in touch!)
The good news:
- The work has started
- The godawful paint job is no more!
- The cabinet is at the paint shop, paint colours have been matched
- Reproduction artwork is available (I’ll be using the guys over at Arcade Art Shop for this)
- I have a NOS monitor to drop in, and I’ve figured out a neat solution to mount it
- Let’s be positive; it’s a Capcom Mini Cute!
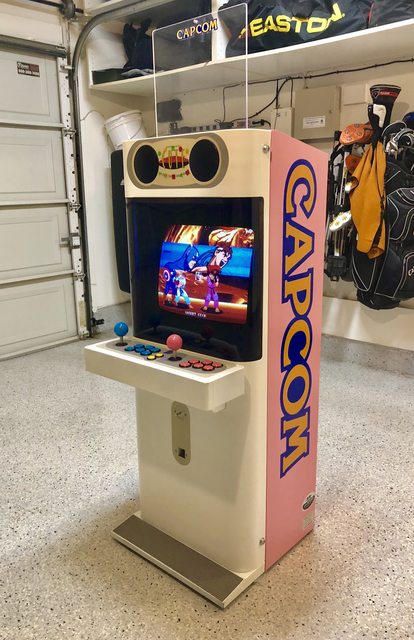
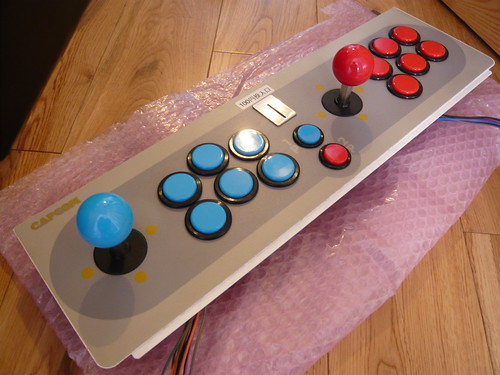
So the aim is to get this Frankenstein Cute to ultimately look like this:

So thanks for reading this far. Stay tuned for more updates in the coming weeks. We’ll soon be playing some great games on this gorgeous classic Candy arcade cabinet.
See you next time.
Tony


Congratulations Tony on your find! A lot of work you have already done to begin restoration of it. Obviously much more to go. I wish you all the Best and Good Luck with it!
Mike B
Michigan USA
Posted by a collector of:
ATARI, INC.
A Warner Communications Company
LikeLiked by 1 person
Looking forward to the process and result.
LikeLiked by 1 person
Yay! Another restoration thread/project. I have to be honest, I’m not a fan of the Cute, but each to their very own. This statement from a guy currently restoring a Dino-King and turning it into a dedicated Dino-Defender…. [blush]….
Looking forward to seeing how you get on. You may even change my mind……
LikeLiked by 1 person
Do you ever record videos of your restoration process? It could be quite relaxing and therapeutic to watch a video of a beat up machine being turned into your beautiful final restorations. Watching something old become new again is such a fulfilling thing. Thanks as always for posting these!
LikeLiked by 1 person
I’m one of those people who daydreams about getting a mini-cute in my home. I’m new to the restoration scene – curious why you only want to get the door powder coated and not the whole thing?
LikeLiked by 1 person
Hey Brock. The door is being powder coated, the cabinet is being sprayed. I’m spraying the cabinet as its the most cost effectively way to match the correct paint colour. (The powder coaters can’t achieve a close match without having to order in new paint in bulk, which I’d have to pay for).
LikeLike
Looking good so far! Reminds me of when I used to rebuild motorcycles in my late teens and early 20s, I always had the frames blasted and power coated.
LikeLike
Olá estou reproduzindo mini cute aqui no Brasil se eu puder lhe ajudar de alguma forma
LikeLike