So as you will have read in Part 1, the initial signs were positive for this Tempest cab. On the surface of it, it seemed like a pretty straight forward job to get the old girl up and running again. I got round to looking at the monitor. An quick visual check around the monitor chassis board found some burnt out parts in the Low Voltage section. A Google search and an hour’s reading later, I established that this was a common fault with the WG6100 colour vector monitor used by Atari. Check out the burnt out parts!
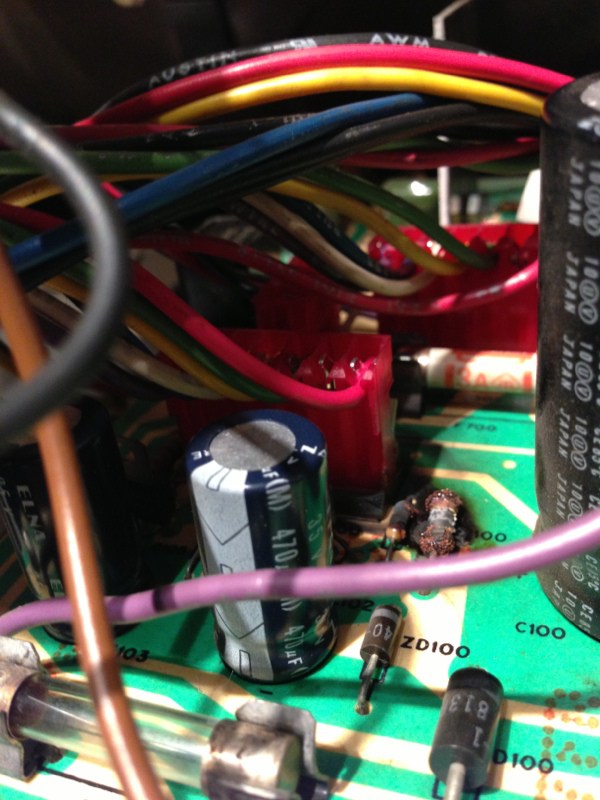
It seems this area was badly designed by the engineers, and it gets really hot – eventually the parts give up and literally catch fire. Not good. The great thing about the arcade community is that people much cleverer than me, do come up with workable solutions for common problems like this, using modern, more reliable parts. The guys over at Vector Repair, had done exactly that, for this very problem. Ladies and gentlemen, I give you the LV2000. This tiny PCB board is a direct replacement for the parts in that area of the monitor chassis, and supposedly doesn’t overheat like the original parts from back in the day. I ordered one from the Vector Repair website (thanks guys), and got it shipped over here to the UK. So a bit of de-soldering to remove the old parts was required, and the LV2000 was placed and re-soldered to the board, like so:

You can still see the scorch marks on the PCB, but thankfully during the mini fire that would have occurred when the original parts blew, the traces weren’t damaged. Once installed and checked over, I expected to be able to plug in and start playing some Tempest. As always with this hobby, that was not the case. Here’s what I got:
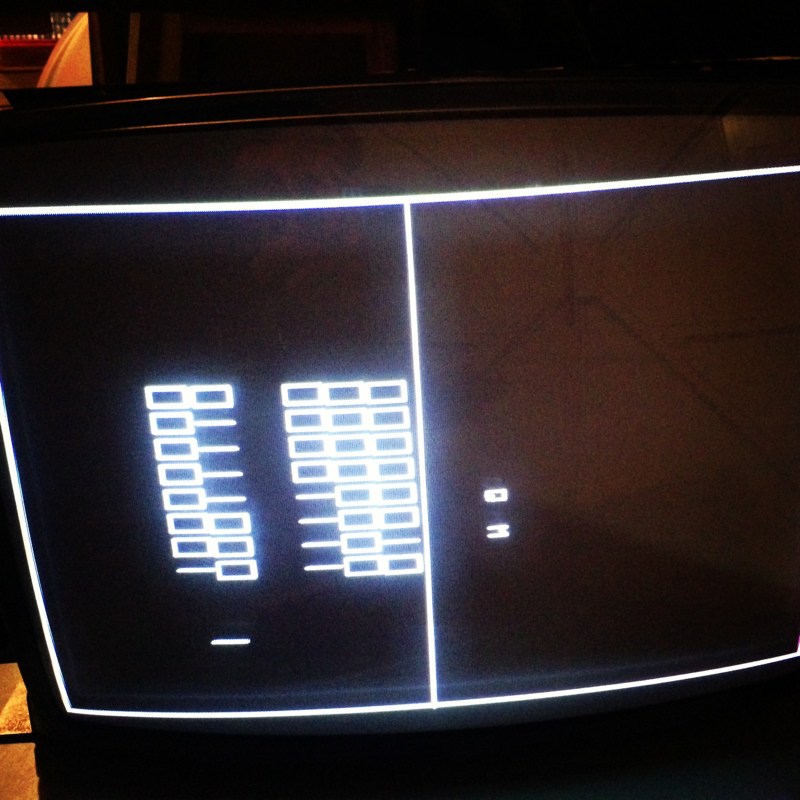
The good news was the monitor was now working! The bad news is the main Tempest game PCB was now reporting Math Box and Audio errors. Bummer. The board had picked up these faults since I owned it, as it was playing blind when I originally picked it up. As I’ve said many times in these arcade repair blogs – ASSUME NOTHING!
I checked out all voltages and everything was fine from what I could see. So I managed to track down a new board in the US at a good price, but the guy wouldn’t ship to the UK, so after a bit of persuasion, he agreed to ship to a buddy of mine in Philadelphia. My buddy duly sent it onto me. It arrived without customs issues, just five days later.

I had my fingers crossed that we now had a working Tempest board set!
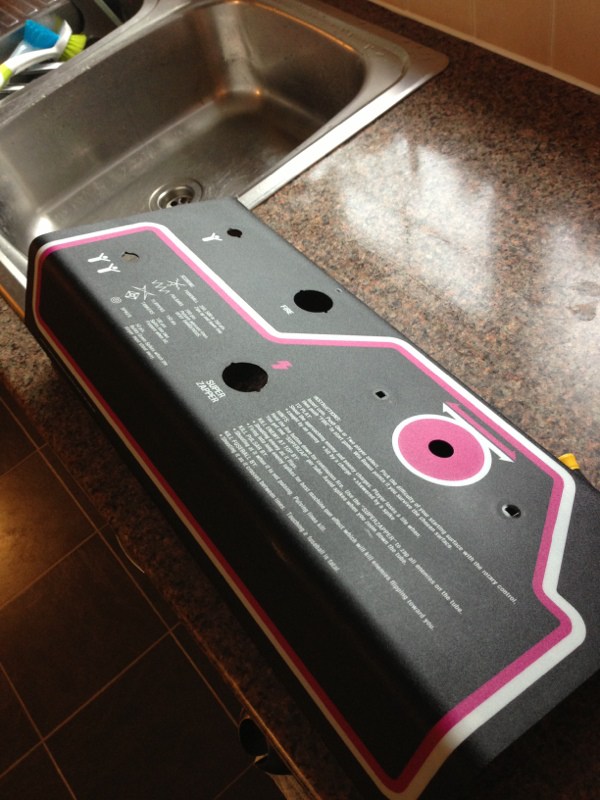
Onto hardware matters. The first thing to get cleaned up was the control panel. Tempest control panels (CPO) are lovely old pieces of kit. They house a two fire buttons and a spinner, which moves the claw around the rim of the gameplay area on screen. The CPO on this machine was in good shape, but it was dirty:

It’s got 30 years of gamer grime on it, and the spinner is grinding with the traditional Tempest “Buuurrrrrrrr!” that happens over time as it wears out, and the buttons are a bit sticky. Someone has spilt cola in there or something.
So let’s strip it down:

Wash the loom!

Boiling hot water, washing detergent, and an old toothbrush seemed the best method to scrub the grime off. Notice the immediate difference in the white line under the soap in this picture to what it looks like above – this thing hadn’t been cleaned up in 30 years.

Two rounds of gentle scrubbing, and a rinse in the sink:

And here’s a top tip – a thin coat of baby oil works wonders to shine the finished product up. Here’s what I ended up with:
Looking much better. The dirt lifted off really nicely and this looks like new again. Nice to be able to keep it all original too. There’s a tiny cigarette burn above the fire button, and a small bit of wear on the corner under the spinner but it’s barely noticeable. The vinyl overlay is pretty tough and water resistant, so washing it hasn’t been a problem.
Both fire buttons and the spinner have been dismantled and scrubbed in hot soapy water where possible. There was some gnarly gunk and human hair (bleh) caught up inside in the spinner mechanism. More on that later.
So everything was left to dry out in the airing cupboard ready for reassembly. Part 3 is incoming!
Tony


Wow you just fumble over arcade cabinets like mana from heaven XD I’ll have to ask you about your connections and how you so easily and cheaply find and keep these cabinets!
LikeLike