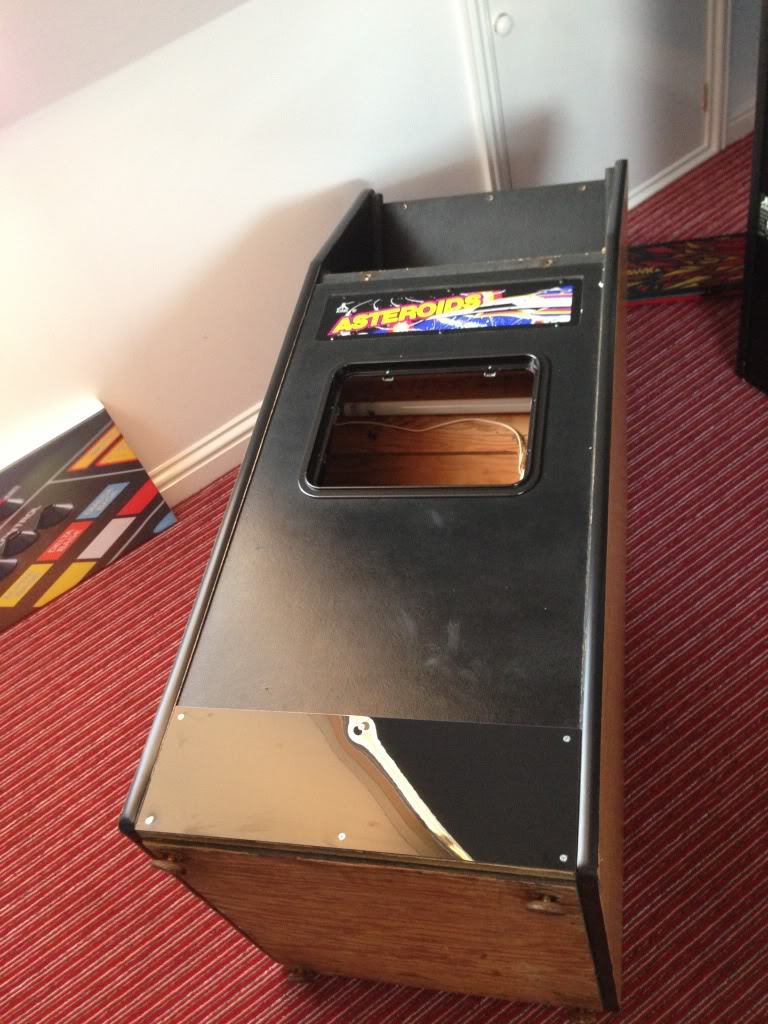
Part 2 saw the cab get to a point where it was looking good for the most part. The bulk of the work was done, now it was time to start putting the parts that had been removed back into the empty shell of the now restored cabinet.
If you’ve been following this blog, this will be a familiar picture – scrubbing the control panel clean in the kitchen sink. Let’s take a moment dear reader…. These cabs in most cases, haven’t been washed in over 30 years. That’s 30 years worth of sweaty, gamer grime, sweat, blood and tears (and Lord knows what else) that’s gone down into the buttons, and perma-engrained into the control panels. Not a nice thought if you think about it too much. Some of this restoration stuff might seem extreme to the casual observer, but purely from a hygienic point of view – these things are going in my house!
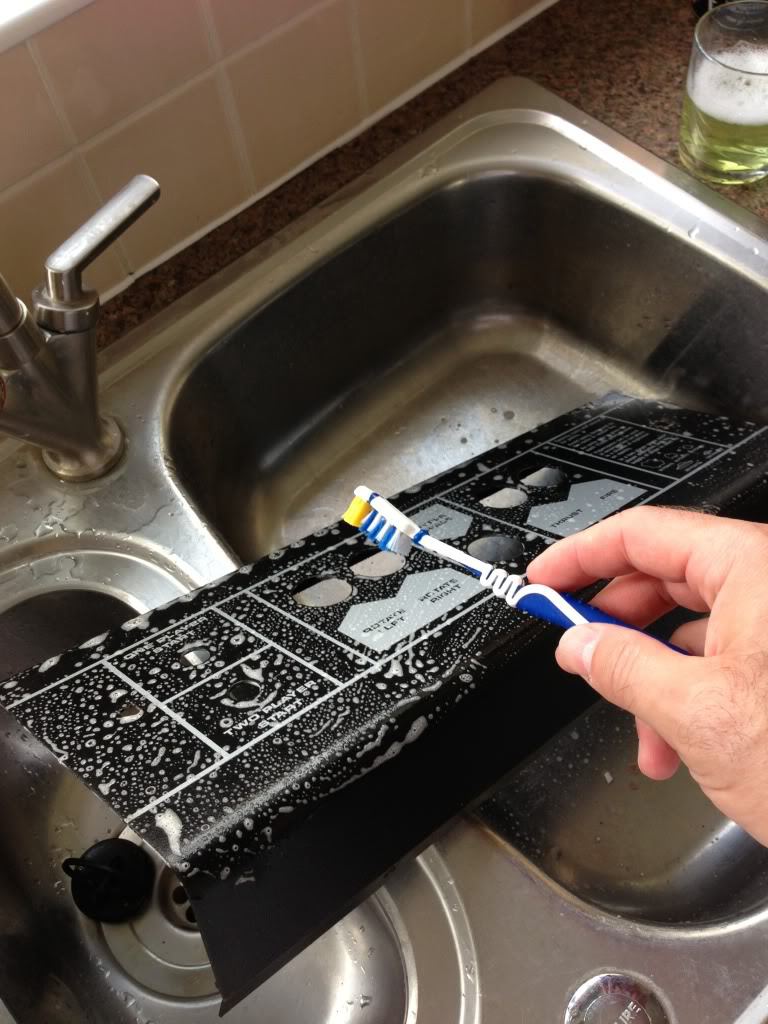
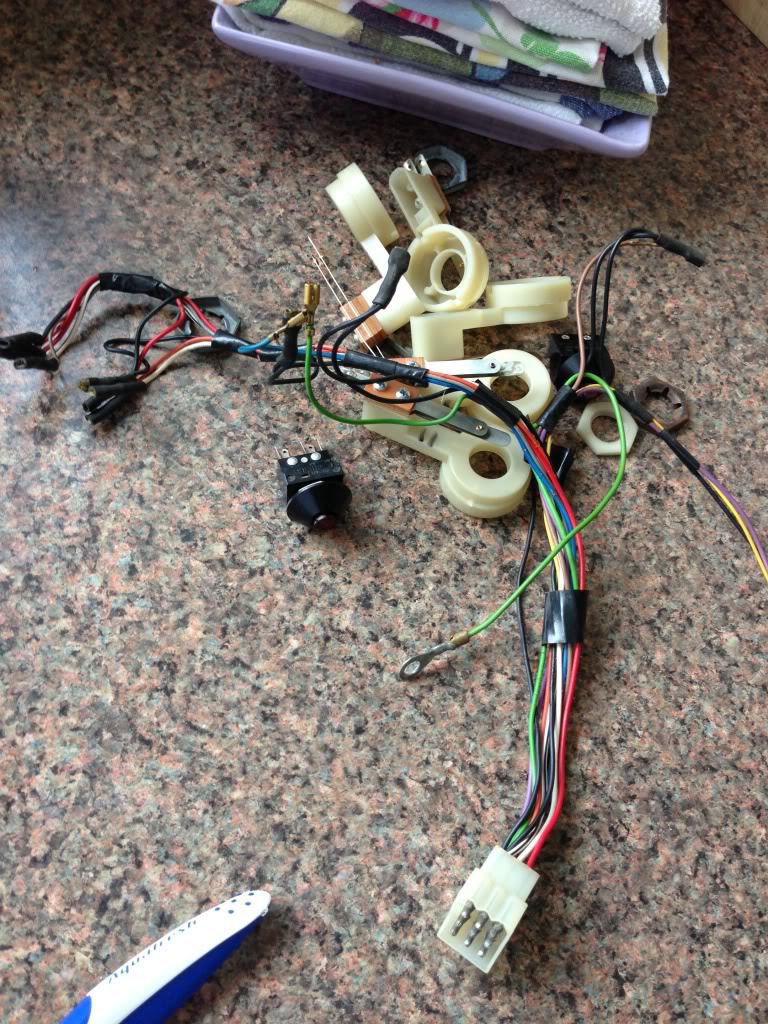
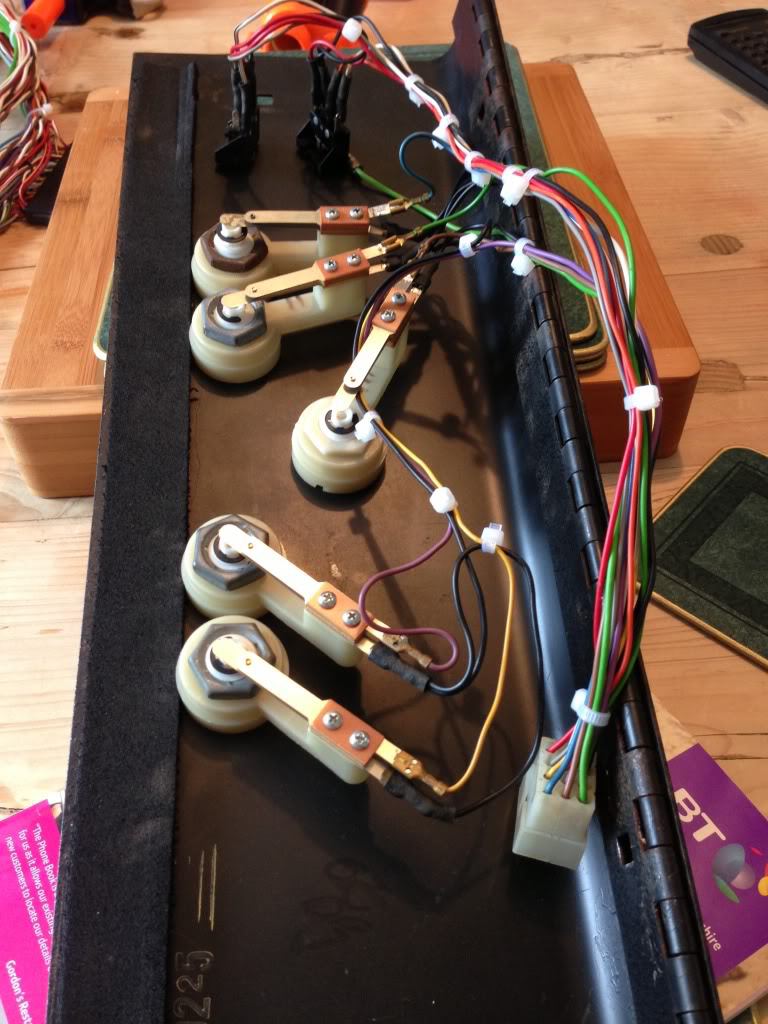
And of course the hardware removed would need scrubbing up and cleaning. Again, that black electrical tape had been used on the control panel loom. All this would be removed, soaked, and replaced with proper cable ties:
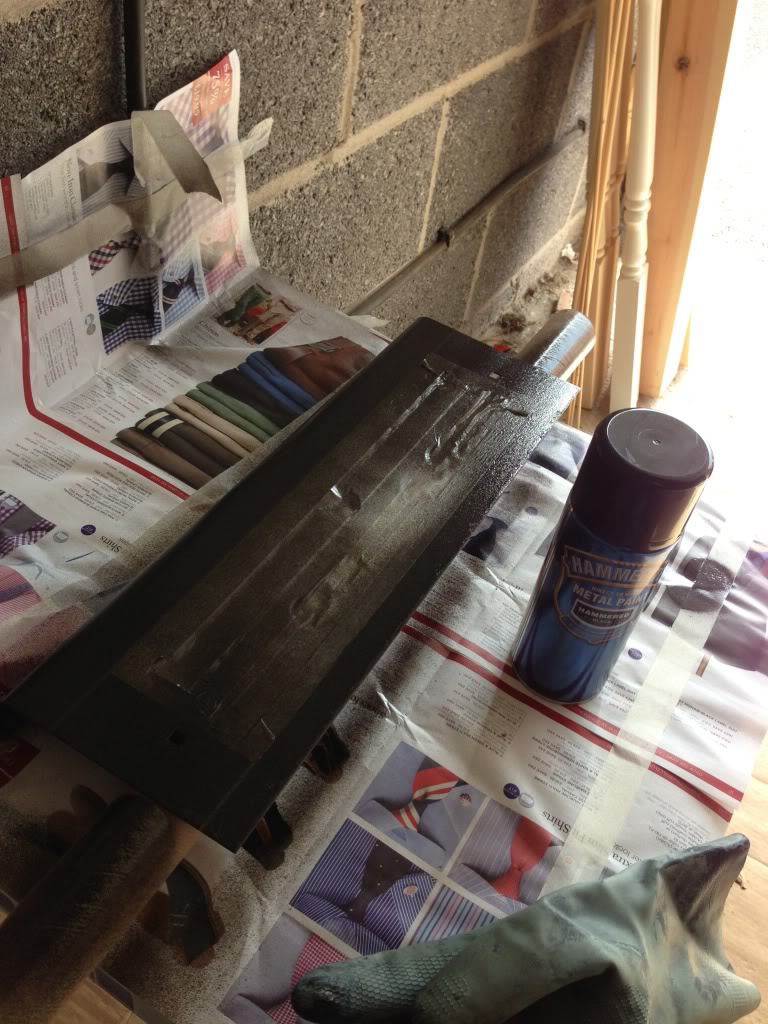
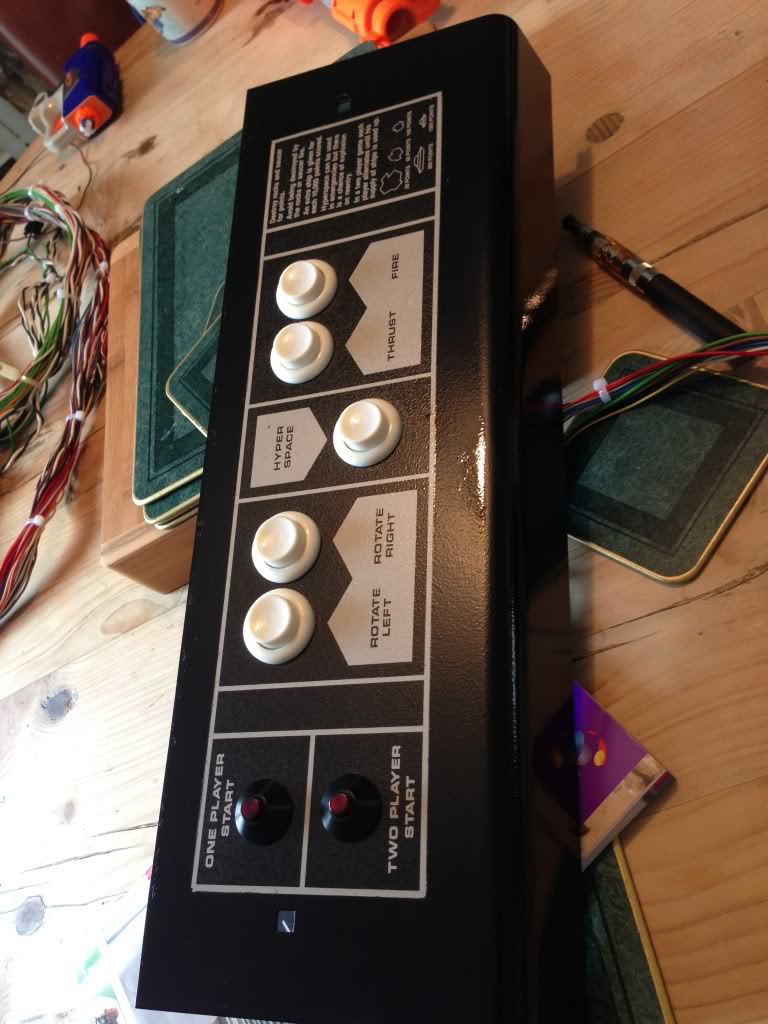
I don’t have a picture of the control panel before, but when I dried it out and looked closely, I noticed the start of rust spots and bubbling of the paint around the edges of the control panel – this was nothing to do with the wash it had just had, this was simply the onset of decay over 30 years. This was a concern, as this was likely to spread – not to mention it looked pretty unsightly. The original panel was silk screened, so it wasn’t just a case of replacing it – as far as I know no one has reproduced these panels, so I had to get creative. After much thought, I decided to respray the outside edge of the panel. So after sanding down the offending areas, I masked off the white graphics, and resprayed the surrounding part with black Hammerite paint.
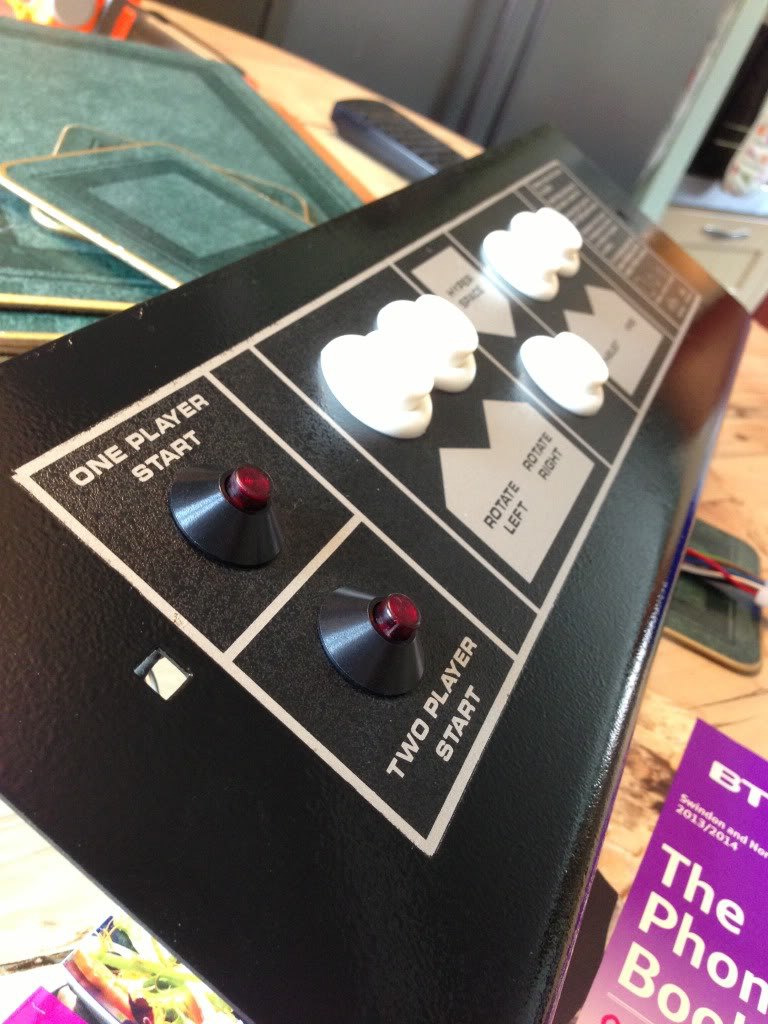
Three coats later, a new set of gleaming white buttons from www.mikesarcade.com and this was the result:
And the underside:
Good as new. really pleased with how that’s come out.
So onto the home straight. Got Mrs TT to help with carrying the cab up the stairs to the arcade room at the top of the house. In a bizarre twist of fate, look what we discovered!
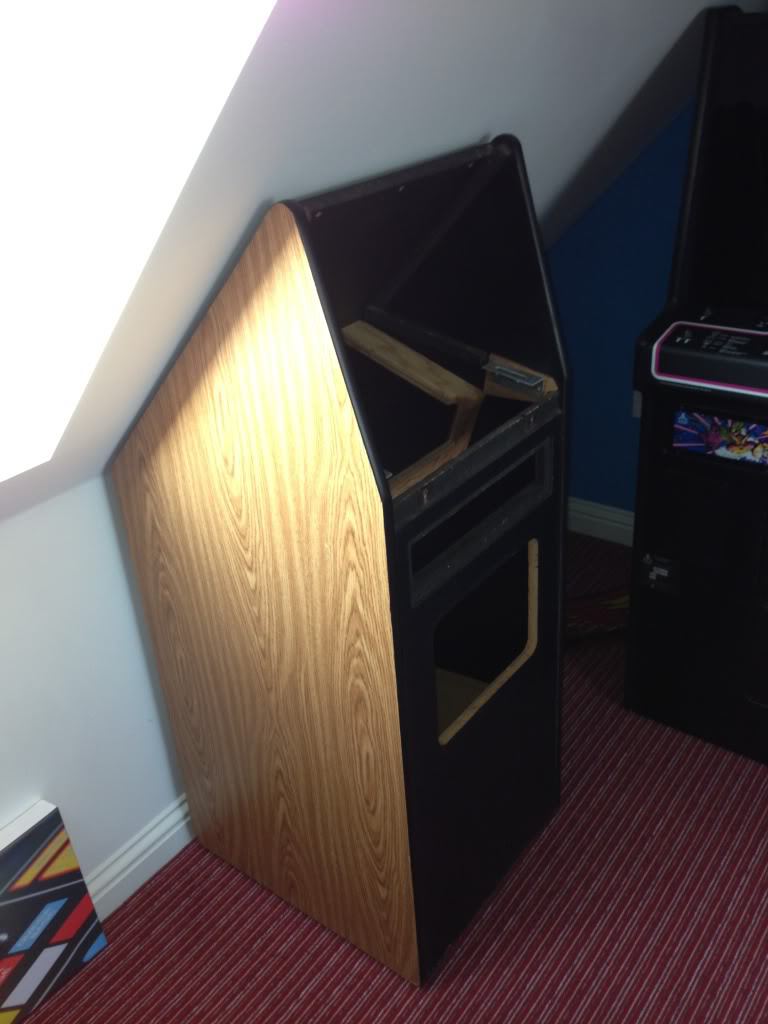
I love it when a plan comes together…
Now I’d love to claim that I specifically asked the builder who did the loft work for us to make sure that the angle of the roof was exactly the same as the angle of the back of an Atari cabaret Asteroids cabinet, but it’s nothing more than a very happy coincidence. It was going to fit perfectly, and not take up too much precious space.
Anyway, with the shell in the arcade, it was down to work to get this thing done.
1. Install black kickplate and coin door surround:
2. Connect the loom back up using new ties, and resecure the speaker, which was replaced at some point and seemed to have been bodged in with string would you believe – I’ve secured it firmly with screws.

3. Install control panel and coin door:
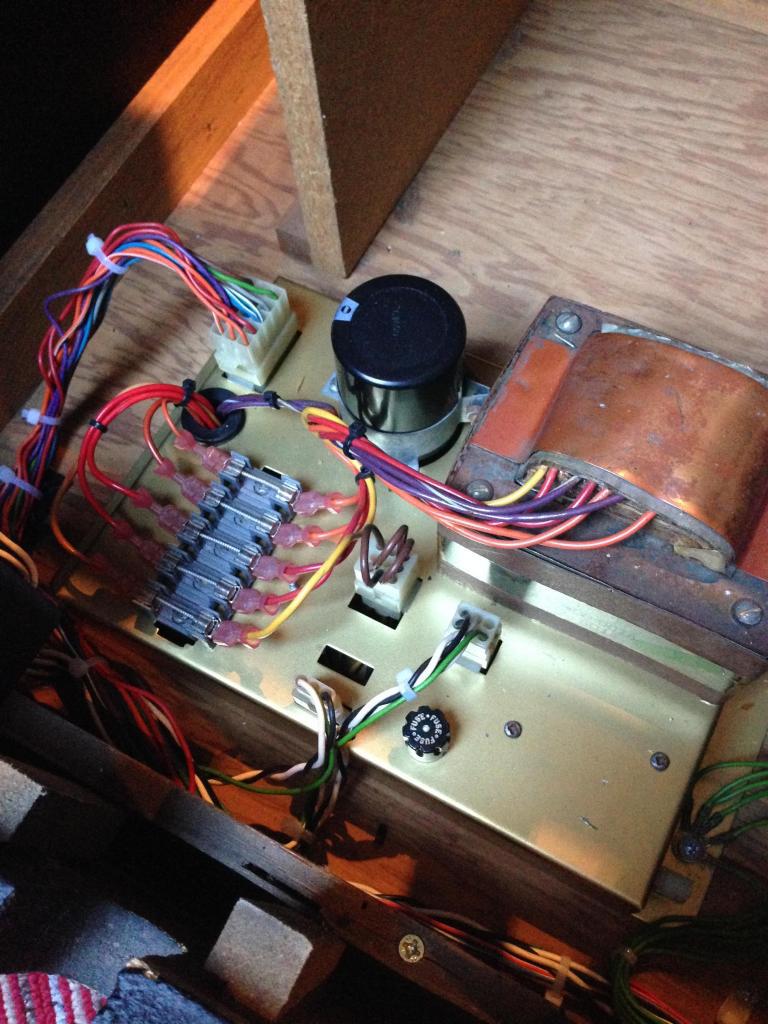
4. Here’s the cleaned up power supply unit back in place at the bottom of the cab:
Then I got to work on cleaning up and fixing the monitor. Whilst it worked, the picture suffered from a slight shake and a certain amount of “blooming” where the picture pulses or breathes in and out slightly. This involved the installation of a new capkit, and a full wash of the whole monitor unit, as it was absolutely filthy. (Sorry the only picture I have of this part of the process is this mash up of the cleaned up components):

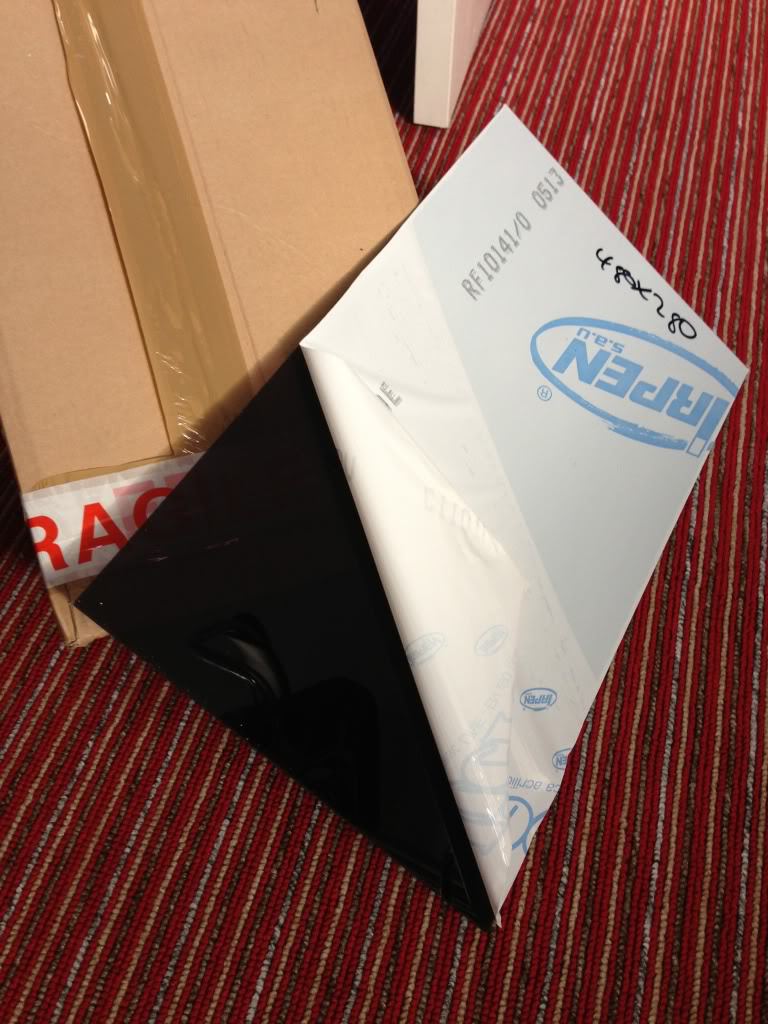
Remember that horrible red plexi screen that was covering the monitor in Part 1? Here’s the replacement correct shade of black smoked plexi ready to go in. It’s pretty inexpensive stuff, cut to size and ordered from a local company:
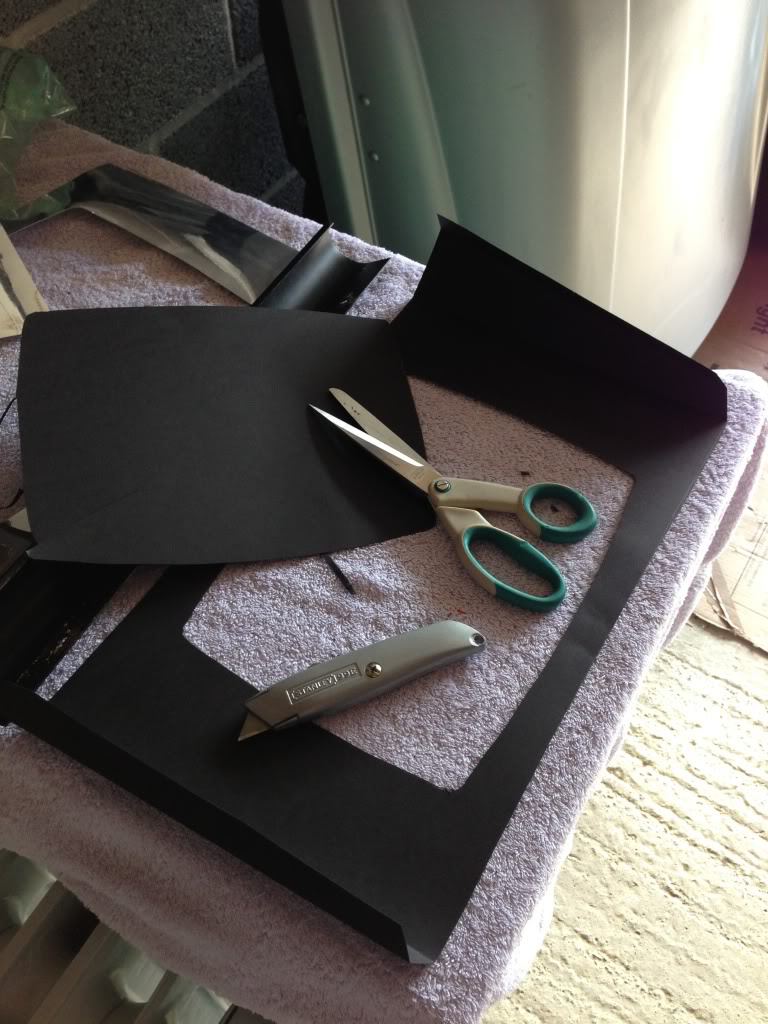
And the last job after dropping the monitor back into the frame, was a new cardboard bezel. Using the old one as a template, simply cut around and score the folds and you’re done:
The main PCU was back from repair, so got that installed. Checked and double checked my work, and we were finally ready for the big switch on:
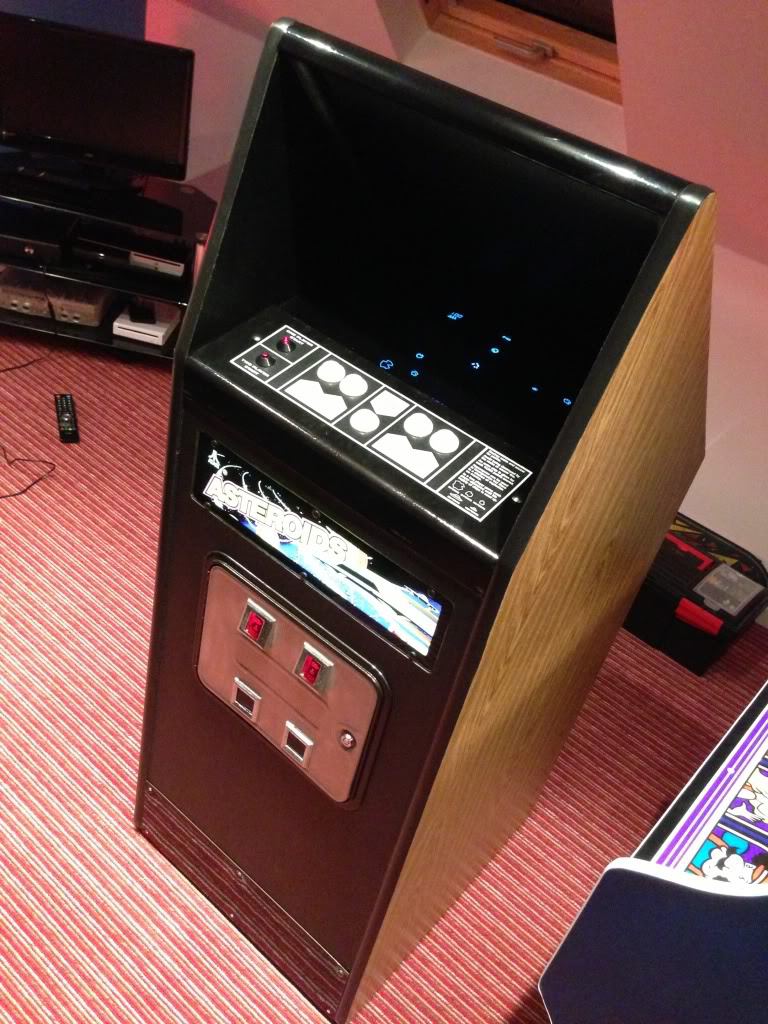
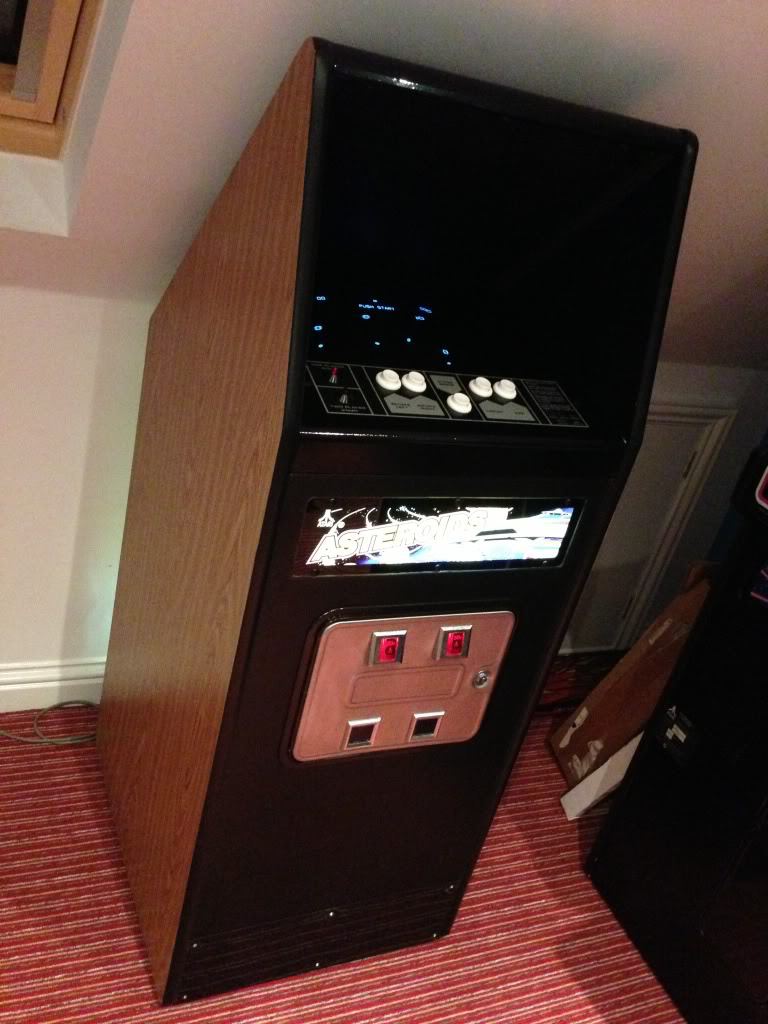
Bingo. Nice sharp clear stable picture and a playable game. After playing around with the cab I realised I had no player 2 button lit up – a quick but of investigation revealed that I’d inadvertently swapped the positions of the wires under the control panel. And easy fix.
Here’s the cab in its new home in the games room next to Centipede and Tempest:
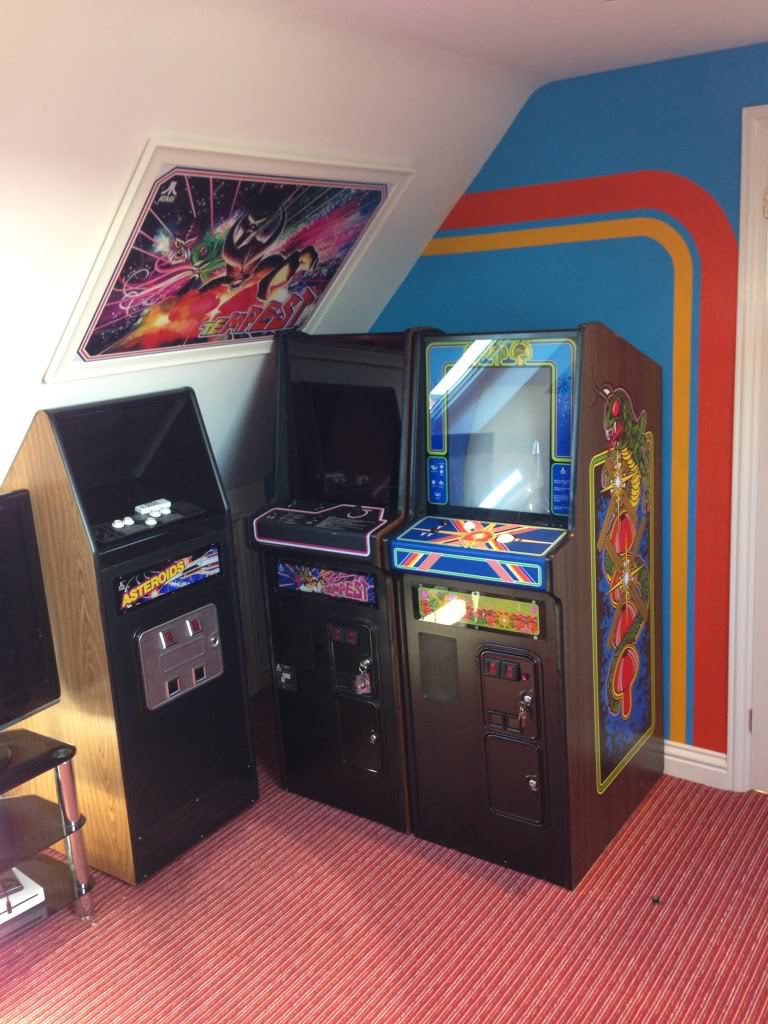
Another successful restoration, and a great addition to the games room. Very pleased with how this one turned out.
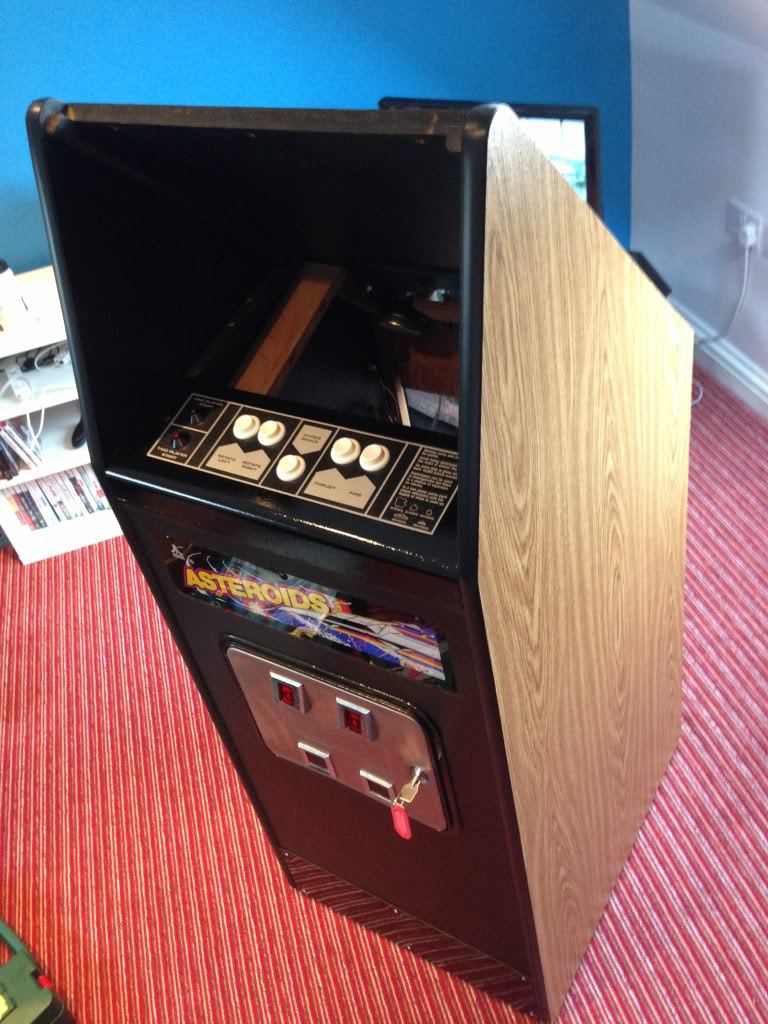
(A footnote here worth mentioning: After a few weeks, I noticed that the DC-Fix vinyl was starting to peel away from the edges of the cab – it can get pretty hot up there in the games room during the summer months, and I suspect this wasn’t helping the adhesive qualities of the product. Thinking about what might be a potential solution – rather than trim the sides off at the edge of the cab, it probably would have been better to fold the vinyl into the t-molding groove around the edge of the cab, and keep it firmly on with the t-molding itself. In the end, a friend helped out, and we fixed the sides permanently with a wood effect laminate and Gorilla glue. It’s now on permanently, is much tougher than vinyl, and isn’t going anywhere!)
Thanks for reading. Do share this restoration using the buttons below!
Tony


Hey Tony,
Great work. I just found an old Asteroids Deluxe upright cab with the monitor and PCB missing that I plan on picking up this weekend.
This will be my first project and your blogs really inspire me to give it a go.
PS the cab was only $100, I think I found a pretty good deal here in Virginia 😉
LikeLiked by 1 person
Sounds like a perfect project John. Good luck with it sir!
LikeLike
Would you be so kind as to share your template for the monitor surround?
LikeLike