Arcade grime. It’s a constant in the hobby. Dealing with 35-year-old equipment comes with many downsides. Aside from questionable reliability, your newly acquired classic arcade cabinet is likely to arrive with the filthy airborne residue from the environment they’ve been located in – smoky arcades, bars, barns, garages and warehouses. It is inevitable that over time a layer of muck is going to build up both inside and out of any arcade game.
You can read some of my arcade restoration posts to see the state that many machines end up in. At some point you have to make a decision on how to clean these things up. I should point out that there are collectors who don’t clean their PCBs. The mantra of “if it ain’t broke, don’t fix it” is a valid one, but to those of us of a more OCD nature, it is something that has to be addressed.
Now the sensible route would be to use products that are designed for that purpose – a vacuum cleaner with brush heads, alcohol, dry sponges, Q-Tips and magic erasers are all valid ways to clean up a PCB covered in dust and grime. Personally, I don’t have the patience to sit for hours to clean up intricate parts using a Q-Tip and alcohol, and when I have gone down that route, I’ve never ended up with results that I’m completely happy with.
But there is a quicker way: soap and water!
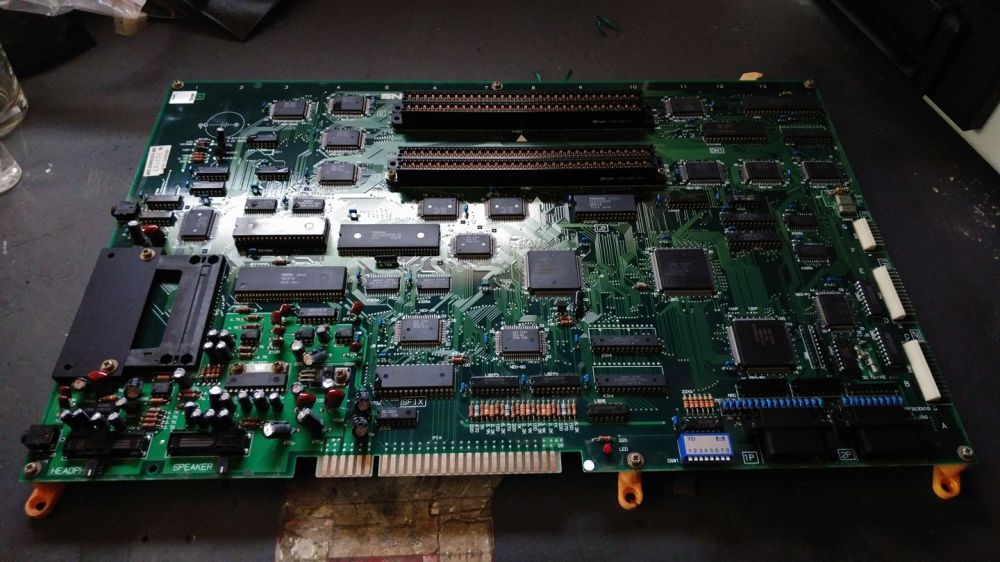
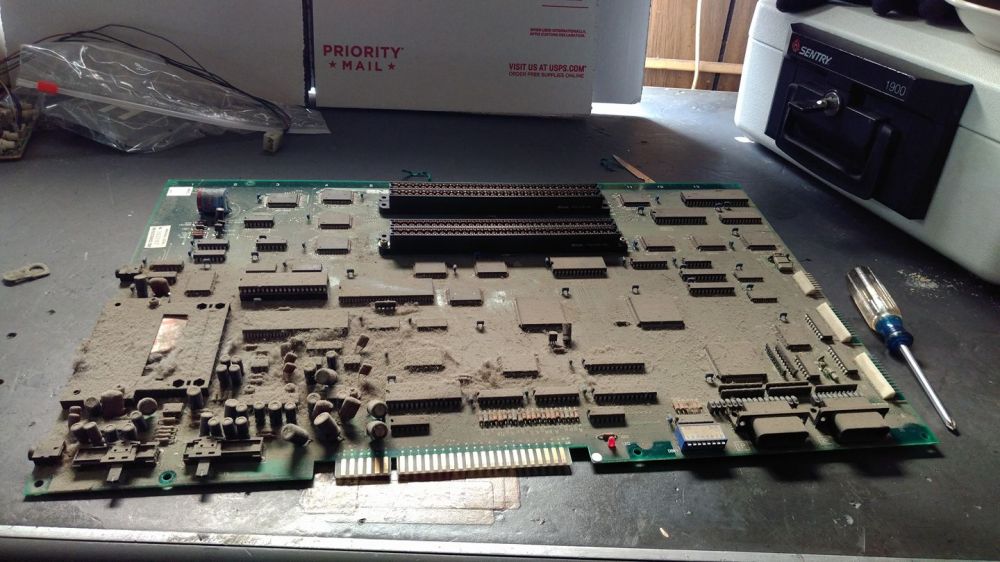
Thanks to collector James Brooks for the two pictures above by the way. That’s the same arcade PCB after a good wash. The difference is like night and day.
Now I appreciate to some people this is an incredulous suggestion. Getting a PCB and electrical parts wet? How on earth does that make any sense? And there are plenty of perfectly valid reasons why this method should be avoided – on paper at least. Soap, according to Wikipedia is a “salt of fatty acid”. Logic tells us that salt is corrosive and PCBs contain many metal parts. Any residue left on the board could lead to future problems.
There’s no doubt that the community is divided on this issue. All I can say is I’ve done this many times and have gained excellent results without any resultant problems.
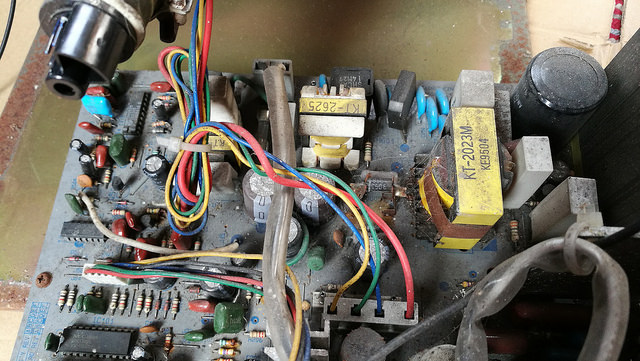
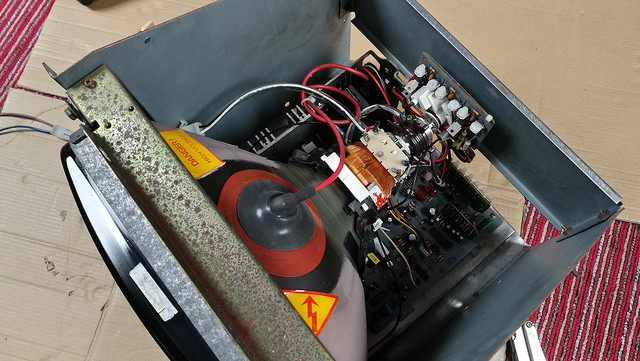
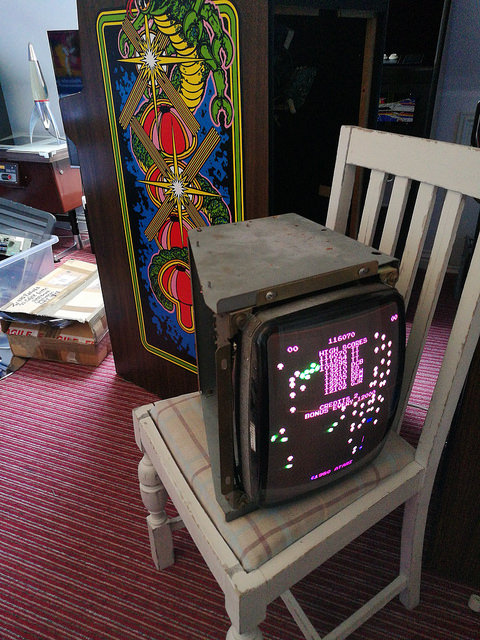
So this week, I thought I’d document a recent clean up I undertook of a little 14″ Kortek arcade monitor that I picked up a few weeks back. It was pulled out of a greenhouse, having been stored there for four years. Amazingly it worked, but it was filthy. So let’s get started:
Here’s our monitor. As you can see, it’s pitted with oxidation and rust on the frame. First job is to discharge it with a HV probe to make it safe to work on:

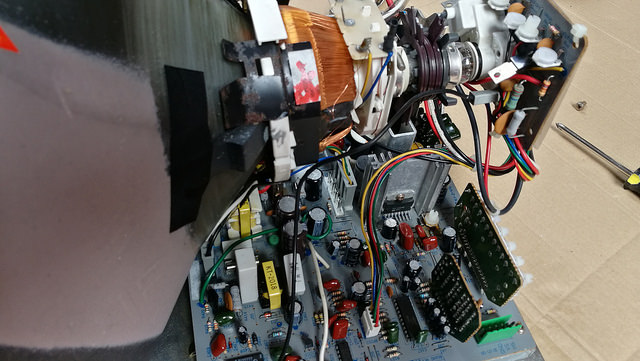
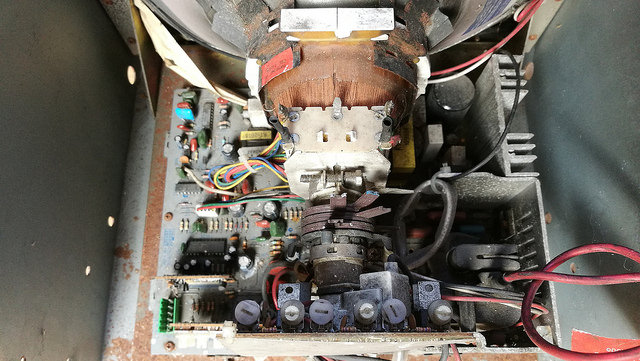
Then dismantle everything:

That PCB is not pretty at all:
So let’s go to the bathroom and commandeer the bath tub (quickly, before the lady of the house notices):

First job is spray everything with a solution of warm water and washing up liquid, then agitate everything with a soft paint brush. Make sure you work the suds into every nook and cranny of the board:


Leave for 15 minutes, then rinse thoroughly with the shower head:

How’s this for clean?
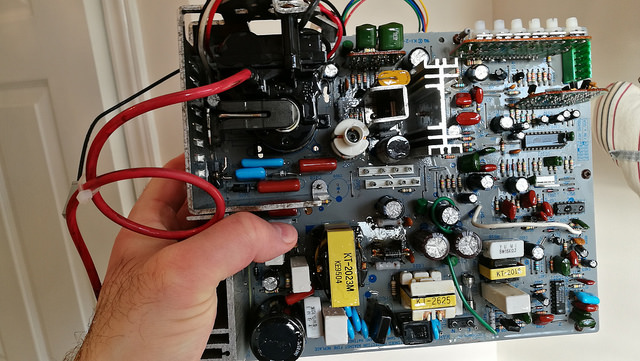
Quite a difference. Now the key bit – we need to get everything bone dry as quickly as possible. There’s various ways to do this – if you are fortunate to live in the state of Nevada, you can leave your PCB out in the sun all day. I’ve heard of other guys pointing a fan to blow warm air at it for an afternoon, and others even put their parts in the oven at a low temperature for fifteen minutes or so! What I do is give everything a good going over with a hair dryer for five or ten minutes:
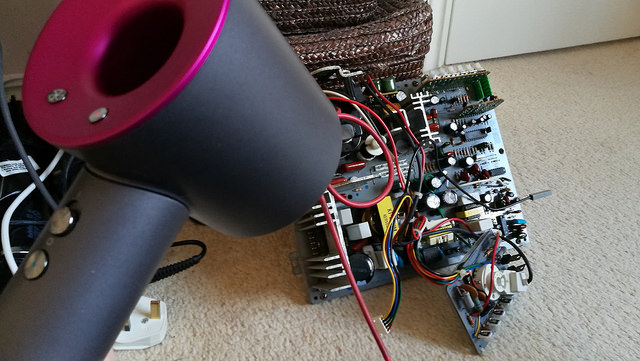
This blows away any residual water. I then leave the board in the linen cupboard to completely dry overnight. While that was going on, I gave the tube the same treatment:

Then out to the garage to look at these rusty frames. For this, I use a wire brush attachment to the drill and work away at the surface rust:


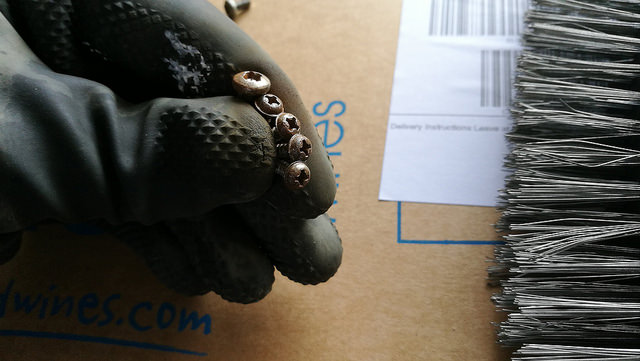
Screw heads too (why not?). A day later, assemble the parts back up:

Looking good!
Double check all wiring, hook up to Centipede cabinet and here we go:
After a few adjustments, we get a bright clear picture. I left it soak testing (pardon the pun) for a few hours and everything was fine. Here’s a before/after:

Everything is shiny clean, and the rust on the frame surround is no more!
So there you go. It is a very unorthodox process to go through, and I’ll admit that I hold my breath when firing things back up again, but I’ve done this a few times and always end up with good results and have never had any problems.
The guys over at Canadian Arcade posted a video last year of how they ‘wash’ an arcade monitor. Slightly different method, but with the same result. It’s worth a watch if you have a few minutes spare:
Thanks for stopping by this week. Do subscribe and share using the buttons below if you feel inclined.
Tony


We can’t all afford Dyson hairdryers, Rockefeller! Seriously, another nice blog.
LikeLiked by 2 people
You put water on the tube with the hv hole exposed? What happens when it gets water in that area?
LikeLike
Hey Marti. Its not really a hole that goes right into the tube. You can dry it out quite easily.
LikeLike
Dyson hairdryer indeed! Sheesh! I drive MrsM around in the car with the window down and her head out of it.
LikeLike
“quickly, before the lady of the house notices”
😀
Great job on cleaning this PCB and his monitor 🙂
For those who would want to do the same, be careful with PCBs that contain a battery! It sure won’t like bathing so be sure to remove it before the splash!
LikeLiked by 1 person
sadly, i turned on my Tempest machine the other night for the first time in quite awhile to find that it’s not working! : ((((
the game works, you can hear it, but there’s nothing coming up on the monitor anymore. we went through and checked all the things that plug, just unplugging and re-plugging them in, and it didn’t change anything. i have a 1″ thick binder full of original manuals and pages of info from old arcade collector’s sites, but i’m not savvy about this sort of thing so i’m at a loss as to what to check next. it’s worked flawlessly for 20 years going through long periods of being shut off, so i am just not sure what could have happened. replacing the X-Y monitor in the first place was hard back in 1992 or so… i shudder to think how hard it would be to find one in 2017!
LikeLiked by 1 person
Take a look at the LV2000. Well worth installing. They aren’t too difficult to fix. If you want someone to repair it for you, I highly recommend thearcadebuffet.com
LikeLiked by 1 person
Thank you! i will look into it. I have other priorities in line right now, unfortunately (it’s always SOMETHING), but this information is perfect. after all, there’s always credit cards. : )
LikeLiked by 1 person
Haha I came across this by chance just now. The PCB pictures are mine ( James Brooks).
Nice write-up.
LikeLiked by 1 person