Those of you with a keen eye for detail may have been wondering what the heck happened to the Atari Gravitar I picked up in the Autumn last year. Well, I can reveal right here, right now, that not very much has happened at all.
We had Christmas, and before that my US trip occurred, and I was generally busy earning a living, and it’s been cold, and real life got in the way. You know how it goes. But this weekend I found myself at a loose end – the sun was shining, and I figured now would be a good time to get my shorts on, get out into the garage, and make a start on this long overdue restoration.
If you missed the original pick up article, have a read here.
So, dragging the thing out from the garage where it has been sitting for nine months, reminded me just how good the overall condition of this cab is:

The sun was shining hard all day, and what you don’t see from that picture is the muck that adorns every surface! We’ll get to that, but first we need to strip the cab down.
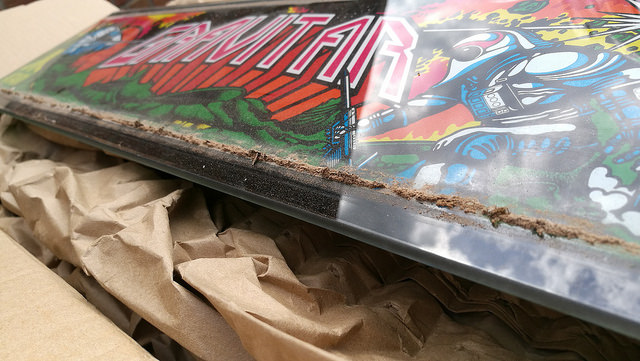
Aside from the dirt, the marquee itself is pretty much mint, but the retaining bars are pretty rusty:


So out with the electric screwdriver to remove the security bolts:

Need to be careful not to destroy the screws, as they tend to be rusted in, having not been unscrewed since the cab left the production line. A little WD-40 helps here. Once off and out, we can get a look at the marquee light fitting:

All present and correct, which is good news. So we have two things to do here. First, clean up the marquee:
Don’t ask what that is, because I don’t know. But there was lots of it. I gave it a hose down with the shower head in the bath and it came up like new.
Now onto those rusted retainer bars. I use paint stripper to remove the old black paint:
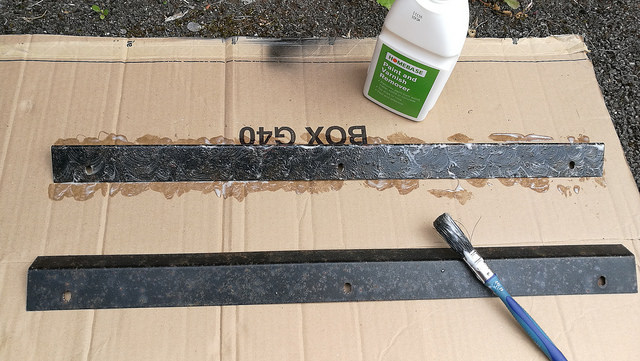
Takes about 30 minutes to do its thing, then you can easily scrape off the bubbled up paint. Give the bars a sand, and they are ready for respraying. I’ll come back to that in part 2, as there’s plenty of other stuff to get on with in the meantime.
Next we need to strip everything out of the cab, as I want to give it a deep clean.
There’s a good layer of dust at the base of the cab – see also the rust on the coin box. We’ll need to sort that out. I’d recommend taking plenty of pictures at this point, as you’ll need to see how everything goes back in when you’re ready to repopulate the hardware. Here’s the coin door coming off:

Bit awkward those bolts as you have to remove them by feel, but I have a handy small ratchet that makes the job easier.
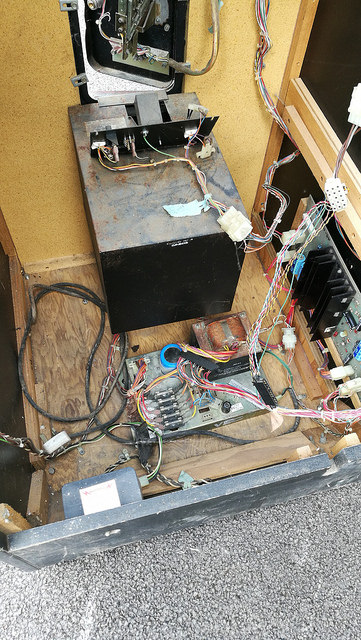
Here’s everything stripped out:

Not much to it! Next up, let’s grab that loom and give it a clean. Biological washing power in a bowl, and drop the whole lot in:

Leave for an hour, and rinse thoroughly:

And it’s good to go – dries out in a day and comes up a treat.
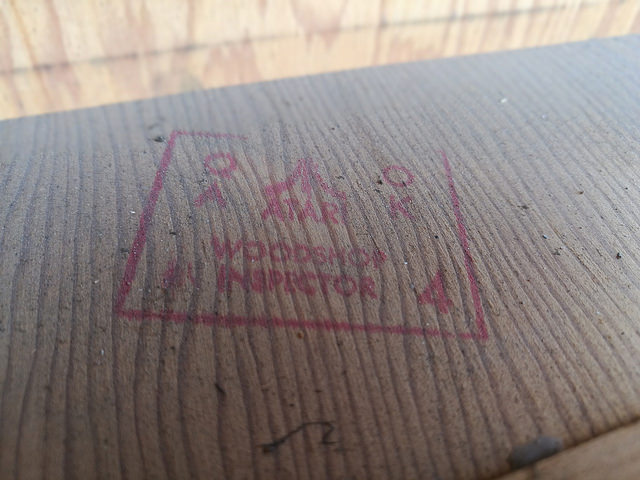
Thought these tags were cool – includes a manufacturing date:

And good to see that Atari’s official wood inspector passed my Gravitar with flying colours!
And here’s the gutted Gravitar, ready for a good scrub:

The artwork is amazing. It’s very intact, with just a few minor blemishes. The worst of which are these three cigarette burns:

Those should patch up OK with a white paint touch up stick. An uncaring arcade goer has deposited their chewing gum right in the middle of the side art at some point too:

That’s nice. I was able to scrape that off with a plastic credit card without damaging the vinyl underneath.
So, cleaning materials – I used an abrasive pad, two full-sized microfiber cloths, and a bucket of super hot water with Flash detergent. This is a general purpose cleaning agent, mixed one part in ten with the water. Here’s how the cab came up after a lot of elbow grease:


The artwork is really popping now. My bucket was holding nothing but black water by the time I was done. It took a good two hours to get everything off and I was left with a bucket of cold, black water and a very sore back – there was a layer of nicotine tar covering the whole thing, as well as several deep grime patches which took a lot of detailing to remove. The abrasive pad took care of these really stubborn marks, and in some places I used the detergent neat from the bottle. It was obvious that this Gravitar had never seen a cloth in its life.
Here’s a close up of the cleaned up artwork:

Very pleased with how that came out – it was a very productive afternoon. So that’s my progress for now – more coming up in part 2.

Thanks for visiting this week.
EDIT: Ready for part 2 of this restoration? Click here.
Tony


Great post Tony, as always. That cab is a stunner under all the grime. The artwork really pops and I love the early Atari cabs, they just look amazing. Looking forward to seeing your progress.
LikeLiked by 1 person
Happy 35th birthday to that cable tag.
LikeLiked by 1 person
Very nice artwork!
LikeLiked by 1 person
wow, that artwork is GORGEOUS. great job! i’m still wrapping my head around just taking the insides and submerging them in a bucket of soapy water and having everything come out ok, haha…
LikeLiked by 1 person
Amazing, this game has the best artwork hands down. I have got fairly far reproducing the artwork but the “galaxy” background colours are indistinguishable with the quality reference material I have sourced off the web. Would you by any chance mind sharing some high resolution photos of the side artwork? I am more than willing to share my final vector artwork with yourself! Thank you.
LikeLiked by 1 person
Tristan – I’ll drop you an email with some pics.
LikeLike
I use to own this arcade game back in 1985. I won it in a contest at an arcade in Independence MO. whoever got the high score got to take it home. I spent a couple weeks trying to get the high score but could only manage second place finally the guy handing out quarters for dollars told me the secret of how the guy who had high score did it. Turns out he didn’t like the guy so he wanted me to win it. I ended up winning it 2 days before the contest ended. I was only 19.
LikeLiked by 1 person