I’ve actually been getting a bit of grief about the lack of updates on my twitter account about this restoration! It’s a fair cop. The grim late winter over here has meant slow progress with the Battlezone (well that, and my laziness hasn’t helped either), but milder weather is upon us, so I’ve been able to venture out to the garage and press on. There’s a lot to do as we uncover various things that need fixing, but I’m confident that it’s going to turn out super nice.
As it’s been a while since I wrote about this Battlezone cabinet, you might want to remind yourself of where it came from. If you haven’t done so already, take a look at my write-up of the Pete Davies Collection.
So let’s get to it. Here’s a nice easy job that needed doing for some time. I waited for a rainy afternoon to pull this power brick out of the garage and get it cleaned up in the house. You may recall that when I picked the cabinet up, it was missing the power brick. I managed to find one from a seller in the USA. No idea yet if its works, but it looks complete if a little grubby:
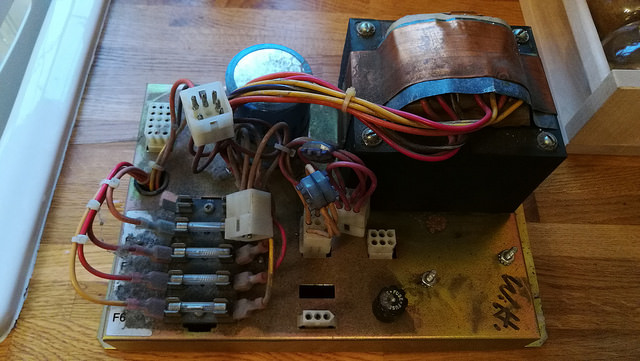
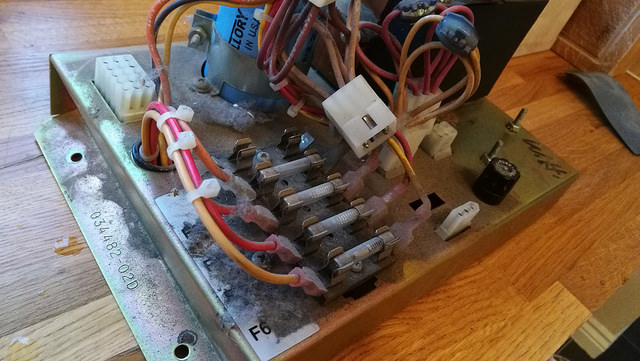
Most of the dirt and dust looked pretty superficial, so I decided the best tactic was to use the trusty vacuum cleaner nozzle and a paint brush. Brush the muck away and suck it up with the vacuum as you go. Turned out super-nice after 10 minutes work:


Very pleased with that. There’s a tiny rust spot on the frame which isn’t worth worrying about, and a nice overall patina effect across the top there which gives a nice aged feel to this component. I don’t see the need to do anything else to it.
While cleaning I noticed some warping on the frame to the left there. I think this was done during shipping, as the seller’s original pictures didn’t have this. I’ll get that folded-in section bent back out before we install it into the cabinet a little later on.
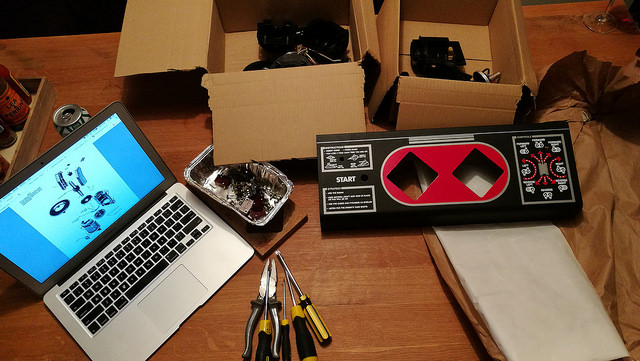
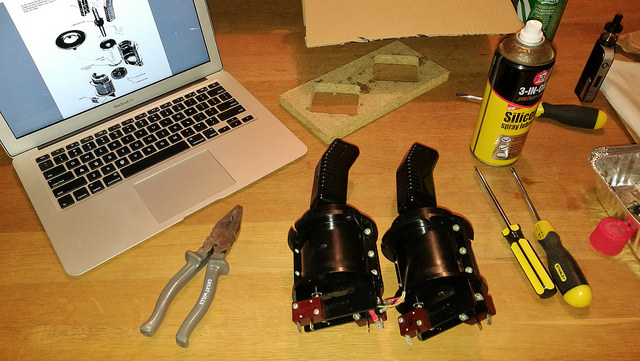
Back indoors, and I figure we can rebuild the control panel. You may recall I’ve already stripped and cleaned each controller stick, and our lovely new control panel from the USA has been stored away safely waiting for this moment:

So, getting things organised ready to start. I kept the dismantled sticks in two separate boxes to ensure nothing got mixed up and the same screws and parts were used again in each.
Putting the sticks back together isn’t too taxing. It’s a fiddly job, but if you refer to the images from the original manual, they do help a lot. The trickiest part is getting the plastic bearings to sit in the slot that triggers the micro switches:
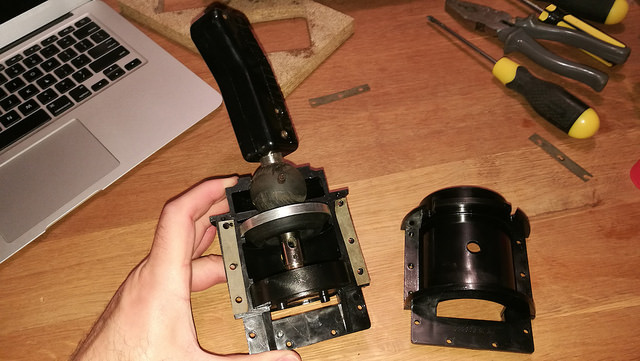
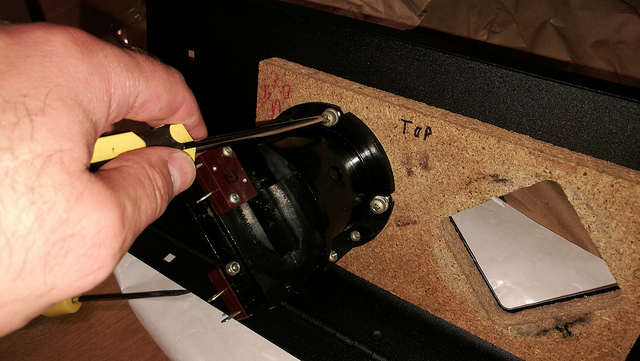
I managed the ping the first one across the kitchen a couple of times before I figured out the proper way to do it. (This also involved a comedic race against the dog to save the part from being consumed). These neat little Cherry switches are still functioning perfectly after all these years. Here they are cleaned up and put back on:


Took an hour or so to get things right, but here we are ready to attach them to the control panel:
I opted for silicon lube spray – should keep things nice and slick for another few years. So let’s get them mounted n the wood plinth:
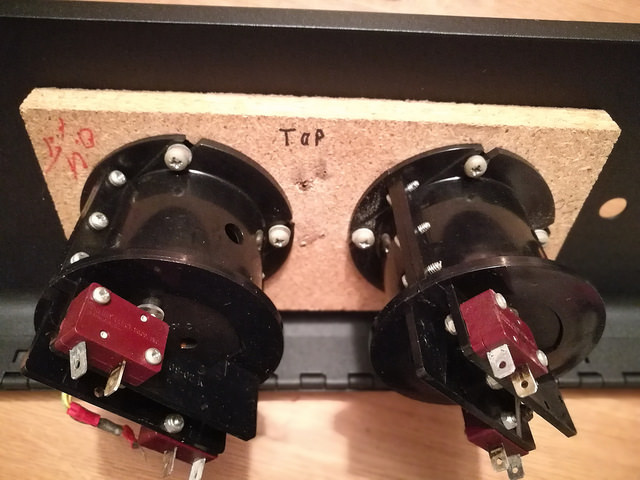
Then present them to the panel, and screw them to the black o rings on top:
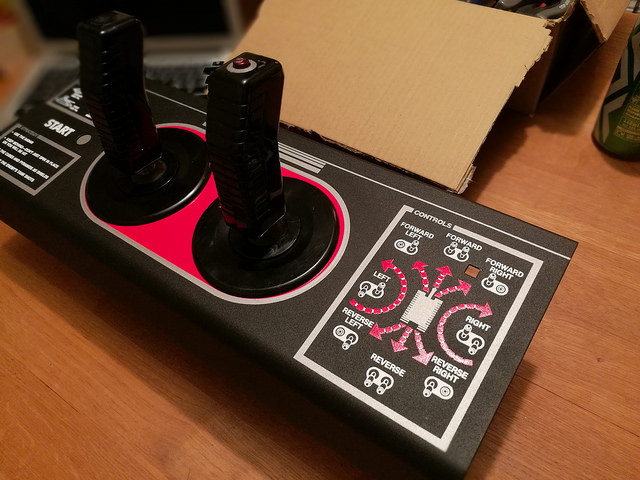
I managed to get a lit start button from fellow collector Oliver (thanks mate!), and with that in place, we can get everything wired up again:

Perfect! Again, the manual describes where each wire clips onto the switches and button. Follow the diagram and you’re good to go.
One cleaned, re-lubed and rebuilt Battlezone control panel. How’s this for smart?
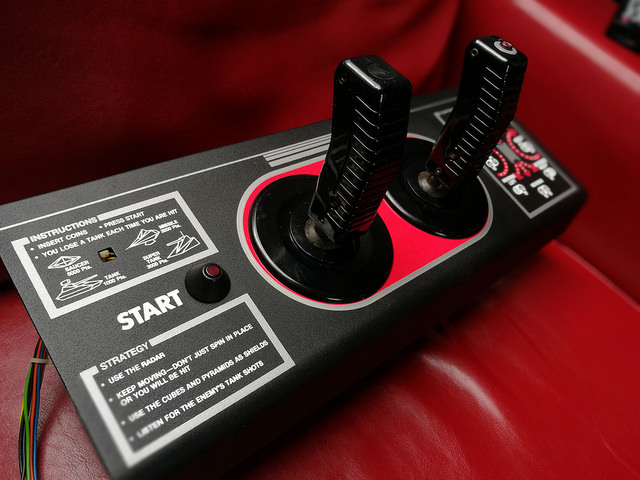
Really pleased with how that’s looking. It’s a huge improvement over what we had to look at before:

Each stick moves nice and smoothly, and each Cherry switch registers a satisfying click as they should. I’m itching to play some Battlezone now!
Before we can do that, there’s more work to be done. Let’s get the retaining bar repainted. This metal bar holds the bezel in place on the front of the cab. I already stripped the old rusty paint off in Part 2, so time to give it a sand, to remove any final stubborn bits of rust:

Then lay it out ready to spray. I had a couple of others to do while I was there from my Gravitar restoration. I sat them on an old upright lid, to keep the paing from sticking to the surface below:
A single layer of undercoat first:

Then three layers of Hammerite Smooth Black paint. Here’s the first coat:

I leave an hour or so to try between coats. Here we are three coats later:

I’ll leave those to fully cure for 48 hours on the bench, before storing them away safe until I’m ready to use them. So there we go. Part 4 of this restoration done. In part 5, we need to get the main cabinet up to shape, and I reckon we’ll be ready for the big switch on. Stay tuned!
If you want to catch up on the previous parts of this Battlezone cabaret restoration, go to this page.
See you next week.
Tony


Coming along very nicely. That CP is a huge improvement. I love projects like that where you can really see the differences. I do like BZ too, don’t get to play it much though with these cabs not that common now. I also prefer the cabaret, never liked that whole sweaty eye mask thing on the upright.
LikeLike