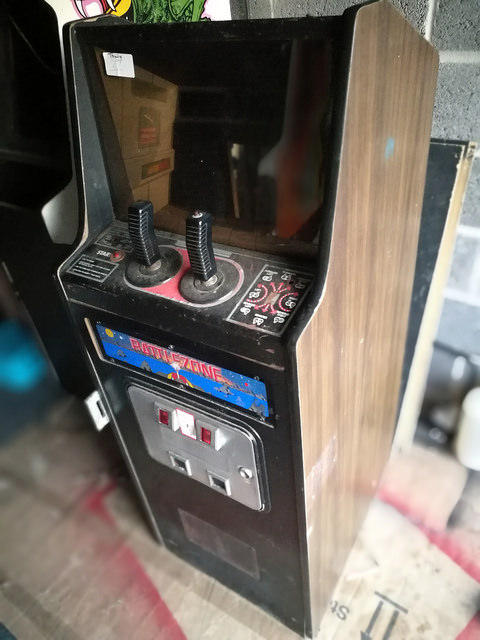
You’ll have read about this cab in a previous “Weekend Pickup” post here. It was one of the cabinets from the late Pete Davies’ collection, which you can read about here.
It’s in a pretty sorry state, but shouldn’t take too much work to get things sorted out. (I don’t know why I always say that, because it’s never the case. Funny things restorations. You can look at a cab in the round and think “yeah, bit of hot water, clean up, few wood repairs, job done”. And then you actually start, and realise that there’s always much, much more to do).
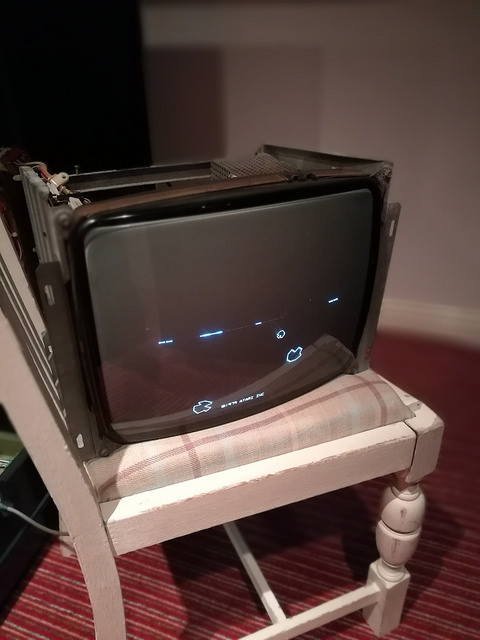
Anyway. Thought I’d start by quickly testing the G05 monitor in my Asteroids cabinet, as it uses the same spec vector monitor. I’m pleased to report that it does work, but has some issues with partial horizontal collapse:

It’s a pretty minor problem. I’ll need to pull the chassis out and it should be no more than replacing two transistors. A job for another time.
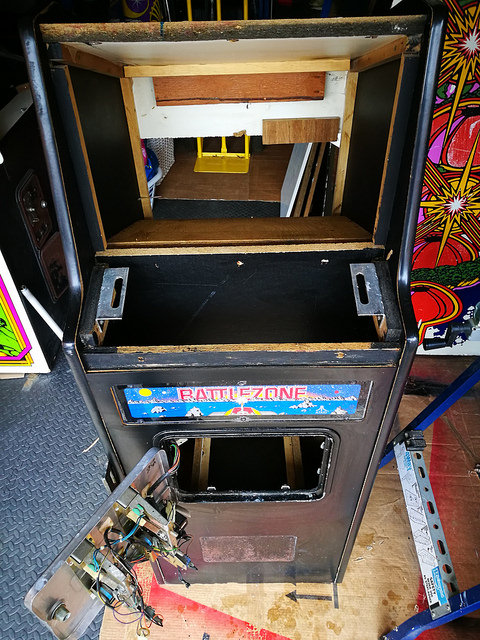
Meantime, I dragged the cab out of the garage, and stripped everything out for cleaning. Starting with the wiring loom placed straight into a bucket of hot water with detergent, and the other hardware parts were sprayed with mould remover and thoroughly cleaned:

Notice the cardboard bezel – it’s in fantastic shape considering its age. No need to replace this.

The wiring loom came up nice after being soaked in a bucket of bio washing powder for a couple of hours, and everything is boxed up safe for now. Parts removed were the loom, plexi bezel, cardboard bezel, light unit, control panel, retainer bracket and various screws/bolts.
For the cabinet itself, the issue was white mould:

Some bits were worse than others, but you can make it out top left and on the bottom. Horrible stuff. So mask on, and armed with my mould killer spray, I doused everything with a good coating of it. Left for 10 minutes, then wiped off with a damp cloth, then went over every surface with bacterial wipes.
Here’s the result of a couple of hours scrubbing and cleaning:


Pleased with that. The cabinet is now out in the sun drying out. While that was all happening I rinsed off the loom, which had been soaking in the detergent for a few hours now:

All the gunk and mold has gone, and we’ll leave that to dry off nicely in a warm room for a day or two. Once fully dry, I’ll get some switch cleaner spray into the switches and volume pot to keep them from seizing up.
If you read my pickup article about this Battlezone, you’ll recall the sorry state of the control panel:
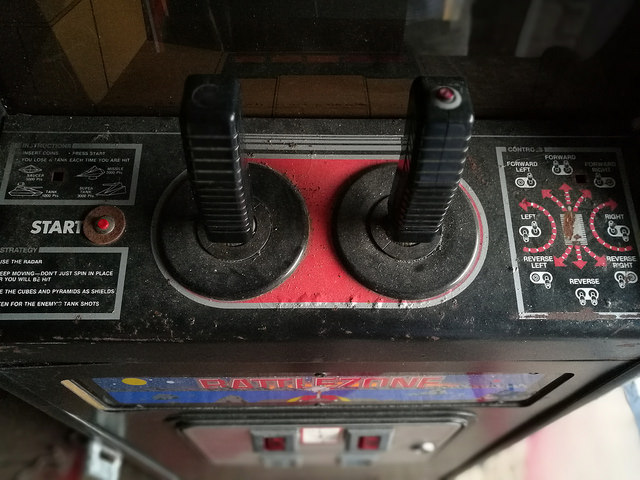
It’s rusty and badly pitted. Atari silk screened these panels – the paint was literally baked straght onto a metal plate to make the artwork stand up to the battering they would undoubtedly take on location. But I guess they weren’t thinking ahead 35 years, and didn’t imagine an arcade cabinet would sit in a barn for a good few years as my Battlezone had. Normally, I’d hunt down a scan of this art, and get an overlay printed up, remove this paint, sand smooth and replace it with a vinyl print. Amazingly, no one appears to have scanned the cabaret panel, which is different to the upright version.
Thankfully, a collector in the USA did a run of silk screened panels, using the same process as the original. I managed to grab a leftover from him, with a few blemishes on the red area:

Yep – I can barely spot them either. Those that are there, are very light and will be covered up by the controls for the most part. I got a great deal, so I’m really pleased with this – to have a mint control panel is a great bonus. I reached out to the community here in the UK for an original Atari start button, as that appears to be missing from my cab. My collector friend Oliver came up trumps (thanks Oll!). Anyway, more on the controls and this panel later.
Back to the monitor. I identified what was the most likely suspect giving us partial collapse on the screen:
Two transistors on the chassis board were bad. I was due to place an order from Ian Kellog’s site which sells parts for arcade monitors, so added these two components to my order, and waited for the postman to arrive a week or so later:

Cracked open the soldering iron, removed the knackered parts and replaced!

Bingo!

Always good when the fix is simple. So we have a working monitor.
In part 2 we’ll get back out to the garage and work on the structure of the cabinet.
Thanks as always for reading this week – stay tuned for some good stuff I have in the works, including an arcade trip to the USA!
Tony


Another awesome project coming on nicely. Great work as always!
LikeLiked by 1 person
Forgive my ignorance but do many arcade circuit boards have that seemingly hand-drawn layout on them? I’m so used to seeing silicon printed with extreme precision that the Battlezone board looks like a piece of art by itself.
LikeLike
Nice work mate 🙂
– Ben
LikeLiked by 1 person
Another great project here Tony. And another cab I prefer in it’s cabaret form than the upright which I find difficult to play on for anything more than short bursts.
LikeLiked by 1 person
How did you remove the plastic Perspex covering the monitor? It seems stuck when I tried to remove it. The bar at the top seems to be glued in place?
LikeLiked by 1 person
I imagine yours is just stuck with grime Lee. It should just lift out.
LikeLike