Well it’s been a while since I wrote about this Battlezone cabaret restoration, so thought it time for an update. Part 1 saw us cleaning the cab out of its hardware, removing the horrible white mould that came with it, and getting the monitor up and running. A solid start. (Catch up on part 1 here).
Back out in the garage, it was time to take a look at the structure of the cabinet itself. Overall, things are very solid. But there’s some work to do:
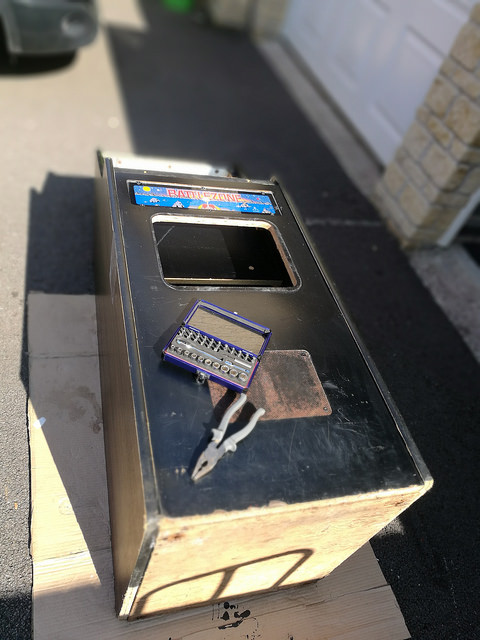
Feet! The cab had old knackered metal feet on it, which were badly rusted and worn out. So let’s get those removed:

While we’re there, we’ll soak the base in wood hardener, after a quick sand down:

Once that had dried out, it was time to get new replacement feet screwed in:
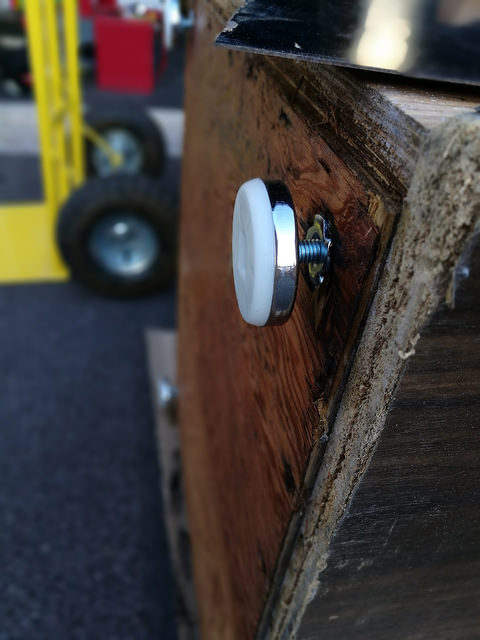
These are teflon coated, making the cab much easier to slide around on carpet.
With everything stripped out, I decided to remove the vinyl laminate from the front of the cab. As you can see in the pic above, it was very badly scratched and tatty looking. Note the usual broken bits at the front – this is very typical of an Atari cab from this era. This damage is the result of years of players kicking the front of the cab as they played. I was able to take it off in one piece using a heat gun and scraper:

So what I’m going to do, is take that template to somewhere local and get them to cut me out a new piece of black laminate to fit. I’d do it myself (as I did with the Centipede recently), but with three holes to cut, I don’t trust my hacksaw and rasp method. This stuff is so easy to split, and you only get one shot at the job.
To the back of the cabinet now. I noticed some swelling at the top due to water damage. Thankfully, it’s only the back panel that’s affected. You can just make out the swelling here top right:

Typically, I’d replace this completely, but given the history of the cab, I’d like to keep its “soul” and originality as much as I can. What we need to do is get some wood glue in that split there and clamp it down overnight. Given the panel is made from particle board, I want to make sure the whole piece is structurally sound, so decided to scrape off the nasty vinyl with my heat gun:

Once I got into a groove it came off pretty easily, and I managed to avoid setting the thing alight which is always nice:

Looking at it now that it’s been stripped, as I mentioned above, if I wanted to be a perfectionist, I’d tear the whole piece off and replace it. But this isn’t going to be a “mint” restoration, so I think I’d rather try to keep this wood in place. It’s part of the cab’s 35-year-old body after all. So what we’ll do here is give it a quick sand down, and seal the porous wood so we can paint it:

To seal the wood, I use a 50/50 mix of PVA glue and water. Mix it together in a pot, and brush it liberally onto the wood. Two or three coats should do it, enough so plenty gets soaked into the wood.
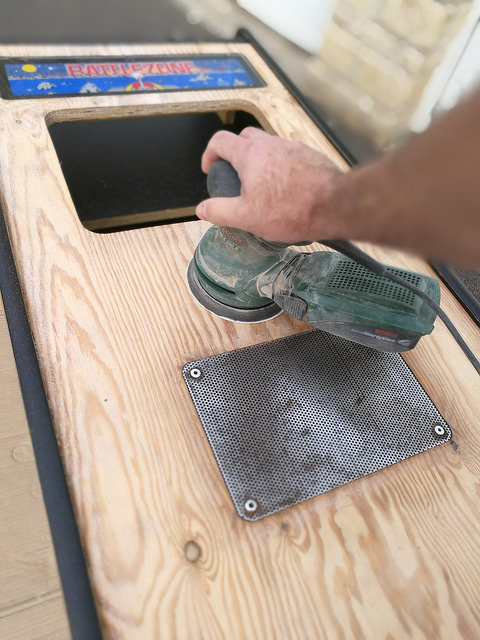
While that was drying out, I got the cab onto its back, and set to work with the sander. First, that speaker grille at the bottom front of the cab. I want to get that rusty paint off so we can respray it:

That came off nicely, ready for our new black paint. And while there, I gave the wood a light sanding to remove any remaining epoxy glue from where we removed the laminate sheet:
Actually, it’s quite tempting to leave the wood grain on the front. Looks pretty cool!
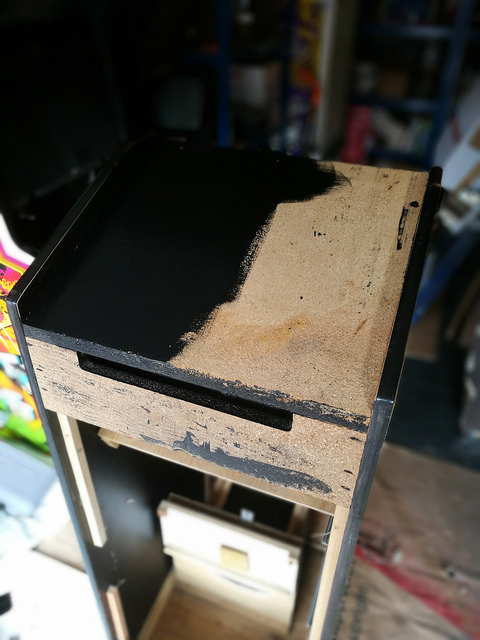
Quick cup of tea, and back out to get that top painted. I use black blackboard paint for this – and do so for all my restorations. It is a great product that goes on really nicely, and covers up all those blemishes. The finish is great:
And with that on and drying out, I grabbed by Bondo filler pot and mixed up a small amount to fill those holes made by the security bars on each side of the cab. Once or two other spots needed a quick fill too:

Time now to mask off the speaker grille that we’ve sanded smooth. Pretty easy job this. Mask off the speaker, so we don’t get spray paint everywhere:

Three coats of Hammerite smooth black later gives us this:

Good as new. While I was in the mood, I grabbed paint stripper and got to work on the rusted marquee retainer bar:

Leave that for 15 minutes, and scrape off the bubbled up paint ready for respray with Hammerite spray paint.
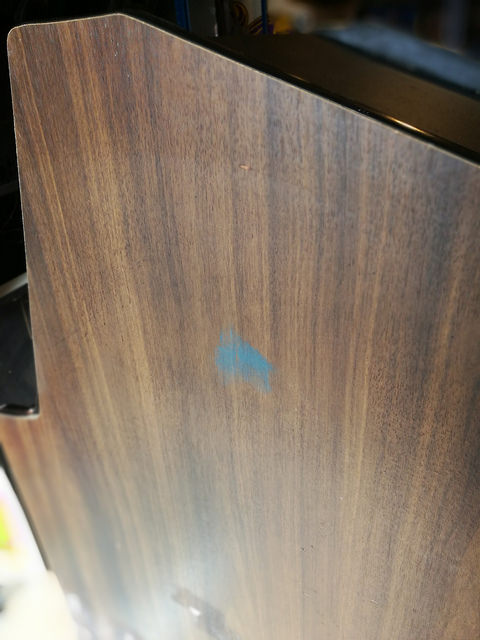
One thing about this cab, is despite giving it a good clean with detergent, there are still paint splashes and nasty brown gunk (which you can’t really see in these pictures, but it’s there if you look closely) on the veneer sides that just hasn’t come off. Best thing here is to buy some carburettor and engine cleaner. This comes in a spray can and evaporates pretty quickly too. This should cut through any nasty stuff and remove it. Like this blue paint spot:
Sure enough, it’s pretty good stuff:

I have no idea what that brown stuff was – it smelt like thick oil. But it came off easily. The blue paint needed more intense scrubbing, but it came off eventually, and without damaging the wood veneer underneath.
So back to the black laminate that we removed from the front of the cabinet. I had real problems trying to find someone who could properly cut out a new template for me. Getting hold of replacement laminate is easily done, but cutting neat holes in the stuff is another matter – I just don’t have the correct tools to do this. Rather than risking doing the job myself, I decided to try to respray it, using Plastikote satin black spray paint, to cover the scratch damage to the front of the cabinet. Plastikote is a strong scratch resistant paint that should be up to the job of tidying up the front of the cab and providing us with a robust surface, assuming I don’t screw up the spraying, which is always a possibility. If it ends up a mess – no problem – I’ll still need to replace it, but my curiosity got the better of me, so here goes. We’ll save ourselves a few quid too. First thing to do is give it a good clean up with our carb cleaner, then give it a light sand to give the spray paint something to key onto:

My plan is to put a made to measure footrest panel on the base of the front, as I’ve done on previous restorations. This will look good, and more to the point, will cover up the damage you can see at the very bottom there.
I think it’ll come up nice, but we’ll see I guess. So here goes! Two coats of undercoat first:

Then I applied three coats of the satin black. Left to dry out for 48 hours. Here’s the result:

Super-pleased with how that came out. Saved a few pounds, and a lot of hassle!
So that’s us done for now with Part 2 of this Battlezone restoration. Stay tuned for part 3, where I get to work on the hardware – we need to tackle that grubby control panel!
Thanks for stopping by this week.
Tony


Another cab getting the Temple Treatment. Great to see such a relatively rare cab being saved.
LikeLike